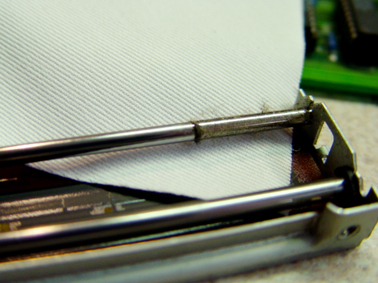
Ask 10 folks who work with sound companies their most detested chore in audio maintenance, and the majority will respond with “the cleaning of mixing consoles.”
Hated or not, however, keeping consoles clean is a primary way to protect the investment and to assure that they will stay on the job and operate at full capacity. Many consoles cost at least as much as the car in your driveway, and some as much as a house. Therefore, responsible sound companies regularly spend quality time in this pursuit.
Manufacturers advise a thorough cleaning twice a year, but unless there is someone sitting around the shop with nothing more immediate to do, reality says shoot for once a year.
But, do it right. The alternative can be compromised performance – at the least – all the way up to total failure. And it can result in expensive repairs that can make a console the hostage of a service center for several weeks.
Let’s take a step-by-step look at “how to” properly and thoroughly tidy up large-frame consoles. (Smaller, single-panel consoles are a different story – other than surface and fader cleaning, the term “no user-serviceable parts applies. Best to have certified service technicians handle this.)
Start by selecting an appropriate area of the shop for cleaning, one that is out of the main traffic flow. This location must offer decent overhead lighting and should be, at least relatively, spic and span. If not, there’s some “pre-cleaning cleaning” that must be done. This process is going to take several days and there shouldn’t be added dirt settling on what has already been cleaned.
Next, set up a table, empty loudspeaker enclosure(s) or other suitable (and very solid!) flat surface on which to place the console. You’ll also want a chair or stool of suitable height, and a smaller table or other surface for the needed tools and materials.
This is back-breaking work – might as well be as comfortable as possible, or else there might be a tendency to skimp in order to “get this over.” And getting everything necessary together before starting the job helps make it go much more smoothly.
Materials to assemble:
- Machines – Air compressor, vacuum cleaner (with attachments)
- Tools – Philips screwdriver, pliers, cable, one 1/2-inch paintbrush, several stiff-bristled artist paintbrushes
- Solvents – Window cleaner, Caig D5 (Deoxit), Caig CaiLube, Goof Off, clear fingernail polish, alcohol (Isopropyl, not Jack Daniels!)
- Miscellaneous – Fine-grit steel wool, lint-free rags, two small cups or butter containers, three nylon zippered hosiery bags
A tip: the best window cleaner I’ve found is windshield washer fluid, mixed one part fluid, one part water. It leaves absolutely no residue on any surface. So dump out the window cleaner from the spray bottle and replace it with this mixture.
Caig products can be purchased directly from Caig via the Internet or at select electronics stores in larger cities. Techspray also offers a quality line of similar products, also available on line. Most of the other items can be obtained from your local home improvement or hardware store.
Just A Little…
Start by using Goof Off to remove Sharpie markings from the armrest strips (and if applicable, knob tops). Goof Off is also great for getting tape gack (along with other nasty “goo” concoctions) off the side rails, cables and etc. Just pour a little on a rag and rub the affected area. Do not, however, use Goof Off as a general cleaner because it’s not friendly to all surfaces, and the fumes can be pretty noxious.
Before removing knobs, turn them all to the zero position so the posts are ready to be replaced accurately. Then, pull the knobs (be prepared to get a blister on your index finger), and store them in the nylon zippered hosiery bags.
I use three bags – one for each side of the desk and the third for the master section. This makes re-knobbing easier later on. Wash and dry the knobs with a laundry load of clothing or towels (do not wash the knobs alone!), and be prepared for a rather noisy drying cycle. Then set the bags of knobs aside until you are ready to reinstall them.
Note: Be sure to secure the zipper of each bag with a safety pin PRIOR to laundering. If not, the knobs can end up scattered in the machines.
Next, use the 1/2-inch paintbrush to thoroughly dust all debris from the main surface of the console. Be diligent in getting around all the nuts. Then dust the rear surface completely, paying extra attention to cleaning out the male XLR jacks as thoroughly as possible. With a rag and some window cleaner, wash the frame (everything except console strips) completely.
At this point, I suggest working on the console in sections, i.e., the left side and the master section, then the right side. There will be less loose parts lying around; it’s psychologically easier to handle a smaller section at a time; and if last-minute emergency call for the console comes in, it will go back together much more quickly.
Remove the screws from the input strips and put them in one of the small cups/containers. Be careful not to drop and lose these screws, as replacements almost always have to be ordered from the manufacturer.
Brush the dust away from the screw holes and note if any of them have begun to rust. If so, use the steel wool to gently it off, and then apply a light coat of clear fingernail polish on the exposed metal to keep it from rusting. This trick can be done anyplace necessary on the chassis as well – it’s something drummers do to protect shell rims, by the way.
Now it’s time to get into the heart of the process.


