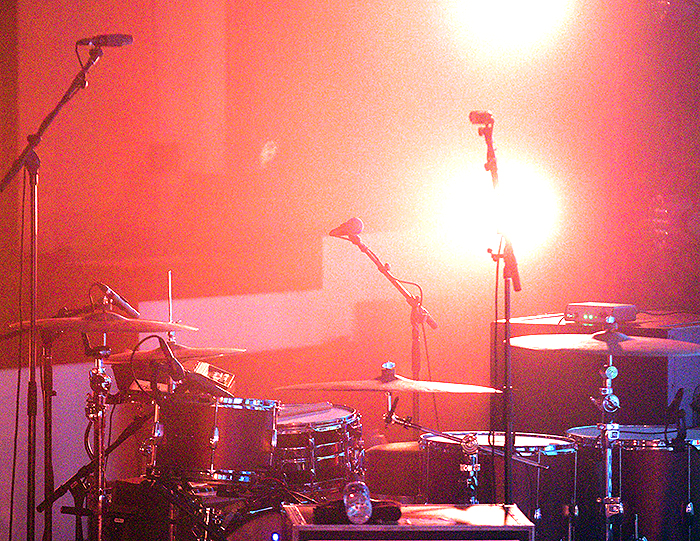

I was recently asked to provide a few insights on mixing drums live. After pondering the topic for a while, I thought it might be interesting to share my thought process for microphone placement when capturing the sound of live drums, particularly overheads.
The first question I ask: Do I really need overheads? In our world of live audio, where close miking is the most-used approach for capturing the sound of just about anything, this question is quite valid.
For example, for shows in small bars, tents, and clubs where the confined space pushes the sound of the drum kit towards the audience – leaving little room for anything else to live in that area – the high-frequency spectrum of cymbals can be overbearing. As a result, it’s tempting to just mike the kick and snare, and maybe an occasional tom, but leave the mics for overheads in the roadcase because there’s already enough of that sound from the acoustic source.
Yet it’s not that simple. From a strictly front of house point of view, this is justifiable, but remember that live sound isn’t just about mixing for the crowd. Maybe a band member is using in-ear monitors and needs to hear those cymbal accents. Maybe the gig also calls for a live recording where not placing overheads can be a huge mistake, leaving the drum facet of the recording lifeless and missing a huge piece of the puzzle.
I tend to consider all these factors and as a result, I utilize overhead mics in just about every situation, even when I’m almost certain that I can do without them for the FOH mix. Deploying them also offers the option of using them at certain times only – maybe the drummer will be employing brushes on a specific song or two, and/or there’s a need to bring out a “roomy” sound of the kit for a special effect.
Having overheads at the ready, as an option, makes for a great tool. And because I think of overheads as my main source of a drum sound for just about any genre, I’d usually rather be missing a tom mic than overheads.
Many Ways
Placing overheads is almost a separate art form because it involves making an informed decision depending on the type of music, the sound of the drums, the way a musician hits those drums, the physical properties of the venue, and what you’re trying to achieve sonically in the mix.
Yet I don’t believe there’s just one way of placing overheads. Learning about different techniques and what they can produce allows engineers to respond to a number of variables, helping them to shape drum sound along the way.
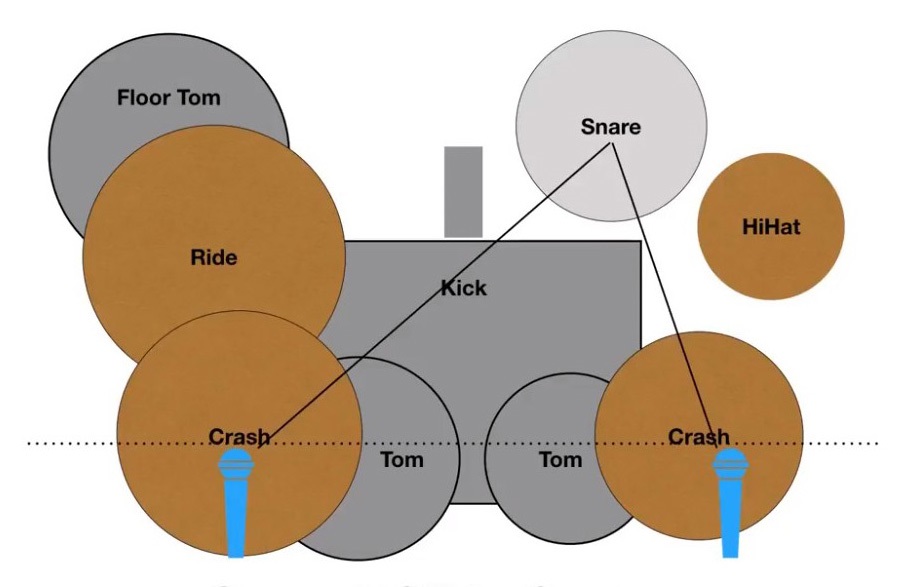
As I see it, there are two primary approaches to overhead placement. The first method is having the mics capture just the cymbals in a “close miking” scenario. The primary goal here is to try and isolate the cymbals as much as possible from the rest of the kit. The second method is just the opposite, placing and processing the overheads to capture as much of the sound of the entire kit as possible.
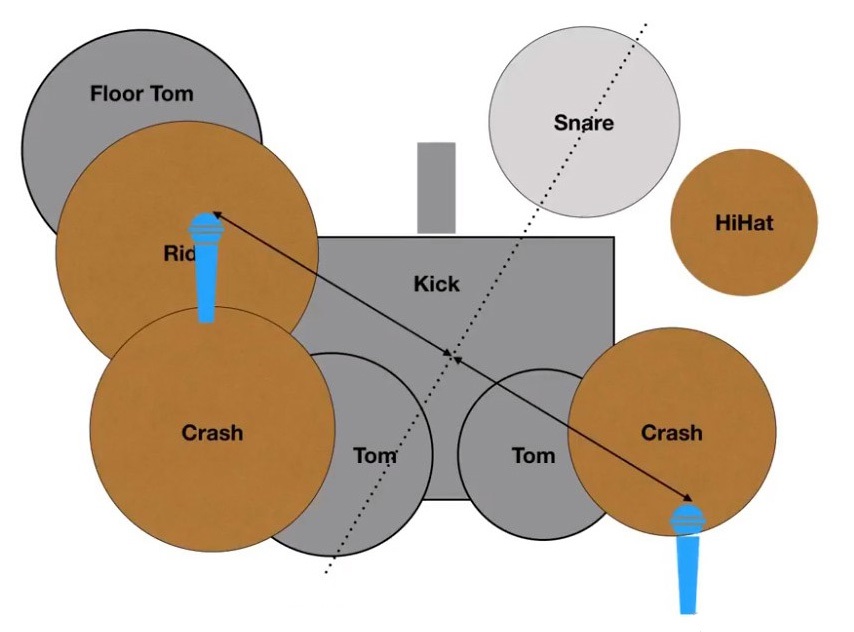
On a recent acoustic tour with the band Siddharta, my strategy was based on the latter. I wanted to grab as much of the drum sound from the overheads as possible and then use the inputs of the other mics of the kit to fill in sonic gaps and boost certain elements to complement the overall sound.
My initial thoughts weren’t about the sound of the cymbals, but the sound of the snare. Making sure that snare is centered and in phase between the two overheads is crucial – it can make or break the sound of the entire kit if not taken into account.
Benefits Of Rotating
With this approach, I also captured a good amount of kick drum in the overheads, working to make sure that it was in the center of the sonic image as well. So instead of placing the mics above the cymbals, almost parallel with the front of the kick (as usually done with close miking), I rotated my point of view by imagining an invisible line going through the center of the kick and the center of the snare, then making sure that the overheads were equidistant to the snare, perpendicular to that invisible line.
In this case both snare and kick were in the center of the sonic image, and I had no issues with the most essential kit elements being out of phase in the overhead mics. This is a well-known studio recording technique that I use when tracking drums quite often, and I was also reminded of this particular placement for live sound by Dejan Radičević, who is Siddharta’s producer and a great studio engineer in his own right.
Besides having kick and snare in the center of the stereo image, there’s also one more benefit that I find very helpful. The overhead mic closest to the hi-hat is, in this placement, moved further away from it.
This can be a lifesaver if the hi-hat is a bit overbearing when played hard; since there’s less of it in the overheads, it’s easier to control. The same holds true if the drummer is using a monitor wedge placed on the left side; there’s simply less bleed from sources that might compromise the sound, which in turn makes our job a bit easier.
In closing, here’s another technique that serves me well: before every gig, walk up to the kit and have the drummer (or drum tech) play a few bars while you simply listen. This provides a great deal of vital information about the kit and helps in plotting a course of action needed to translate that sound to the audience.