

In live audio production, choosing a vocal microphone for a singer you’ve never worked with can be a bit challenging. The “correct” choice is the one that complements the voice and how the particular singer “works” the mic.
Another factor is providing a comfort level for someone who may be wary of using an unfamiliar mic, which shouldn’t be overlooked—a timid, unsure performance usually isn’t a good one.
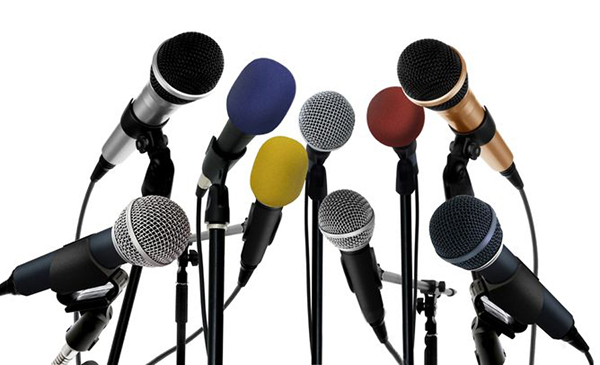
Let’s first look at what we have to work with. Mics come in many types, including dynamic, condenser and ribbon. Dynamics are the most common type for live vocals because many models offer good (and better) performance characteristics in a rugged package.
Condensers have become increasingly popular in the live realm because of an often more-detailed high-end response along with a nice full sound across the frequency spectrum. They’ve also become much more durable, able to handle the usual bumps and jolts that occur on stage.
The same goes with ribbons, which were usually relegated to the studio due to fragility and lack of ability to handle high sound pressure levels. And, most were only available with a figure-8 pattern. That’s changed as well, with ribbons able to withstand normal live use while being available in directional patterns that are a necessity on louder stages. Some engineers describe ribbon mics as sounding “warm” and natural, but some models may not exhibit a flat high-frequency response like condensers.
Speaking of patterns, directional patterns are usually the first choice for vocals because they reject the often considerable output of stage wedges, fills, instrument amps, drums, etc. Cardioid is probably the most common pattern for singers, offering a wide pickup pattern but with good rejection off to the sides and rear.
Hypercardioid and supercardioid patterns also work well for singers, but may be more affected by poor mic technique—not singing directly into the mic and/or holding it, at least in part, so that the element is obscured. A subcardioid pattern can be a good choice in this regard, with a wider pattern that still offers some rejection at the sides and rear.

Omnidirectional patterns are usually not advised for handheld vocal applications, but they’re useful for lavalier or other miniature mics for theatrical performances. Singers in this genre may also be outfitted with headworn miniature mics that mount around one or both ears and use a small boom arm to position the mic closer to the mouth.
A similar approach is preferred by concert singers who also dance, except these mics tend to be outfitted with a larger mic element located close to the mouth since the performers are not trying to hide the fact that they’re using a mic.
Smart Choices
With so many different types, styles, models and brands, it can be a bit daunting as to where to start. The first thing I do is advance the show, finding out who is performing and if I can speak with them (or their audio folks) in order to get an idea of preferences and expectations.
Sometimes the internet is handy as well, with artist websites and YouTube offering videos/photos of them in concert that can offer clues on their mic choice(s) as well as specific vocal style and mic technique. The bottom line is that I don’t want to get to sound check and waste their time and mine in checking out a dozen different mics, and I don’t want to carry a ton of extra mics to the show to start with. Advancing the show is the way to go.
Since I’ve been in business for quite some time, I’m fortunate to have amassed a pretty decent selection of vocal mics, but even if you only have a few choices, there are (generally speaking) certain types that work better for certain singers.
For example, for a singer with good mic technique, I start with hyper- and supercardioids in order to attain as much gain before feedback as possible, especially if the stage is going to be loud.
For those preferring a wireless handheld, my choices narrow significantly because I only have six different mic elements to choose from in my inventory—and all except two of them are cardioid. Still, this usually has sufficed.
With selections narrowed down, I take the most likely models to the show, and first test each one through the PA and monitors. I then present the one that’s best-suited, and if I’m undecided, let the singer try out the two choices and make the final selection.
Every mic has its own sonic signature, and knowing the frequency response and proximity effect (a characteristic of a directional mic when used close that tends to accentuate the bass frequencies) of various models will help in selecting one that flatters a particular voice.
Also note that some mics exhibit a fair bit of handling noise. This may not be a problem for a singer in a heavy metal band on a loud stage, but it can be quite noticeable (and distracting) for a folk singer holding the mic on a very quiet stage.
Related Issues
Most vocalists on my stages get handed mics with an additional foam windscreen. I’m a big fan of these for a several reasons. First, they help in blocking wind noise, which is a particular problem outdoors. (I put windscreens on most/all mics when outside.) Second, they can help lessen the problem of “plosives” (hard consonants like P, B, T that can really pop).
Windscreens also come in various colors, so on a festival or a show with numerous singers, they help my crew to identify what mics are being used. Finally, windscreens help with “hygienic issues”—they can be quickly replaced between acts.
Speaking of hygiene, it definitely should be standard operating procedure to make sure mic grills aren’t caked with crud and grime. It’s gross for the performer, unprofessional of the provider, and the gunk can also change the sound and frequency response of the mic. I carry a basic cleaning kit to shows, consisting of a toothbrush and Listerine, to perform a quick clean-up between acts (when we’re not using windscreens).
To clean. we unscrew the grill, remove the inner foam with needle nose pliers, and then scrub the grill with Listerine on the toothbrush. Blow any excess liquid off the grill with a can of compressed air, towel dry it, and screw it back on. If the inner foam has seen better days, we replace it with one of the spares we bring to the gig. The used foam can be washed in soapy water back at the shop and then dried for re-use—don’t put damp foam back on the grille because it can corrode metal parts.
Microphome, a foam disinfectant/deodorizer, is a handy alternative to the toothbrush and Listerine method. The foam evaporates in about two minutes, allowing the mic to be refreshed and ready for use pretty quickly.
The Stage Sound
Choosing the mic is not the only piece of the puzzle. Good monitoring practices are crucial for vocal performances, and it also means singers aren’t as likely to blame the mic for any perceived deficiencies.
Allowing singers to hear what they need in order to be in time and on key boosts confidence. It also reduces the need to sing loudly, which can strain the voice in trying to “get over” the other things onstage so they can hear themselves. In-ear monitors are great, but the majority of one-offs we work still rely on stage wedges.

For vocal monitors, I usually roll off the low end between 80 Hz and 125 Hz, depending on whether it’s a male or female singer. This eliminates low frequencies bouncing around the stage and bleeding into open mics.
Placement of wedges is usually at the discretion of performers, but if they don’t have a stage plot or preference, I usually provide two wedges on a single mix and space them a few feet apart to provide a large “sweet spot.”
For festivals, especially ones with amateur performers or track acts, our go-to is to place four to six wedges across the front of the stage on the same mix. That way we provide good coverage for vocalists who want to wander about as they perform.
Not all wedge angles work for everyone, so we use “Acoustic Aiming Devices” (a.k.a., black-painted pieces of wood) to make sure the angle can be tailored for specific performers. It’s best for vocalists to be fully in the wedge pattern so they’re hearing the entire mix, not just the woofer or the horn.
Vocalists who walk all over the stage may be better served with side fills shooting across the stage to provide a “wash” of sound. Just make sure the singers are aware of them because if they wander too close, feedback can ensue.
One More Thing
Mic stands are important as well. They come in two primary types, round weighted base and folding tripod style. I carry both styles to gigs because a singer may also want to use the stand as a prop, and I want them to be comfortable.

Regardless of type, make sure that any rubber feet are firmly in place so the stands don’t wobble or transmit stage noise and rumble up into the mics. Also check the clutch mechanism to verify it’s in working condition. Many vocalists like to play with the adjustments while they sing, and a broken stand can be a real distraction from their performance.
I prefer rubber clips to attach mics to stands because they don’t break as easily, and “seem” (not verified) to transmit less noise to the mic element. For very noisy stages, I also carry a few isolation clips that can help eliminate most of the stage vibrations from reaching the mic.


