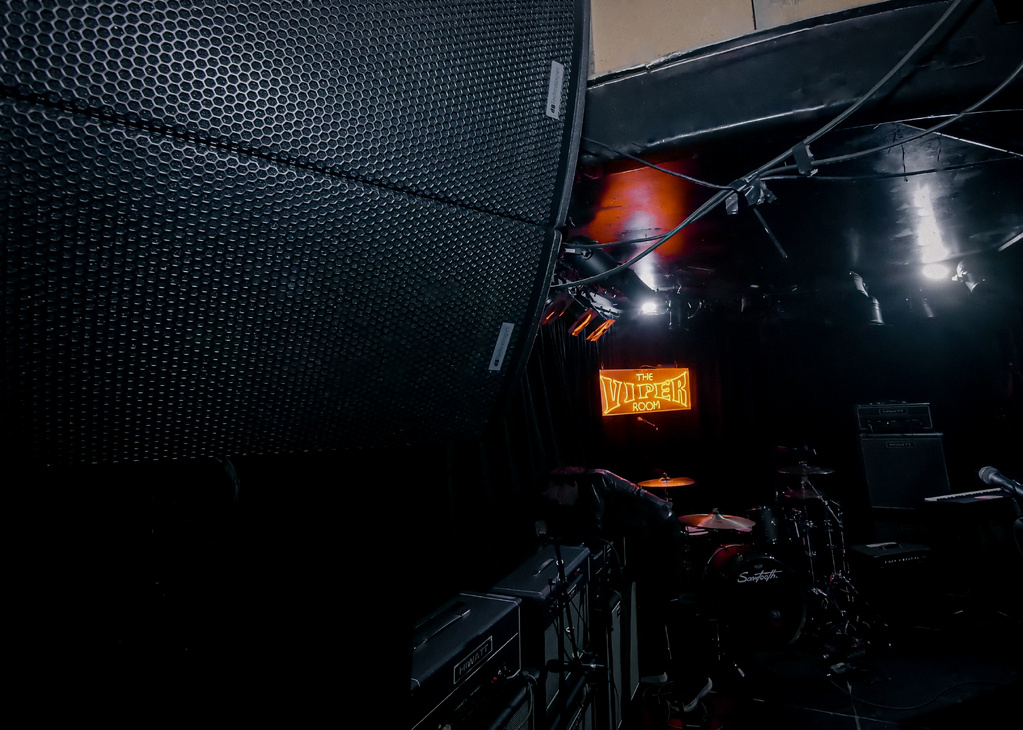
A great music mix, like a sturdy building, has to begin with a solid foundation. The instrumentation in a worship band may consist of drums, bass, keys, and vocals, but may also include guitars, brass, strings, percussion, and tracks. It can all get a little busy (and shaky) if you don’t start with a firm foundation to keep it all standing tall.
It’s our responsibility as mix engineers to build a fantastic mix from the ground up, so start with drums and bass, then stack the rest of the instruments and vocals carefully on top. Let’s have a look at how we can get these to work together as the bedrock for your worship music mix.
Drums
Tuning drums is absolutely vital. It changes everything. Be sure before deep-diving into drum miking and processing that the heads are new and the drums are tuned! An improperly tuned snare, for instance, can sound “out of place” in some worship music, so work to settle on a tone through tuning that works best with the music, and the rest of the instrumentation.
Kick. It all starts with the kick drum, the cornerstone on which many great modern music structures are built. If treated correctly, the kick can be a wonderfully solid place to start building a mix, just be careful to blend it respectfully with everything else so it’s more of a “best supporting actor” than the star of the show.
The most common practice is to start with head tuning in conjunction with dampening such as a pillow that rests against both the front and back head or a foam ring. This helps produce a big, deep tone that sounds great in the house system without over-ringing. For increased “resonance control,” insert a noise gate on the kick channel(s) and work with the threshold, hold, and release times to ensure even light taps from the drummer make it through the gate but the “note” doesn’t hold on so long that it results in “droning” and possibly feedback. It takes a bit of work, but the extra time spent tuning and setting noise gate(s) just right will help the overall low-end spectrum to be much tighter.
An important decision is whether to use one microphone or two. Using only one can be a lot less complicated. An EQ cut around 300 Hz, a small boost at 60 Hz and another boost at 5 kHz may be all that’s needed. There are a few things to watch out for when combining two mics, but this approach can offer tonal flexibility and options. Let me explain with the following two-mic approach:
Mic 1: A purpose-designed kick drum mic (for example, the Shure BETA 91A) that sits inside the drum on a pillow or dampening device can produce a nice tight tone and a clear “attack” sound. You may find the drum sits nicely in the PA with its natural frequency sitting around 63 Hz. This mic can serve to increase clarity and impact when the drummer is hitting the kick drum a bit softer.
Mic 2: A mic with lower frequency characteristics (such as the Shure BETA 52 or Telefunken M82), placed slightly in the hole in the front head, may result in a big, round tone (around 45 Hz) with a little less attack but much more depth that can be used when the drummer is playing a lot harder and Mic 1 just sounds too “clacky.”
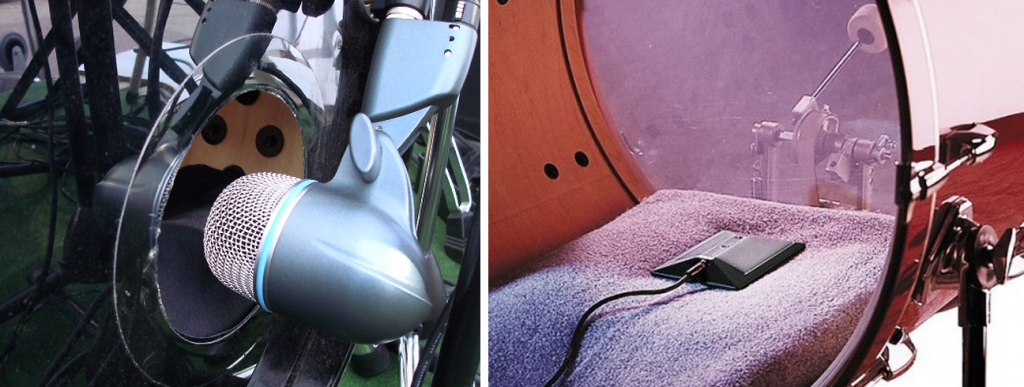
This multi-mic setup supplies some options. Use one mic for a particular sound (uptempo rock song), and the other for different characteristics that might be better for another style song (slow ballad). But what if you want to combine the two mics in the PA for another optional tone?
By all means give it a listen, but please be mindful. Combining two mics can cause frequency cancellations due to time arrival offset that can cause phase issues. If you bring the fader up on one mic and it sounds good, and the second mic by itself also sounds nice, but both together make the lows and sub frequencies disappear, you’ll need to work on their phase relationship.
I recommend adding delay on one channel in the range of 2 to 5 milliseconds (ms) to start. There’s no “perfect delay time for every situation,” so use the delay setting that makes the two mics sound best in the PA and always keep in mind: one microphone may sound better on its own than two combined! (For more about phase – and polarity – be sure to check out Samantha Potter’s recent Church Sound University video.)
Snare. The snare drum is just as important as the kick (and again, I stress the importance of a fresh drumhead and solid tuning). If you have the mics and channels available on the mixing board, I recommend two mics because it offers more options that don’t require excessive EQ.
If you do use a second mic pointing up to the bottom skin of the snare be absolutely sure that when adding the two together in the mix to check the polarity and phase. Keep in mind that neglecting to reverse polarity for one of the mics will almost always result in frequency cancellations in the “meat” of the tone (between 100 and 600 Hz).
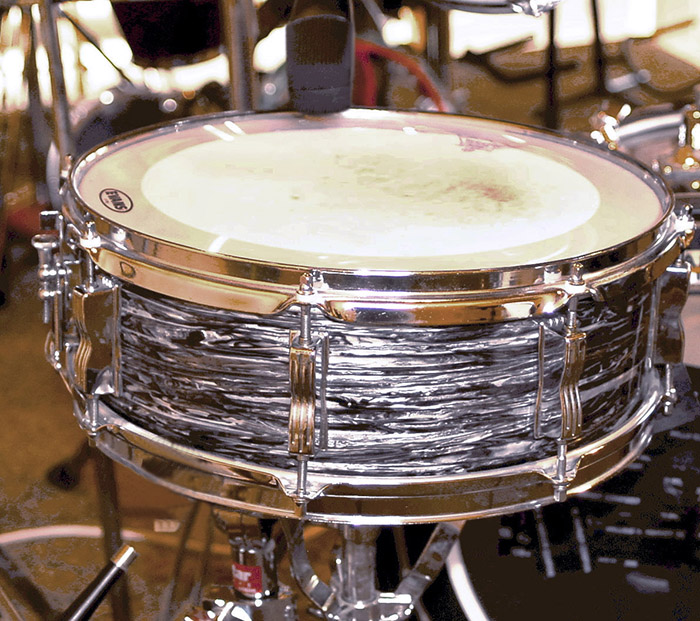
EQ options are varied and personal, so add or subtract a little EQ here or there to the top and bottom snare mic channels to taste. If you’re only using a top mic, there may be the need to add a decent amount (+6 dB) of 5 kHz or so to give it some high-end “cut.” If using top and bottom mics, try starting with flat EQ and see what’s missing before starting to EQ too much. A little boost around 200 Hz can add some “fatness” to the sound.
Toms. Drum kits can vary from a single tom to as many as five or six (think Neil Peart from Rush). Most kits have two to four toms. Tuning the toms to work well within the sound of the entire kit is the most important part. Most toms have a “note” or “pitch” where they naturally want to resonate. Ask the drummer to work on the kit before arriving at rehearsal/service.
Once toms are amplified, you may need to retune them slightly to work with the resonances of the PA and the room. There may also be need for a bit of “MoonGel” or gaff tape to control excessive ring. A noise gate on each of the toms can also help in eliminating overly extended resonance and feedback. Use the “hold” and “release” times on the gates to control and tailor the decay times.
Hi-Hat, Ride & Cymbals. Depending on the size of the auditorium and stage, there may be the need to add a few mics to capture the cymbals. Hi-hat and ride cymbal help balance out the rhythm of the song, so be sure to mic them if possible, and putting one or two overhead mics up to pick up all the cymbals can help to bring the whole kit together. Remember to roll up the high-pass filter (HPF) on each of these channels to around 160 Hz so that they don’t pick up a bunch of low end from the bass guitar or the PA.
FX.
You may also want to add a touch of reverb to some drum channels – snare and toms can benefit greatly from this. My favorite way to treat drums is with some short reverb (like a gated preset) and a slightly longer (1.0 sec) hall reverb. Add a bit of both reverbs to these drums and the kit should come to life. However, too much can reduce clarity and get “washy” so proceed with caution.