
Are you a Lone Ranger of the audio world? I’ve been one for more than 20 years, working as an independent practitioner of live sound.
Lone Rangers face the common scenario of ever-increasing responsibilities from advancing the load in and out, to pinning the stage, handling musicians and tour managers, corporate clients and eager brides. All with no A2 or enough hands or help – just a steady schedule of shows ranging from music to corporate events to weddings to comedy shows, plus that children’s theater show thrown into the mix at the last moment (of course).
We strive to make the nearly impossible possible, all while flying solo as the promoter, client and entertainers put the squeeze on our time and patience. The aim of this column is to share what I’ve learned over the past two decades in hopes of helping fellow Lone Rangers better deal with the challenges that lay before us day after day. And while these challenges are unfortunately quite common, they also present a wonderful opportunity to learn some powerful fundamentals.
Future topics will range from gear and maintenance to troubleshooting and organization, as well as advancing shows, client relations, work flow strategies, wireless challenges and of course, mixing tips and tricks. But first let’s start with some workflow strategies for mixing monitors (wedges and in-ear monitors) from front of house, in addition to stage techniques to maximize monitoring success.
Stop The Hacking: Output EQ
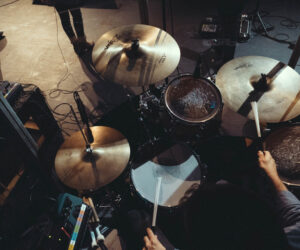
Imagine this common scene: a singer is playing acoustic guitar through a direct box (DI) and a wedge, providing foldback for both her voice and guitar. The acoustic guitar is feeding back in the wedge and/or just plain sounds bad. You start hacking away at the mix graph, yet now her vocal in the wedge sounds horrible. The problem is that you’re trying to solve one problem while making another worse.
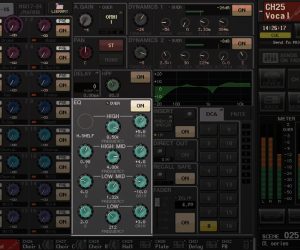
Look to the output EQ as the tool for making the wedge sound natural, not the input. This also serves as a quick test to know if something is wrong with the monitor, crossover or amplifier. Once comfortable, you now have a reference – when something doesn’t sound right, you know it’s the source.
Mixing For Two Bosses
A sole mix engineer is responsible for providing a mix to two important groups: the audience and the performers. The audience is hearing the house mix through the main PA. The performers hear the monitor mix through wedges and possibly IEMs, both of which are completely different from the PA.
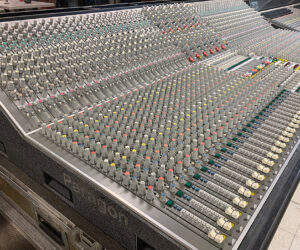
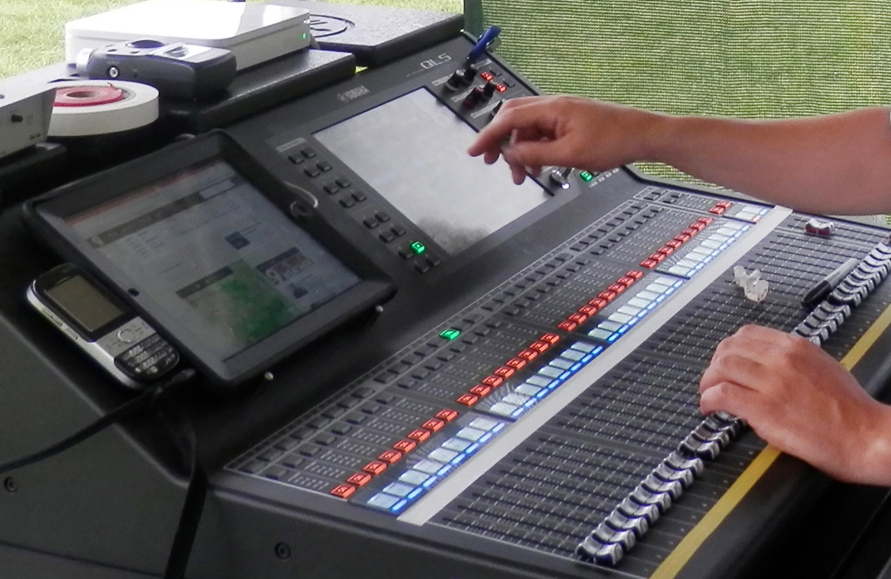
When confronted with a single channel strip for the singer’s main vocal and another for her guitar, how do you manage making both sound good through two or three completely different loudspeakers? Split. Think of yourself as a hybrid engineer. In the traditional live audio world, both house and monitor engineers have a split of all inputs. But as a Lone Ranger, you’re not that fortunate; it’s all you.
But why can’t there be the same flexibility and separation? There can be, by splitting inputs to separate channels on the console, one for the house mix and the other for the monitor mix. Be sure to un-assign the “monitor channels” from the stereo bus. The monitor sends will come from the “monitor channels” and not the house channels. The parametric nature of channel EQ and its accompanying high-pass filter are potent tools for monitor mixing.
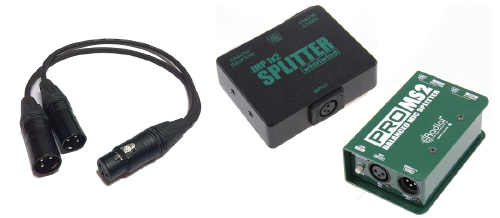
This approach provides independent control over each input for each type of output/loudspeaker. It can be done at the desk or at the snake head using simple XLR “Y” cables or a proper isolated splitter such as a Radial Engineering ProMS2 or Whirlwind IMP splitter. (Both are available in 1 x 2 and 1 x 3 configurations). Another useful tool for this purpose is the Klark Teknik Square ONE, a unit providing a 8-in x 24-out split.
If the number of open channels is tight, prioritize the most important and challenging inputs, such as vocals and acoustic instruments.
In the digital world, physical splits may not be required, yet be aware that when “soft” splitting channels on a digital desk, sharing the head amp may be necessary. The use of physical splits provides the benefit of independent head amp control.
I tend to set up the monitor channels as post fader because they provide the benefit of the channel EQ and the fader, which makes it much easier to give everyone more or less of a single input by simply using the fader.
A trick with analog consoles is to take off the fader cap or exchange different colored caps for easy identification. If digital, label the monitor channels in lower case and/or a different color.
Cue Me
The cue wedge is essential to a monitor engineer, supplying a true reference of what the musicians are hearing through their monitors. This is especially useful when doing double-duty on house and monitor mixes. Try to borrow (from the stage) a wedge with the same drive quotient (crossover, amplification, etc.) as the monitors on stage and place it next to the console.
If mixing IEM, invest in decent buds (preferably molds), but I’ve found that the foamy Shure tips work well. In addition, a wired IEM pack such as a Shure P4HW or a wireless unit is a smart thing to have and use. In soloing the output for the mix, you hear the actual mix(another word for mix) as the musician hears it on stage, not just the description from the musician.
Flip It
The polarity button, often incorrectly referred to as the “phase button,” simply flips the input polarity 180 degrees. This is especially useful in eliminating low end feedback from acoustic guitars and other instruments.
In addition, when mixing ears, flipping the polarity on a singer’s vocal and other inputs can yield incredible results without needing to pull out an excessive amount of EQ. Don’t be afraid to hit that button.
Wedge & Mic Placement
This one is a biggie, a bedrock fundamental that I teach others constantly. A mic and a wedge are always a compromise, and there’s always a limit to how loud a wedge can be. Feedback happens when the mic is picking up the output of itself in the monitor. Therefore it’s very important to know the pick-up patterns of the mics on stage. So if you’re at a gig and not sure, look it up!
For example, a standard Shure SM58 has a cardioid pattern, so it’s null (rejection zone) is in the rear. A Shure BETA 58, meanwhile, has a supercardioid pattern so the null is to the sides.
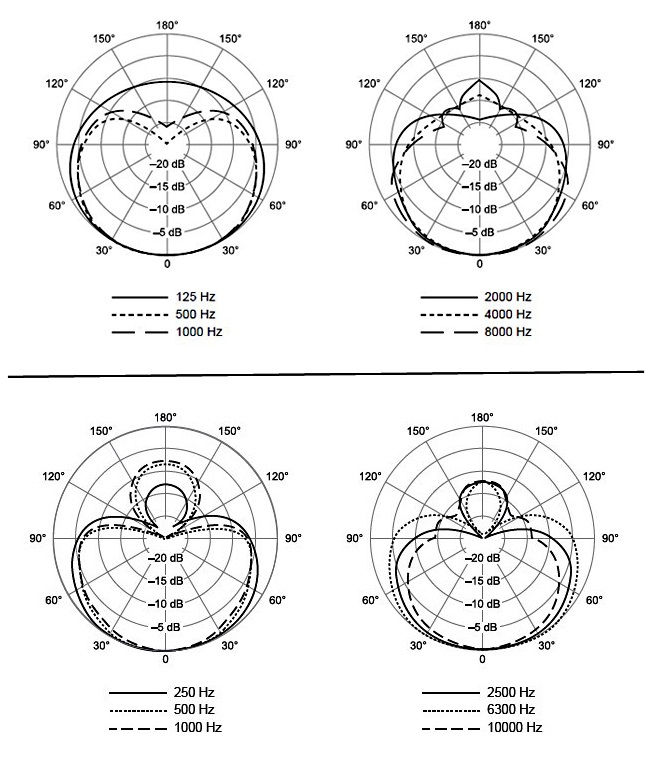
The essential take-away is to make sure the null faces the wedge or wedges so the mic(s) avoid sound you don’t want to pick up. A great resource is an article on here on PSW by Mark Frink entitled “Monitor Mixing Tips & Tools Of The Trade For A Successful Show.”
Staying In Control
As a Lone Ranger, it’s important to be creative and able to adapt on the fly – while adhering to essential fundamentals of audio. There’s no other way to success.
Give these techniques outlined here a try, and let me know your experiences and questions. Next time I’ll address advancing and handling multiple performances on the same bill with maximum efficiency. Good luck out there!