
Good church sound often crescendos or crashes at the mixing board. A new whiz-bang mixing console will not improve the quality of sound one bit if your sound system is flawed in design, doesn’t have enough amplification, delivers uneven coverage, or has poor system processing.
But even if all of that is in sync, the board can still fail to orchestrate good sound if a sound engineer isn’t operating it properly.
A Complex Board
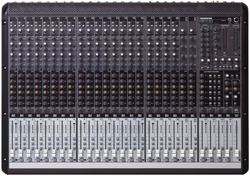
I’ve trained sound technicians in church ministries on systems ranging from a 12-channel mixer to a 56-channel mixer, and on systems that have a single loudspeaker to systems with multiple clusters cross-matrixed to deliver left-center-right information into a room.
All of this taught me that the mixing board is one of the most complex components of a sound system. To obtain good sound, an engineer must have a good understanding of not only what all the buttons do on a soundboard, but also the concepts behind pushing those buttons.
Employing some simple principles can go a long way to helping raise the performance level of your church console.
Step 1: Go For The Gain
One of the most important components of a mixing board is gain structure. If the gain structure is off, you will have distortion or noise (hiss) in your system.

If gain structure isn’t right, the board also will be awkward and unpredictable in its response. For example, sliding the lever from the bottom to part of the way up could result in parts of your loudspeaker system flying by your head. Well, it might not be quite that bad, but the effect could clean out your ears and the ears of everyone around you.
You may also find yourself riding the fader on the board all the way to the top without getting the right level of sound. In the process, you’ll generate all kinds of hiss.
On most mixing boards, the first knob on an input channel is the gain (or trim) knob. In layperson’s terms, this is the master volume-control button. If we liken the mixing board to a plumbing system, this knob is the master valve. If the valve is barely open, the water pressure (or sound) is low; if open too far, the pressure will be so high that it will produce incredible distortion.
Mackie has a very good paper outlining the way to set up channel gain. I’ll borrow the salient points here:
—Turn the input trim control of the desired channel all the way down.
—Connect the mic or line input to that channel (turn down or mute all other channels). Press the channel’s solo button, making sure it’s set to PFL mode if you have a PFL/AFL option. As a musician begins to sing or play, turn up the channel’s input trim. You should see the input level on the mixer’s meters. Adjust the input trim until the meter level is around zero (0) dB.
—Adjust the channel’s volume the way you want it with either fader or gain control. Don’t forget to turn up the master volume or you may not be able to hear the sermon.