Step 4: Route The Signal
The bottom of the channel strip offers another option for routing signals. On most mixing boards, you can choose left or right signals as well as subgroups. By selecting the right buttons, you can assign sound to travel right to the main output of the mixer or through a subgroup.
Subgroups are good for controlling the volume of multiple inputs. For example, you could assign the worship leader’s microphone to the main mix and the background vocalists’ mics to a subgroup. This will allow you to bring the total level of all the background mics up or down with one fader.
The mute button is the channel’s on/off button. Caution: if you turn it off, it might also turn off the auxiliary sends. Check your console’s operating manual to see whether this is how your mute button works.
Regardless, the mute button will affect a channel in the subgroup as well as the main mix. When the pre-fade listen (PFL) button is pressed down on most soundboards, a channel can be assigned to headphones regardless of the channel fader position.
This is very handy for cueing up recordings (from hard disc, CD, tape or whatever) to be played through the system. You can listen via headphones to a recording without letting the signal go to the main mix.

However, proceed with caution. If you have any prefade aux sends turned on, the sound on the recording will be sent there. There’s nothing worse than checking to see if a recording is cued properly during prayer in a worship service and forgetting to turn off the prefade aux send monitors. Been there, done that, will never do that again.
The channel fader is the master volume control for that input. Most mixing takes place in adjusting the volume of the signal that goes through the mix board.
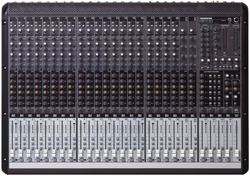
Step 5: Master The Mix
The master section of the mixing board consists of the subgroup control, mains, aux masters, and headphone level. This section is where everything comes together before it is sent out of the mixing board.
If proper sound checks have been done and the board has been set up correctly, you can spend most of your time mixing by adjusting levels, and can adjust subgroups to bring the mix together. You can also make minor individual channel-level changes, minor equalizer changes on individual channels, and small adjustments on the aux sends.
Once the mix is set up, you’re free to camp out at the master section to manage the mix.
Practice to Perform
To obtain good sound, a sound operator/engineer must have a good understanding of not only what all the buttons do on a console, but also the concepts behind pushing those buttons.
The most important thing that an operator can do to learn how to mix sound is to spend time experimenting with various buttons on the board. The time to do this is not during a service, however. Nor should this be done when rehearsing for a worship service or performance. This time should be spent with musicians, adjusting the sound levels as they rehearse and setting the mix for when they perform.
In addition, anyone mixing should read through the console manual to be come familiar with its features and how to use them. Also, read articles on mixing sound and try to attend training sessions or workshops on sound.
The better we understand every part of a mixing console, the better our mixes sound.
Gary Zandstra is a professional AV systems integrator with Parkway Electric and has been involved with sound at his church for more than 25 years.