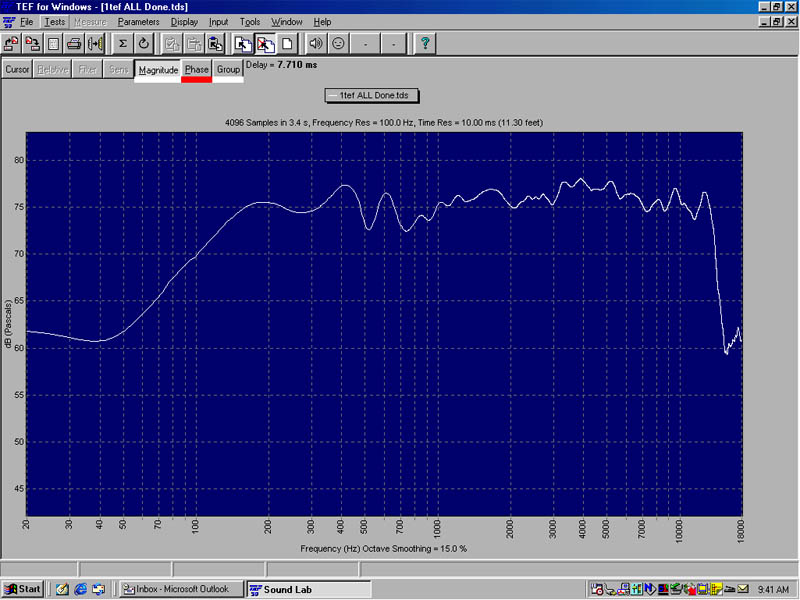
If the box is using a constant directivity horn you may need to use a shelving filter to increase the high frequency output above 2 to 3 kHz. Get the response as flat as you can across the full frequency spectrum.
Remember, if you leave a 3 dB peak in the response and it happens to coincide with a 3 dB peak in the vocal mic response, it will cost you 6 dB of headroom.
You should discover an overlapping frequency range where the low- and high-frequency devices are behaving in a fairly linear fashion. The crossover can be set anywhere within that region. As a general rule, if the horn is small, set the crossover towards the high end of the overlap zone.
Larger horn mouths provide pattern control down to lower frequencies, so if the horn is larger, you can set the crossover point lower while maintaining good directivity from the device.
Next, the levels and time alignment between the low- and high -requency sections should be set. With the mic on-axis and centered between the horn and woofer, do a full range sweep. Set the crossover outputs so the average volume level is the same across the entire frequency spectrum.
Then look at the frequency and phase response at the crossover frequency. Pretty ugly, eh?
Using an impulse response or ETC measurement, look at the arrival times for the two devices. Set the alignment delay on the DSP to eliminate the time arrival offset.
Now look at the frequency and phase again. Better? You will need to do a little fine tuning to get the flattest possible phase line.
If you’re using an RTA, this part is harder. Try inverting the polarity of the high output on the crossover. You should see a notch at the crossover frequency. Adjust the delay until the notch is at its deepest. Reset the high polarity back to normal.
If the time offset is correct the notch should disappear. If your RTA has a 1/12th octave mode, it will be easier to see.
Some real time analyzers have a loudspeaker timing analysis feature as well. Using asymmetrical crossover slopes can produce better (or worse) off-axis response.
Experiment with this if you have time, but this magazine isn’t long enough to cover all the possible permutations. Program in some brick wall limiters just before the little red lights on the amps start to dance.
Less From Two Than One?
Save these settings as a preset in your DSP of choice and repeat the process for each type of monitor wedge in your inventory as well as side fills and drum monitor rigs. You can also use these settings as a basis for multiple wedge setups.
But remember that when you use multiple cabinets of any sort, comb filtering will occur because of the time arrival differences. These peaks and notches are non-minimum phase. That means that they are not “EQ-able”. (Is that a word? It is now!)
Because of this, sometimes it’s possible to get less output with two wedges than with one.
But riders being what they are, go ahead and do a preset for dual wedge setups. The crossover and time alignment settings will remain the same, but you may get some summing in the low frequencies.
Use the RTA to check the frequency response because a TEF sweep will be too frightening to look at. If you need a preset for absolute maximum output with a particular vocal mic, try putting it on a stand exactly as if you were setting up for a show. Plug the mic into the test microphone input on the test rig.
The response will be a combination of the speaker under test and the off axis response of the microphone. EQ the response to be as flat as possible. It may not sound pretty, but it will get loud. (At least until the singer cups the microphone, sealing off the back of the cartridge, turning it into an omni).
You may also want to do presets for full range response or one with a higher frequency on the low-cut filter for vocal only. Sometimes it is beneficial to attenuate the lows for an acoustic set to avoid exciting acoustic guitars or pianos. Save a preset and switch back and forth at the appropriate times.
With the current crop of DSP devices, it’s not uncommon to find configurations like four input, eight output that work perfectly for either four two-way mixes or two three-way side fills and a cue wedge. Look for routing flexibility and the ability to store lots of presets.
But most of all, listen to the units. Audio quality varies as much with digital equipment as with analog.
It’s too easy to buy this type of device based on a laundry list of features and functions when the most important thing is great sound.

