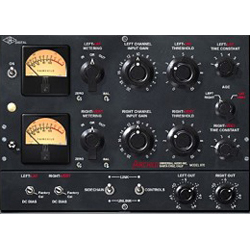
Hardly a mix is completed these days without the engineer placing a compressor across the mix bus, even if they’re not sure exactly why they’re doing it.
Here’s an excerpt from Mixing And Mastering With T-RackS which explains both why a bus compressor is used, and how to properly set one up.
Along with compressing the individual track of a song, many engineers place a stereo compressor across the mix bus to affect the entire mix as well.
Originally this came about when artists began asking why their mixes sounded different in the studio from what they heard on the radio or when their record came from the pressing plant (it was still vinyl in those days). Indeed both the radio and record did sound different because an additional round (or two) of compression was added in both mastering and broadcast.
In order to simulate what this would sound like, mixing engineers began to add a touch of compression across the mix bus.
The problem was, everybody liked the sound so much that now the majority of records have at least a bit (a few dB’s) of compression added to the stereo mix despite the fact that it will probably be re-compressed again at mastering and yet again if played on the radio or television.
Why Use Buss Compression?
Generally you’ll find that most renowned mixers use the buss compressor to add a sort of “glue” to the track so the instruments fit together better, but that also means that they’ll actually use very little compression. In fact, sometimes only a dB or two of gain reduction at the most is added for the final mix.
That being said, many mixers will also offer their clients (artists, band members, producers and label execs) a more compressed version to simulate what it will sound like after it’s mastered.
This “client mix” is achieved by using a signal path across the mix bus that’s similar to what a mastering engineer would use, that is, a compressor that’s fed into limiter at the end of the chain to raise the level to a point similar to a mastered release.
Because the clients get used to hearing the “client mix,” it’s so easy to let bus compression get out of hand.
One of the problems with compressing too much is that it leaves the mastering engineer a lot less room to work, and in the case of a track that’s “hyper-compressed,” virtually eliminates the ability for the mastering engineer to be of much help at all.
Setting The Compressor
In most modern music, compressors are used to make the sound “punchy” and in your face. The trick to getting the punch out of a compressor is to let the attacks through and play with the release to elongate the sound.
Fast attack times are going to reduce the punchiness of a signal, while slow release times are going to make the compressor pump out of time with the music.
Since the timing of the attack and release is so important, here are a few steps to help set it up. Assuming you have some kind of constant meter in the song, you can use the snare drum to set up the attack and release parameters. This method will work the same for individual instruments as well.
1) Start with the slowest attack and fastest release settings on the compressor.
2) Turn the attack faster until the instrument (snare) begins to dull. Stop at that point.
3) Adjust the release time so that after the snare hit, the volume is back to 90-100% normal by the next snare beat.
4) Add the rest of the mix back in and listen. Make any slight adjustments to the attack and release times as needed.
The Idea Is To Make The Compressor “Breath” In Time With The Song.
Bobby Owsinski is an author, producer, music industry veteran and technical consultant who has written numerous books covering all aspects of audio recording. For more information be sure to check out his website and blog.


