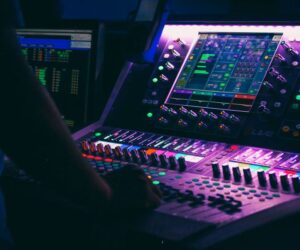
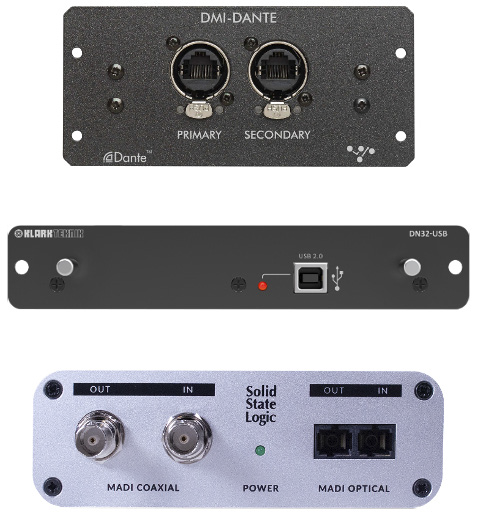
I remember the first time I saw someone perform a virtual sound check. It was my first arena tour and I was looking after the support band. I could hear the full mix coming out of the PA system and could see the engineer manipulating the mix in real time, yet when I looked at the stage the crew was still rigging the lights and the band’s equipment hadn’t even been set up yet – what magic was this?
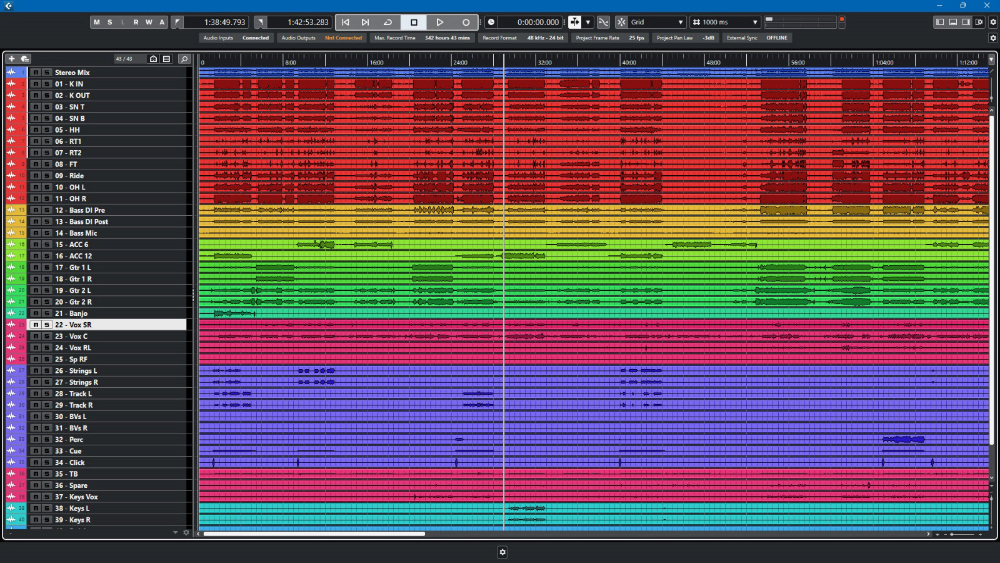
Thankfully the headliner’s mix engineer was happy to explain it to me. He had a powerful computer hooked up to the mixing console that enabled him to make a multi-track recording of each individual input directly from the mic preamps such that when he played it back, it was if the signals were coming directly from the stage in real time, as during a live performance. This enabled him to play yesterday’s show through today’s sound system, affording the valuable opportunity to tweak the mix and the system without the band needing to be present.
Back then this kind of functionality was only available to the highest level of touring productions, but over time the wide-scale adoption of digital consoles at all levels has bought this facility into the reach of everyone. As a result, I thought it was about time to take a look at the issues and challenges arising from the increasingly common practice of virtual sound checking.
Connectivity Methods
I wish I could say you can just plug a computer directly into any console via a USB port, but we’re not quite there yet – different console manufacturers offer different connectivity methods – so there are a variety of protocols and hardware options to be aware of. Let’s take a look at the three most common.
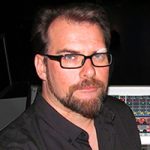
First there’s Audio over Ethernet (AoE), which uses the data networking topology long used by businesses to create office networks not to mention enabling the internet itself. The two most common examples of AoE are Dante and AVB (Audio Video Bridging), both of which are widely used by equipment manufacturers, most notably by Yamaha in the case of Dante and Avid for AVB. The great advantage here is that you don’t need any additional hardware; in most cases you can just connect a network cable between the desk and the computer and you’re good to go – although be aware that not all modern laptops have an RJ45 network socket, so an adapter might be needed.
Second, there are USB audio interfaces. They typically employ a square USB B socket (such as those used by printers) on the console that connects directly to the USB port on a laptop, essentially turning the console into a multi-channel sound card (as far as the laptop is concerned). You may need to download a custom driver from the specific console manufacturer’s website in order to get it to work.
The third method is via MADI (multichannel audio digital interface), a widely used interface (also known as AES10) that operates over coaxial or fiber optic cables. Many professional consoles have MADI ports built in, and pretty much all can have a MADI card installed; however you will need a USB to MADI interface to connect to a laptop (such as the RME MADIface or the DiGiCo UB-MADI). A manufacturer that always includes MADI ports on its consoles is DiGiCo (and the newer models have the 48-channel UB-MADI interface built in).
Be aware that there can be quite a difference in how many channels a particular method can handle, and this may change depending on the sample rate being used. Some interfaces provide seamless sample rate conversion – but not all, so you might need to be able to record at the sample rate that matches the console or even change the console sampling rate to one that the laptop can handle at the required channel count. There are far too many permutations to list here, so always do your research and make sure the method you plan to use can deliver the expected results.
To cover as many bases as possible, I always carry a MADI interface while also making sure I have a copy of Dante Virtual Sound Card (and Dante Controller) installed, as well as copies of the USB drivers for as many consoles as possible (not to mention coaxial, network and USB cables). This enables me to cover most if not all the bases when it comes to virtual sound checking.
Also required is digital audio workstation (DAW) software that’s capable of recording the number of channels you require at the appropriate sample rate. Also bear in mind that all that’s needed is to be able to record and play back multiple tracks, so you don’t need to spend a lot of money on expensive software – I’ve found less-expensive options such as Cockos Reaper (reaper.fm) to be more than up to the job.
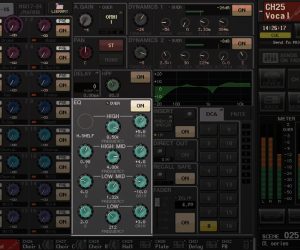
It’s important to point out that the console in use needs to be able to take the signal directly from the preamp before any channel processing (including gain and high pass filter) while also enabling the signal to be played back into the same point in the signal chain. Thankfully, the modular nature of modern digital consoles, i.e., the fact that consoles and stage boxes are separate but networked together, makes it easy to do this.
In the past I’ve managed to finagle a working alternative on consoles that don’t have this facility by taking direct outputs and playing them back into alternative channel inputs, but any workaround along these lines runs the risk of messing with gain structure. If the input levels in the virtual sound check don’t match the levels coming from stage during the show, it can render the whole process pointless.
Storage Issues
Now that we have the communication method sorted we need to talk about data storage. All of the above methods deal in linear audio, and by this I mean the audio is completely uncompressed – a minute’s silence generates a file exactly the same size as a minute of blistering heavy metal or banging dance music.
If you’re recording at a sample rate of 48 kHz at a bit depth of 24 bits, you’re looking at about 9 megabytes per minute. If you multiply that by the number of channels and then multiply it again by the number of minutes, the data size gets big fast – for example, recording 48 channels for 90 minutes would result in about 40 gigabytes of data. If you increase the sample rate to 96 kHz then that figure instantly doubles to 80 gigabytes.
Therefore, always make sure there’s enough storage space on your chosen storage device before attempting to record a show (thankfully most DAWs let you know the maximum recording time once you arm the tracks for recording).
In addition to physical data size, we also need to think about the write speed of the storage device being used, and I’m afraid this means more math. Take that sample rate of 96,000 samples per second, multiply it by 24 bits and then 48 channels and you get a rate of 110 megabits per second. Then divide that by 8 (as there are 8 bits in a byte) and it works out to about 14 megabytes per second (I’m rounding up here but it’s always better to round up than down).
As long as your storage device can handle a sustained write speed of at least 14 MB/s, you’ll be fine recording 48 channels of 24/96 audio. Thankfully most modern hard drives can handle much higher speeds than that, but it’s worth checking just to be sure.
If using an external hard drive, also be aware of the data transfer speed of the interface you’re using. For instance, USB version 3 can handle sustained transfer speeds of about 85 megabytes per second whereas USB 2 dips down to about 22 megabytes per second.
External storage also introduces a possible point of failure in the physical connection itself, especially during a hectic live show. I avoid this issue by always recording to the internal solid state drive (SSD) of my laptop and then archive recordings to an external hard drive to free up space for future recordings, which I can do at my leisure.
Where To Keep It
This brings up another interesting issue that I didn’t anticipate when starting to regularly do virtual sound checks – the issue of data warehousing. If you’re recording about 80 gigabytes a night, the amount of data can quickly build up over the course of a tour.
Obviously you don’t need to keep a recording of every single show if you’re only using the recordings for virtual sound check purposes; it can even be argued that you only need one show from the beginning of a run or campaign as long as nothing changes in terms of the inputs that should work fine.
Alternatively, you can just keep yesterday’s show and delete as you go. However, some acts I work with like me to record and store everything, which introduces its own set of challenges because most storage methods aren’t at all suited to long-term storage.
Traditional mechanical disc drives are reasonably robust, and while the data may well stay intact for relatively long periods of time, if the drive isn’t spun up regularly, the bearings will seize and then you’re looking at a potentially expensive retrieval operation. Solid state drives (SSDs) would appear to be the better choice since there are no moving parts, but the quirk of quantum physics exploited to store data can cause the floating gate transistors to lose the odd electron over the years, so there’s a real risk of data corruption over time.
As a result, many turn to optical disks such as DVD for long-term storage because as long as they’re stored correctly they should last a long time – some manufacturers claim up to 100 years and you can even get glassy carbon discs that claim to last 1,000 years. However, be aware that you might struggle to find an optical drive that reads a certain format or file structure in as little as 10 years time, so if you’re serious about long-term storage you might need to plan to update your archive to the latest technology on an ongoing basis.
I’m sure some of you are reading this and shouting, “What about cloud storage?” It seems as though this would be the perfect answer, but I’ve looked into it and most cloud storage is designed around users storing relatively small amounts of personal documents, data and photographs. This means it can quite quickly get very expensive to store large amounts of data. There’s also the added issue of regularly requiring a decent internet connection in order to upload an 80-gigabyte show every night, usually just as the tour bus is pulling away from the loading dock.
Getting The Most
Now that we have our equipment, protocols and data storage sorted out, what’s the best approach to getting the most out of a virtual sound check? Most of the bands I work with typically have one or two songs that best define their sound, and I usually start with those. I use them to make sure the core elements (i.e., drums, bass, keys and guitars) are bedded in before I add the bells and whistles (vocals, horns, backing tracks, effects, etc.).
Beyond that I have a handful of songs that cover the various permutations of instrument use so that I can quickly check that all is working properly in the environment. Not having the band on stage also means I can spend more time exploring and building the mix by combining and substituting groups of channels (via subgroups or DCAs) without putting the band off (as their stage sound is based on a combination of the monitors, backline and main PA system, any drastic changes to the main mix will have a knock-on effect).
I also make use of tools I never use during show time such as “solo in place,” which enables me to solo individual channels in the PA (in the same way that PFL works in the headphones). Take great care to disable this feature once you’re done because you don’t want to accidentally solo the kick drum in the PA during the show (which is why it’s often referred to as the “pink slip” button).
Something else I do during my virtual sound checks is to spend time setting the correct balance between the main system and any additional fills or delays, something that can be difficult to do once the show has started due to the presence of the audience. I use a Bluetooth keypad as a portable transport control for my DAW and wander around with a remote control tablet, enabling me to tweak the desk outputs (via the matrix) while the room is empty. Once I’m happy with the way the mix is working, as well as the overall balance of the PA system, I always finish with the first song in the set to make sure the console is ready to go.
As soon as I’ve identified the handful of songs I need for virtual sound checks, I often create a new project containing just the audio for those songs to cut down on the disk space required to store the virtual sound check files (which means a full 90-minute show can be slimmed down from 80 GB to about 18 GB).
An important caveat to be aware of is that while a virtual sound check enables us to exactly replicate the multiple signals we get from stage during a performance and output them through the system as if the band were on stage in front of us, the one thing that will be missing is any ambient sound generated on stage by the backline or monitors. While many front of house engineers have long considered such spill to be an annoyance, it’s still part and parcel of the overall sound, particularly in smaller rooms where the ambient stage sound will have a much greater impact.
Thankfully the move towards widespread use of in-ear monitors and generally quieter stage levels is starting to negate this issue, but it’s something to be aware of when virtual sound checking. In most professional sound systems, it’s possible to introduce the virtual sound check audio into the system such that it’s available to both FOH and monitors, providing a better idea of the overall mix with the monitor spill included.
However, in my experience this isn’t always practical because I’m typically running the virtual sound check while the techs are setting up the stage, and they tend not to appreciate being blasted out by gig levels of sound while they’re trying to do their jobs. (Trust me, I’ve tried.)
Added Considerations
In addition to all the stage inputs, you might also wish to record additional signals alongside your virtual sound check. For instance, if there’s a possibility the recordings might be used for a live album then it’s a good idea to include some ambient microphones to capture the audience noise. Monitor engineers often deploy ambient mics along the front of the stage, so you might just be able to pluck those inputs from the audio network. You can also set some up at front of house and input them directly into the console.
I also always record a copy of my main stereo mix to two channels for reference purposes. If a band member wants to hear how a particular song is working I can just snip it out and send it to them without having to do a full mixdown – just make sure there are enough recording channels available to cope with these additional inputs.
Before concluding, I’d like to mention a useful fringe benefit from the practice of virtual sound checking. Once you have all stage inputs nicely recorded and safely archived, you can take them anywhere and even use them to build a new show file.
This is particularly useful if you’re switching from one console to another and can even be done in advance of the show. All that’s needed is the virtual sound check setup and the appropriate console. This can save you from wasting time at the venue building the mix from scratch when you could be refining and tweaking it with a virtual sound check.
I hope this guide has helped to demystify some of the issues and challenges associated with the practice of virtual sound checking, which is definitely one of the great boons of this glorious digital age of live sound in which we find ourselves.