Record the reverb return on one track of a two -track or cassette, and your original dry signal on the other. Bring it back to your place and pan the dry signal to the center of your monitors, and the reverb send from their plate on the right.
Send the dry signal to your plate, return it to your mixer, and pan it to the left. Now you can directly compare your plate to theirs, and tune and equalize until the you sound of is equal to, or better than, theirs (again, subjectively speaking).
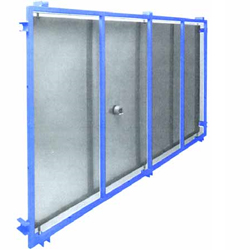
A Case For The Plate
Theoretically, you’re done — but you really need a place to put your unit and something to put it in.
The best place would be a separate quiet room or closet so that no outside vibrations will affect the plate. Even so, a case for the unit is suggested. The case is simply a wooden box that the frame can sit in.
EMT, Audi-ence, and Ecoplate used pressboard, Lawson used plywood, while Stocktronics used only paneling. The frame can be placed in the case on rubber feet, or better yet, suspended in the case using rubber straps with hooks, such as those found in automotive stores for holding down luggage.
The straps can be wrapped around the frame and the hooks hooked to holes or eyelets in the case. This way you can literally pound the case with little vibration. Eyelets can also be put on the outside of the case on each side so that rods can be inserted for carrying.
If you’re only using the plate during mixdown, the studio isn’t a bad place for it. It probably has the best isolation from your monitors and has easy access to your mic inputs and headphone jacks.
The case only has to be a few inches bigger than the entire unit on each side, unless you plan on using the next step — damping.
Damping
The decay time for the reverb as it now stands is approximately 5 seconds at 500 Hz. This is fine for most applications, but is easily altered by fitting a damping plate, which can be a piece of plywood the same size as the plate and covered with an absorptive material (such as compressed fiberglass, styrofoam, or foam rubber) that can be moved closer to or farther from the plate to alter the decay time of the reverb.
EMT, Lawson, Audi-ence, and Ecoplate all moved the damping plate in parallel to the steel plate, from almost touching (1/8 inch) to 6-8 inches away. This is accomplished by forming a parallelogram type set-up where two metal arms attach to the frame and to the damping plate so that when the damping plate is moved, the arms travel sideways and move it closer to the steel.
Stocktronics simply hinged their styrofoam damping plate at the bottom and then pulls the top closer to, or farther from, the steel, claiming this gives a more uniform frequency response in the decay characteristics. A handle or lever on the damping plate facilitates moving it.
It can also be remote-controlled using servo motors and cams, but this is beyond the scope of this article. The choices of materials, method, or even use of damping at all is left up to you.
Plate Tricks
Using equalization will help you get the reverb characteristics that you are after much easier than tuning alone. In fact, all the commercial units have some sort of equalization in their electronics, either a bass cut-off on the pickup amps, a high-frequency boost to the drive signal, or both. EMT cuts the bottom at 80 Hz, but many engineers use a 700 Hz high-pass filter to accentuate the top.
If you have a few equalizers to spare (i.e., tube, class A, graphic, parametric, etc.), it would be a good idea to patch one to the send and one to each return. This will allow you to match the sound of almost any of the commercial plates or any plate sound you have heard. (We have designed a drive signal response shaper that we feel emulates the sound of our favorite EMTs.)
Take the send to the plate and first put it into your delay line. Use a full-bandwidth setting so that you don’t lose any top end. The effect is that you’re in a large hall where the first reflection isn’t heard until milliseconds after the initial dry signal. The longer the delay, the bigger the hall.
A good example of an extra long pre-delay is the reverb on the snare at the end of “It Keeps You Running” by the Doobie Brothers. You hear the snare hit first-and the reverb later. Sort of “boom … cha!”
This will also bring out the deficiencies of a unit, and if you try it on a twangy spring, the time delay doesn’t let the program mask the boing of the snare transient. But with a plate, this is no problem.
To shorten the decay without damping, a noise gate comes in handy. Placed on the return, the release time can be shortened.
When the attenuation and threshold are properly set, the decay will be gradual and smooth, only shorter. If the controls are set to dramatically attenuate the decay, it can be rhythmic. For example, if hand-claps are done on the downbeat, the reverb decay can end sharply and completely on the upbeat.
You can also gate the send to the plate such that you only reverberate certain signals. For example, if you want reverb only on the snare track, and it wasn’t gated when recorded, gate the snare track to the send, and you will only get the reverb on the snare beats, not on any tom toms, bass drum, or cymbals that might have leaked onto your snare mic.
If you drive the plate a little harder, the effect will sound like a series of fading repeating reflections analogous to what it looks like when you drop a pebble in a pond.
Early reflections can be achieved by using a digital delay, in combination with the plate, as well. Experiment and you can get any sound you’ve heard, and some you haven’t.
“So, if I use one plate reverb with a lot of top end and a gate for the snare, and another one with a lot of bottom for `thunder toms,’ and one more with a long pre-send delay and high frequency boost for that `sizzly vocal’ sound; maybe one for the strings… with maybe a little flange on the return … and maybe one more….”
Plate Reverb Required Parts
1 x Steel Sheet (your choice)
Approx 30 feet x Tubular Steel or Angle Iron (for frame)
10 x Threaded Rubber Coated Mounting Hooks
10 x Nuts (to fit Hooks)
10 x Rubber Washers
10 x Fender Washers
1 x Driver (your choice)
1 or 2 x Pickup Transducers
1 or 2 x Preamps, DI boxes, Transformers for Pickups (if needed)
Optional Parts
1 x Case (your choice of style and material)
1 x Damping Mechanism with Absorptive Material (your choice)
Suspension Method (to isolate plate and frame from case)