I tend to enjoy the “bonus features” of my favorite DVDs more than the actual movie. Getting a sneak peek behind the scenes and watching interviews with the cast and crew can be highly entertaining, but nothing tops outtakes and on-set bloopers for pure comedic value.
In my career, I’ve unfortunately been the star of some audio mishaps that would have made the outtakes reel. They were sometimes funny later that night on the bus; some weren’t funny ever, and others required time on the couch with my therapist to get past.
I’m very thankful these “oops-a-daisy’s” weren’t captured on film for the world to chuckle at later, and the good news is that with each audio “crash and burn” came lessons learned the hard way. It stings at the time, but avoiding that mistake a second time is the reward earned for the pain felt in the moment.
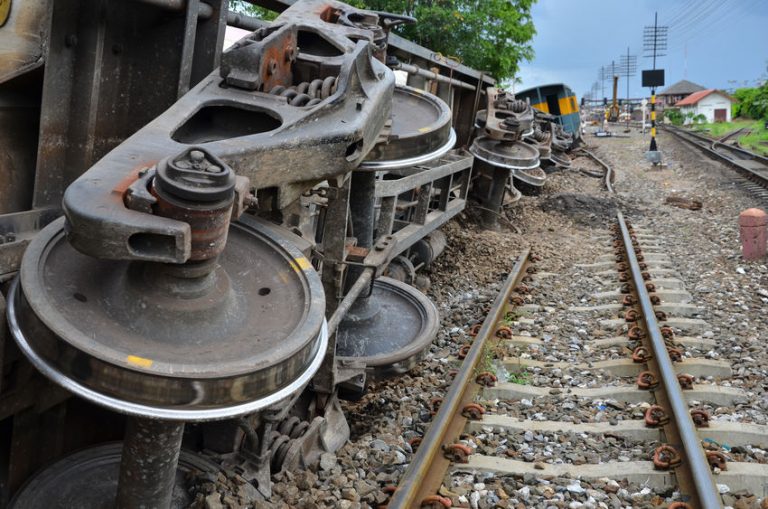
Hopefully you’ll chuckle a bit as you read these stories of audio train wrecks and mix engineer bloopers. I don’t mind sharing, and I think I’ll have a few partners in crime raising their hands and saying, “Yeah…that one got me too.” The embarrassing incidents are immediately followed with the lessons I learned, so I can hopefully steer you clear of repeating my mistakes and also get some sleep at night.
Hidden Channels… Crouching Soundperson
Have you ever assigned a channel to more than one fader on the console? It may be handy to access that input on the drum layer, and on another layer as well. This technique can prove helpful and I do it when it’s really needed, but I generally stick with a “less is more” architecture when laying out my console. I like to know that channels are only assigned to one fader. If that fader is down or that channel is muted, I shouldn’t hear it in the PA.
That said, I’ve strayed a time or two and assigned two inputs from a stereo source (e.g., Video Playback-Left and -Right) to multiple channels and faders. In this example, I have a stereo Video PB channel along with two mono channels (Vid PB-L and Vid PB-R). In corporate world, this can help if you’re surprised by a split channel video roll that has music on one side and dialog on the other. I position the stereo fader alongside my other stereo playback sources and tuck the two mono channels far away on another layer of faders. I now have options, but I’ve also created an opportunity for a mishap if I’m not careful.
Let’s say I check the mono inputs in the PA at some point in the rehearsal, then turn them down, but one fader is accidently left up just a little. I leave that layer and return to my “home” fader layer where my stereo Video PB fader lives. We move on to other things, but I keep hearing a distant “bleed” of Video PB even though my stereo fader is clearly all the way down! Oops! I can’t see that mono fader that’s barely cracked open; it’s on layer 6 of the console, way down the food chain, but it’s burned me all the same.
Lessons learned: If I double assign faders to various layers on the console, I make a mental or physical note to remind myself I’ve done this so I can check that “off” really means “OFF.” Better yet, I don’t double-assign faders unless it’s really necessary and useful.
Another crazy example of this is when mixing using a console’s “virtual sound check” option. Let’s say you’ve got the console set to play back channels 1-64, even though your updated show channel count now only goes to 56. (Many shows ago, you recorded audio on inputs 57-64, but you don’t use those inputs anymore). They used to be assigned to faders on the console, but you’ve since removed those faders from your layout. You hit the spacebar and magically hear playback even though you have all the input faders and DCAs on the console turned down. (What the heck!) You only realize the mess you’ve made when re-assigning those channels to faders on the console and turning their faders down, or setting virtual playback to only return channels 1-56.
Lesson learned: When using virtual sound check, I only return playback from channels I actually want to hear. If there are channels that are no longer needed, assigned outside of this scope, I make sure they’re muted and the fader is down.
Virtual Sound Check… No Actual Sound
I’m sure there will be more than a few hands in the air for this tale of woe. The band decides they’re not going to come in for sound check, so you finish tuning the PA and play back last night’s multitrack show recording using the console’s virtual sound check feature. Fantastic! Who could have imagined we would have this feature 20 years ago?
You finish up and are ready to open doors. Walk-in music is playing and is all is well. House lights go down, you trigger the intro music, the band hits the stage and you press the “Unmute All” button – and to your horror not a darn thing is coming out of the PA, You can see them hammering away at their instruments but you’ve got nothin’! It’s then you realize you left the console in virtual sound check mode.
Yup…been there/done that and bought the T-shirt as well. It may only last five seconds or so (which feels like a lifetime), and when you switch the inputs back to “actual” inputs instead of “virtual” inputs there’s an audible gasp from the audience. You skate directly to the penalty box for two minutes and feel much shame.
Lessons learned: Have a pre-show checklist. Pilots do it, why shouldn’t audio engineers? List several important items that ensure the show kicks off properly, and a big one is double-checking that you’re not in virtual sound check mode and the stage inputs are active.
Signal Routing Snafu
Back in the good ol’ days of analog consoles before “digital store and recall,” we carried around printed sheets of paper that were a blank outline of the console’s knobs and buttons. This way we could mark where they should be set for quick and accurate recall.
I remember waiting my turn at front of house during festival sound checks to access the behemoth Midas console I’d be using later for the show. When my chance came, I would pull out my printed channel papers and start “recalling” each input’s settings from the last time I charted them. Even if the act I was working with was squeezed out of the sound check line up that day, I could feel comfortable that my channel EQ, gain, auxes and inserts would be close.
However, I remember a particularly bad day when I accurately dialed in all of the input knobs and buttons but missed a very critical step. On this tour I was assigning inputs to groups instead of straight to the Master L/R bus, and while this portion of the “recall” was done correctly, I missed the important step of assigning the groups to the Master L/R. We were unfortunately denied a sound check through the PA due to time constraints, so I had to be happy with a line check in headphones. The first time I was going to hear anything for real was at the top of our show.
I played the intro music then un-muted the inputs only to find they weren’t feeding the system. I saw the input meters bouncing, and the group meters were showing signal, but nothing was getting to the Master bus. It didn’t take long to realize the “sounds of silence” we were all hearing was due to an important omission in signal routing that I was solely responsible for. (Aw jeez, eh!) I started pushing the “Group to Master” buttons and (one by one) sections of the band suddenly came to life in the loudspeakers. A lot of heads spun around to see the knucklehead who was flying the plane!
Lessons learned: Be hyper-alert that you’ve completed every step when recalling settings to a console especially if you don’t think you’re going to get a sound check through the PA. After this incident happened in the early 1990s, I changed my standard festival protocol and just un-muted all the inputs while the intro music was playing so I could hear them in the PA before the show started. Or I would quickly unmute the lead vocal or kick drum so I could hear it “live” during line check.
These days we load our shows into digital consoles from a USB stick, but many parameters like Master or Matrix routing to the PA system or interfacing plugin servers can be different for every one-off and/or festival, so double check everything and be sure stuff will actually come out of the system when it’s go-time.
Total Recall
Some of the greatest features of modern digital consoles are the Scene Store/Recall, Show File Store/Recall and Automation functions. When instrumentation is vastly different from song to song or FX is needed to provide a distinct feel when the band changes from an up-tempo song to a ballad, it’s wonderful that it can all be saved and recalled instantly. Like many cool features that are meant to improve our lives, they can also introduce complications that set us up for a crash if we don’t pay attention to certain ground rules.
Saving each song as a “Scene” can often open up an audio can of worms. When I’m mixing a band that’s fairly straightforward, with only a few instrument changes through the night, I avoid using scenes for each song. I’ll roll through the show with one scene entitled “SHOW” and a couple of hot keys entitled “MUTE ALL INPUTS” and “UNMUTE ALL INPUTS.” This steers me clear of recalling something I had no intention of recalling.
I remember an unsavory example of this years ago while setting up the console and system for a corporate event. It happened while timing and equalizing all of the loudspeaker zones using the console’s matrices. I was approximately one hour into the process and just about finished when I accidentally recalled the scene that was one number below the one I’d been working on. I immediately knew I hadn’t saved my changes in the scene I’d been working on, and in a flash, all of my work was lost. This console didn’t have an AutoSave or “History” feature, so my recent changes couldn’t be recalled. I had to start over.
Another example of changes being lost and old settings recalled is when songs are saved as scenes, but the scene parameter SCOPE options are not set up as you would like. The first time I ever worked on a digital console, a Yamaha PM1D in 2003, I wasn’t really hip to the SCOPE thing and I spent a good 10 minutes EQ’ing the kick drum in line check only to see those changes dissolve in a puff of smoke when I recalled the next scene during sound check. Other sad things can happen involving mutes and fader levels if those features are not set to “ignore” in the SCOPE.
Lessons learned: Save early and save often! When I’m setting up a console at the start of a tour or a corporate event and decide I’m only going to use one scene, I make sure to repeatedly hit the Save button as I move along.
Another practice I’ve incorporated is saving all my changes to my main scene, let’s say Scene 11, but also saving a backup in Scene 10 and Scene 12, just in case I accidentally fire Next or Previous Scene. This one has saved me more than once. I also click the box entitled “Scene Recall Confirmation” so I don’t accidentally recall another scene. When I want to use a different scene for each song, I open the SCOPE and start by unchecking all of the parameters to be recalled when I fire a scene until I’m sure I know exactly what I want to change.
Insert Foot In Mouth
I like to experiment with inserting a cool compressor plugin across the Master L-R bus. My favorite so far is the SSL bus compressor, and when I have the time to really dial it in, it can be a nice addition.
However, a Main L-R insert can cause trouble if you’re doing a lot of one-offs or festivals using a number of different consoles and processing supplied by various vendors. Sound companies providing consoles for one-offs will often ask for a recent show file from the FOH and monitor engineers before the event so they can load them and fully check the gear.
I often forget at the end of the night and leave the insert in on the Master L-R bus, save my show file, then email it to an upcoming show’s audio provider. I’ll then receive a troubling phone call from a tech setting up my next console package asking why he can’t get any signal to the Master bus when running test signal. Unless all the plugin hardware and software is in line exactly the way I had it at the end of the last show, this can be the case.
Lessons learned: If you’re doing a lot of one-offs, make a note to pop the insert off the Master L-R before saving your show file. At the very least make a note in your advance to upcoming sound providers that they will need to do this if all of the plugins are not up and running. An even safer route is avoiding any inserts across the Main L-R if you’re not on the same gear night after night. Too many tragic stories begin this way…
Well, we’ve had a few laughs and these tales have probably brought to mind a few personal audio tragedies you’ve been a part of. Let’s agree to keep both hands on the wheel, check our mirrors and steer clear of potholes. It’s usually “the other” driver that causes the accident, but if we all stay alert and prepared, hopefully we won’t have any fender benders or humorous audio outtakes to add to the bonus features.


