
Sometimes you start a position or get contracted for a job, and when you start digging into the audio system, you find out just how badly you’re needed. I recently began working at a small-ish church recently, so I’ll share my experiences with this and how I’m handling all of it.
The church had never had anyone with real work experience or a technical background running any of the equipment. The “tech” at the time wanted to step down, and a colleague asked me to take it on.
When I first stepped into the tech booth, I just about fainted. It was a real horror story. Every piece of equipment running off a single circuit, daisy-chained power strips and tri-taps off of other strips and tri-taps, wireless receivers thrown into cabinets, cables wrapped in figure-8s then tossed into a basket, stacks and stacks of CDs, wires twisted and tangled and mislabeled, weird routing, and so on.
There was also a single subwoofer gently placed on a piece of plywood 20 feet in the air in the back of the sanctuary fed with a cable terminated “+” and “–” in lieu of a Speakon connector (or even 1/4-inch for goodness sake). Oh, and everything was covered in a pound of dust and cobwebs.
The tech booth was a switch-flip away from burning down the church, and I’m not sure how the system ever produced quality sound, if it ever did.
Cleaning Up
I actually really enjoy this part. As horrifying as walking into this particular tech booth was, part of me was so thrilled to dive in and start fixing it all. I always feel like a kid in a candy store. So much to do! So much to touch! Every time I lift up one set of cables, three more unlabeled bundles surprise me. Oh, a wireless pack without a receiver! What fun!
After having toyed with the system for a few hours and learning the way that it’s set up, I made a list of everything that needed to be done. It’s important to keep track of what you’ve done and what you haven’t. Take pictures of things as they were; that way, if there’s the need to troubleshoot because all of a sudden the new setup isn’t working, the photos can serve as a reference to see where there might be a problem.
Next, grab a vacuum, some rubbing alcohol, some paper towels, a label-maker, a trash can, some zip ties, and a multi-tool. Strategically begin taking out all of the cabling. Things that can be completely unplugged should be labeled (what they’re used for, not what the cable is), wrapped, and put off to the side for now. Don’t just haphazardly rip things out.
Wipe off flat surfaces, clean out cooling fans, and wash away goo.
Sort all equipment into different sections. On this project, my sections included wireless units, miscellaneous audio cables, video cables, random stuff, and throw-away junk.
Reorganization
As usual, I drew out exactly what I wanted the final look to be. Goals need to be set and clear. I knew I wanted to relocate the mixing console, move the graphics computer to the other side of the booth, re-patch the entire system, ring out the main loudspeakers, equalize the system as best as possible, and come up with a new storage system.
After cleaning off everything and getting everything organized into sections and piles, I began moving things, starting with the console, then putting the computer on a different counter, and placing the monitor wedges and microphone stands in a temporary spot until I could get some cabinets built.
Then I plugged back in the things I knew didn’t need to be tested in order to actually function: computer, lighting board, power supplies galore. Following that, I grabbed all of the wireless microphone transmitters and receivers to check that the RF was unhindered and the transmitters were frequency matched their respective receivers, and further, that the receivers were receiving signal. 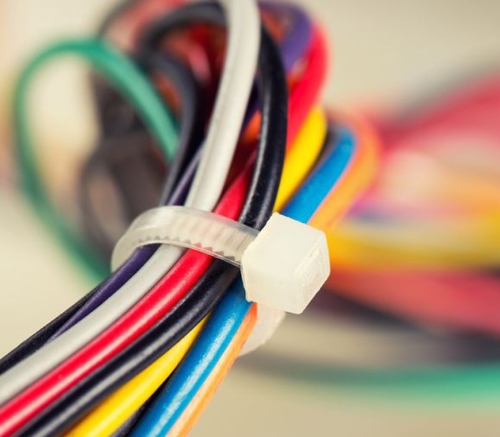
With respect to AC power, I rerouted everything so that equipment I wanted to be power-independent could get power straight from wall outlets while equipment I wanted to be power-dependent could be plugged into a power conditioner. I also began making wraps of excess cable in the back of the equipment to keep things clean and easy to fix, using zip ties and coiling them up neatly to avoid “rats nests.”
Next, I broke out my label-maker to tag all wireless packs, receivers, 1/8-inch adapters, and power conditioners. (I went a bit “label crazy,” to be honest.) But I needed to make sure that volunteers and others could walk in and quickly get a sense of what everything is.
Finally, all of the cables that were horrendously wrapped were treated to some massaging and reworking. I had to somewhat force them into the proper “over-under” coils, and then let them hang on a hook so that they can “learn” to lay flat once again. The cables are organized by size and hung for quick access, the stage monitors are placed out of the way but with easy access, mic stands are organized and put away, and the mics are gently placed in an orderly fashion inside a drawer of their own.
Finishing Touches
It’s at this point when everything begins to come together: the trash piles are huge, but the cables have found new homes, screens have been dusted off, and you realize just how much junk a place can really collect. Now, this next step may not be needed, but in this case, it most certainly did – locating and testing every cable installed in the walls. It was a huge pain, but absolutely necessary. I found dead lines, and lines to nowhere.
A SoundTools XLR Sniffer cable tester helped with some of the lines, and then I had a colleague grab a Shure SM58 mic, plug it into the cable snake while I grabbed the tail end near the console and checked every single line. None of the numbers matched at the ends of the drop snake, let alone the correct inputs into the digital snake. It took a good chunk of time, and I still need to find where those “lines to nowhere” lead. The process concluded with re-labeling and then making sure everything was tidy and clean. 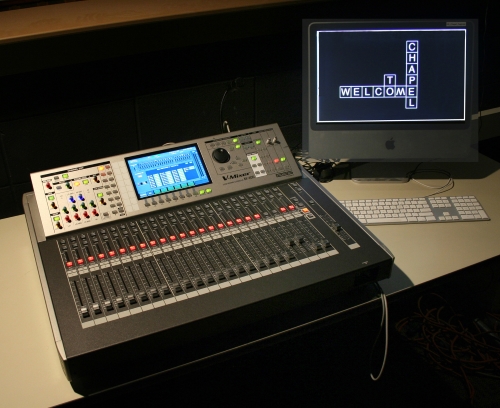
There are additional things to do, and they’ll happen soon. The choir mics could use some attention, I need to make an NL4 to 1/4-inch cable so that the subwoofer can be physically relocated with a more reliable signal path, some cabinets and shelving units have to be built, the lavalier mics should to be tested… and about a hundred other things.
The list is never really done, and that’s fine! Try to get some enjoyment out of the process, because sometimes all we focus on is the fun of actually mixing a show. As many of you know, 90 percent of the job is this kind of stuff: getting things ready and keeping them maintained.
I get a lot of pleasure out of using a system just after this process because I’ve had a hand in making it better while also making the experience better for everyone else. It’s an art form, just like mixing. Take pride in it.


