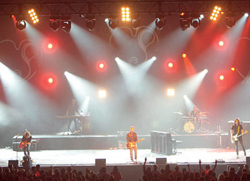
The back light should be located directly behind the subject or acting area and it can be anywhere from 45 to 60 degrees or more above the horizon.
The purpose of the back light is to bring out the shape of the subject and create depth.
If the luminaire/lens combination for each lighting position is carefully chosen and the plot is carefully constructed, then the peak illumination at the center of the beam will correspond with the center of each acting area, and the adjacent beams will overlap at 50 percent of the center beam intensity.
The point in the beam profile where the intensity is 50 percent of the peak is defined as the edge of the “beam” (Figure 7). The angle of the beam, therefore, is defined by the two points in the beam profile where the intensity is 50 percent of the peak.
The beam angle is often given in the literature provided by the manufacturer or can be found in the specifi cations of the fixture online.
When two adjacent fixtures overlap at the edge of the beam, it should result in approximately the same illuminance where the two beams overlap as the center of a single beam because 2 x 50% = 100%.
But it requires that the selection of lenses provides the right beam width at the throw distance chosen by the designer and meets the illuminance target of the design.
After the key, fill, and back lights are selected and properly placed, the set can be duplicated for every acting area.

If the design is carried out properly, then at least three things will be accomplished: (1) the light level anywhere on the stage will be high enough to create good visibility, (2) the lighting across the entire stage from stage right to stage left and from downstage to upstage will be relatively uniform, and (3) the lighting designer will have complete control over which acting areas can be lit or unlit.
The key lights and fill lights should be soft-edge fixtures like a Fresnel or a PC spot so that when they overlap with the adjacent key and fill light, respectively, they will blend well. The profile of a fixture is the cross-sectional plot of light intensity. When the profile is peaked and looks like half of a cosine wave form then the fixture has a “cosine beam profile.”
Two fixtures with a cosine beam profile will produce maximum uniformity when they overlap at the point in the beam profile where the intensity is 50 percent of the peak (Figure 8). A cosine beam profile is sometimes referred to as a blending distribution.

It’s important that there should be some means of controlling light spill to keep stray light off of set pieces, walls, the fascia of the stage, video display surfaces, the cyc, and any other surface that shouldn’t be lit by the stage wash. Some automated lights have motorized barn doors or framing shutters that can be used for that purpose.
Toning A Three-Point Lighting System
In a three-point lighting system, the subject is typically lit with a warm/cool color contrast. The key light can be warm or cool light and the fill light should be the opposite of the key light.
The amount of color depends on the application. For a live audience the color contrast can be stronger, but video and I-mag strong contrast on opposite sides of a subject’s face can look peculiar.
Multi-Point Lighting
If a production involves the use of video or film, a three-point lighting system may produce too much contrast between the light and dark areas. In those instances a four-point or a multi-point lighting system, sometimes called a jewel lighting system, may produce better results.
In a four-point lighting system, the key light is moved directly in front of the subject and two fill lights are placed on either side of the subject. The back light remains in the same position as in the three-point lighting system (Figure 9).

Because the key light, which is a front light, projects directly onto the subject, it looks flat to the human eye, making it harder to distinguish features. But to the camera it looks more natural by de-emphasizing the shadows on the face.
In a concert touring system, the key light is typically provided by followspots. Many times there are at least two followspots for each band member, so the lighting is often a five-point system. If there are no followspots available, then the front light or key light is often provided by Fresnels, PAR cans, or Lekos, since they’re much more affordable compared to automated lighting.
The exceptions are when the cost of labor is very high, as in a convention space, or when time is very short.
——————————————-
Go here to acquire Automated Lighting, 2nd Edition, published by Focal Press. Use the promo code FOC20 during checkout to receive a 20 percent discount.
——————————————
Richard Cadena is the technical editor for PLASA, an authorized WYSIWYG trainer, and 20-year veteran of the entertainment lighting industry including stints with two of the world’s largest automated lighting manufacturers. He has a background in electrical engineering and electronics, and he is a freelance lighting designer with a portfolio of several major lighting designs and installations and is proficient in WYSIWYG, LD Assistant, and Vectorworks.
