Modeling
One of the main objectives of lighting design is to give form and definition to the subject by “modeling” it with light. That simply means to accentuate the shape, texture, and form of a subject by lighting it from different angles and carefully controlling the intensity of the various lights to reveal information about the subject.
Lighting an object only from the front tends to make it look flat and two-dimensional. It does little to give the subject definition and depth and bring out the features of the subject.
A video camera tends to accentuate shadows and sometimes they can make them look unnatural. A video camera also has the ability to zoom tightly on the subject and magnify the intensity of shadows. For those reasons, a lighting designer might choose to light a subject more flatly if video is involved.
But if we’re lighting primarily for an audience, then we can model the subject, illuminate its distinguishing characteristics, and make it look more natural from a distance.
Creating Depth
Lighting can also create depth and give the appearance of space. By controlling the intensity of the foreground, mid-ground, and background, we can give the stage spatial reference and definition. This prevents objects and people from looking as if they’re on top of each other or right next to each other.
We can also create depth by using backlight to highlight the form and shape of a subject.
Aesthetics And Mood
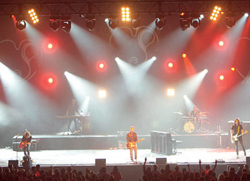
By using color, patterns, and projections, we can change the aesthetics and influence the mood of the audience (Figure 4). This is one of the areas where automated lighting excels. It can be bright and cheery, dark and moody, or simply paint a picture with an interesting aesthetic appeal.

Although any two people may or may not agree on what’s “aesthetically pleasing,” there are certain guiding principles. For example, the combination of blue and yellow creates a strong contrast. There are many other principles of colors and color combinations that are very useful as a starting point in lighting and scenic design.
Most lighting design is a combination of some or all of these objectives. The job of the lighting designer is to prioritize the goals of the project and make the best use of the tools to meet those objectives. In the end, the final result is often a compromise between what’s desired and what’s possible given the technology, expertise, creativity, and budget.
Once the design goals are decided, the task of laying out a lighting plot to meet those goals comes next. Any or all of these goals can be met using a three- or four-point lighting system.
Three-Point Lighting
A three-point lighting system uses three lights to illuminate each “acting area” on a stage.

An acting area is a section of the stage, typically 8 to 10 ft 2 (2.5 to 3 m 2 ) delineated by the lighting designer for the purpose of breaking down the task of lighting the stage into smaller areas with better control over the illuminance of a subject and the foreground, mid-ground, and background (Figure 5).
A lighting plot typically begins with a scale drawing of the stage and/or space in which the production will take place. By marking off a grid on the drawing of the stage, the designer can treat each of the acting areas to be lit as a single entity.
The three lights that light each acting area include the key light, fill light, and back light. The key light is the strongest light of the three and it represents the dominant source of light such as the sun or artifi cial light in a room.
In a three-point lighting system the key light is located 45 degrees above the horizon and 45 degrees to the left of the center line (as seen from the stage – Figure 6).

The purpose of the key light is to provide visibility and to model the subject. The 45-degree angles provide enough shadow to help define the characteristics of the subject such as the nose, chin, and eye sockets.
The fill light is also located 45 degrees above the horizon and 45 degrees to the right of the center line. Its purpose is to help ameliorate the intensity of the shadows produced by the key light and control the contrast between light and dark. By adjusting the intensity of the fill light the depth of the shadows can be controlled and the amount of modeling can be adjusted.