
Human listeners are effective “comparators.” We are very sensitive to changes in what we hear.
When comparing loudspeakers, we are most sensitive to differences between models or brands rather than similarities. This powerful analytical tool can be emulated in the world of test and measurement.
I have long considered the “difference” measurement to be one of the most valuable tools available to the sound practitioner.
The procedure involves:
1. Performing a measurement
2. Storing it as a reference
3. Introduce a change in the measurement setup
4. Observing the difference
In this example, I will be using the iPad along with AudioTools from StudioSixDigital.com to assess the effect of a piece of grill cloth. These days, almost any mainstream measurement program can also do this and the steps are the same in principle.
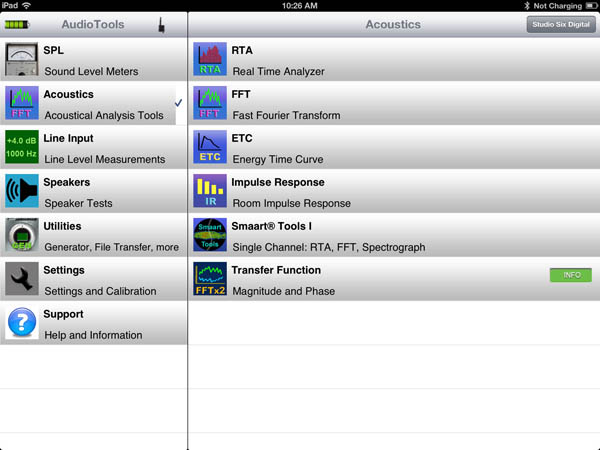
Here’s how it works. I will select Transfer Function from the AudioTools home screen (Figure 1).
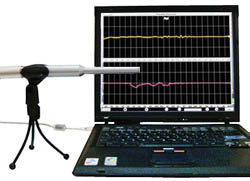
First, set up a microphone and full-range loudspeaker at 1 to 2 meters separation and perform a transfer function measurement of the loudspeaker.
The procedure for doing this should be described in the Help files of your measurement application. The transfer function yields the magnitude and phase of the loudspeaker in the frequency domain (Figure 2).
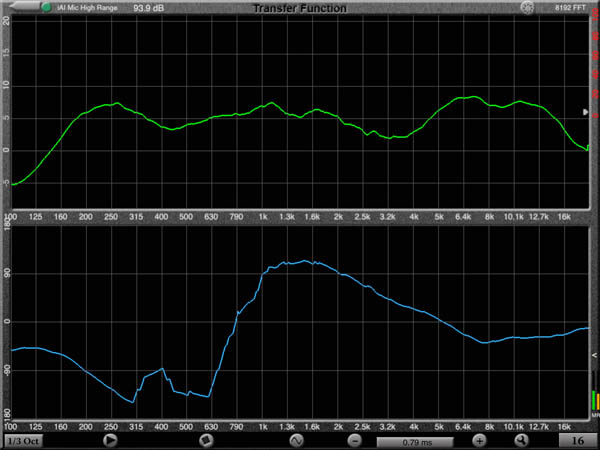
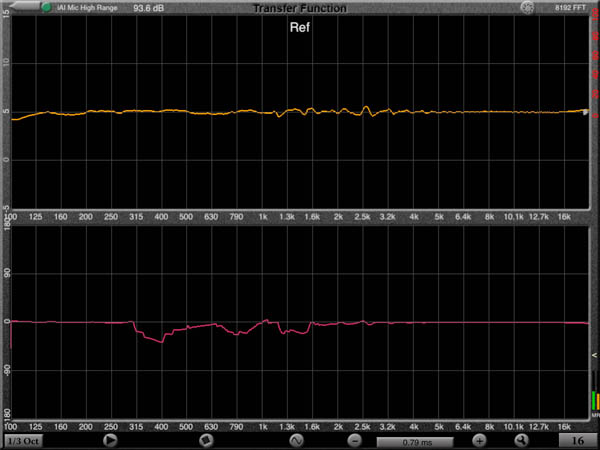
Once the transfer function is displayed, save or store the file. I have named the file “Ref” since it is my reference file.
Recall this file to the iPad screen. In the Setup section of the program, select “Difference Mode” (Figure 3).
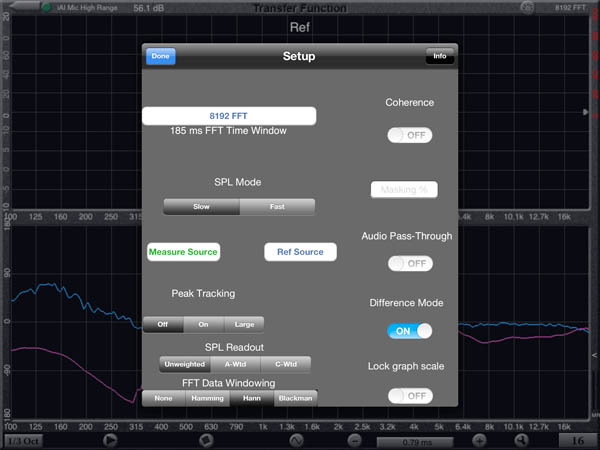
Now when you re-start the capture process, the difference between “Ref” and the current, ongoing measurement will be displayed. Since they are the same, this will be a relatively flat line in both the magnitude and phase displays (Figure 4).
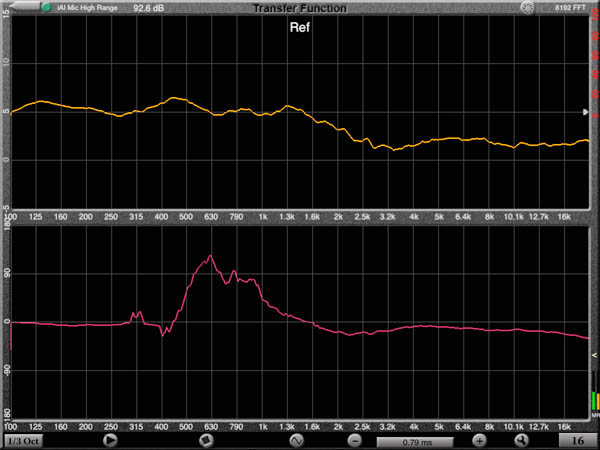
Now the fun begins. I placed a grill cloth sample between the mic and loudspeaker.
The response change caused by the grill cloth can now be observed (Figure 5). I can correct this with equalization if I wish to compensate for it.
There are many uses for this comparison technique. These include:
1. Seeing how a cheapie measurement mic compares to an expensive one, and determining the EQ correction curve needed to match their responses.
2. Comparing the on and off-axis response of a loudspeaker.
3. Assessing the effect of a structural member on the response of a loudspeaker, answering the common question “Can we build a grill to hide the loudspeaker array?”
4. Assessing the influence of a boundary on the response of a loudspeaker.
There are many, many more. In fact, it can be stated that this “difference measurement” is very much like what humans do when they assess changes by listening.
Our ear/brain system senses the relative effects caused by changes introduced to a reference condition. It is the link between subjective impression and objective analysis. We are just formalizing the process with instrumentation.
The difference measurement is virtually independent of the response of the mic or loudspeaker used, since it is only assessing the change made to a setup that we designate as the reference. This allows detailed and accurate information about the influence of grill cloth or whatever to be obtained with a less-than-perfect microphone or loudspeaker.
These are but a few of the possible uses for this powerful measurement technique. We leave you to your own imagination in finding other uses for the difference measurement.


