Being in the business of sound reinforcement, we’re always using our ears and associated parts of the brain to determine when problems are happening, and if we’re doing a good job, we figure out the sources of these problems quickly and efficiently. Hopefully most if not all of us have had some ear training in classes, workshops, or self-study including learning how to identify certain frequencies, how to identify distortion, and the like.
The more we can learn how to determine the source of problems simply by listening, the faster and more efficiently we can work. This is the first of a two-part series on this subject. Let’s start with the basics.
What’s The Rattle?
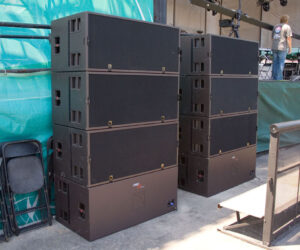
Hopefully we can tell when there’s a blown or damaged driver in one of our cabinets. We listen for scraping voice coils, the “ragged” sound of a torn surround, or the flap or pop of a loose dust cover. It isn’t always easy, however, to know which driver might be having issues until we start narrowing the field or reducing variables.
And, for this we’ll need to get close to the cabinets. Often, ramping up or down the level can help us focus on the area or even the cabinet where the offending driver/s are. Then, if we have to, we can disconnect one cabinet at a time until we know which one it is.
Blown circuits sound different than blown drivers, usually. Often there is a drop in level but not always – sometimes it is just distorted or clipped sound, or it has a high level of noise. Here, though, anything downstream from a component with a blown circuit can be affected, while if the distorted sound is just coming out of one loudspeaker, the issue is likely just that loudspeaker. If a whole loudspeaker array is affected, then the bad unit is in the drive rack or possibly a console output.
One great troubleshooting tool to use for a problem like this is to cut the chain in half and see if the problem follows one half or the other. Then, cut the “bad” half in half again. Rinse and repeat. Use your ears but don’t forget your troubleshooting logic and work on eliminating variables. Only change one thing at a time (i.e., replace one component and don’t change anything else).
Now let’s look at cabinets and drivers that are out of polarity. This is extremely rare for speakers coming from any reputable factory brand. Mostly it happens when connectors or drivers are replaced and someone makes a mistake. For checking overall cabinet polarity, set up the test cabinet a few feet apart from a known good (factory new, etc.) cabinet, fed with the same source material.
If, when moving from side to side, the sound stays centered and moves only subtly left to right, the cabinet is wired correctly. If, however, the sound swings wildly around or sounds “swishy” then the cabinet is out of polarity. Out-of-polarity drivers – very rare – can be identified when compared to known good cabinets by the “hole” in the sound (a range of missing frequencies), especially in the crossover range. This is because of massive phase cancellation happening in the regions of the sound shared by more than one driver.
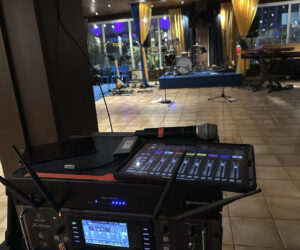
Mic Matters
One of the classic problems we run into in our line of work is the dropped leg in a microphone cable. This one can be identified by sound with most standard dynamic mics: the sound will seem “thin” and “scratchy” on that channel. The same rules about changing one variable at a time apply – switch mics of the same type and see if the problem follows the mic or stays on a particular input.
But – and here’s the thing – the normal “scratch the mic grille to see if that channel is working” won’t identify this problem. It requires speaking into the mic and listening to the sound of the voice.
Is It Cold In Here?
Cold solder joint can be elusive to track down because they can be intermittent – particularly in situations where the ambient temperature is constantly changing. Often in cold solder joint cases things will improve when the equipment warms up, but it can also be the opposite.
I’ve found that one sonic signature for a cold solder joint is a “rectified” sound – it’s distorted almost like the audio is passing through a diode – because that’s not far off from what is happening. Depending on where the bad solder joint is, it may be easily repairable in the field (XLR or other larger connectors) or it may require a trip to a repair facility (surface mount components, etc.)
Finally, I think it is really valuable if we can get better at identifying even mild distortion, overload or clipping with a pure tone. An easy way to learn this is to put a test tone – I tend to use frequencies lower than 1 kHz for my own sanity, say, 200 Hz – through a channel on the console. Start with the normal gain structure, like putting the channel fader at zero then bringing up the input gain until the level is decent, like -20 dBFS, for instance.
Now, bring the fader down by 10 dB, and bring up the input gain by the corresponding amount. Does the tone sound different? Add another 6 dB at the input and reduce the fader again by that amount – the goal being to keep the overall level the same, but approach the end of the input headroom with signal level.
Does it sound different? Add 3 dB at the input, and reduce the fader by that amount. Your input level should be close to maximum by now, but the output should be at the same level. Keep going until you can clearly hear distortion on the input.
Then, back off and try to determine where exactly you can start hearing the overload happening. Most of us can’t hear distortion below 1 percent unless it’s a really obnoxious type of distortion, but once we get to 3 percent, we should be able to hear it. This is also a good lesson in gain structure while we’re at it.
OK, these are some of the basics of learning to listen for specific types of audio problems and fixes for them. My follow-up article will cover some additional, important points on this topic. Until then, happy mixing!