
One of the other things I do for a living is repair and upgrade professional audio equipment, mostly on the recording studio side of the business. One day, around 2003 or so, I got a phone call from a studio owner, a somewhat eccentric and reclusive guy, with an unusual request. He prefaced it by telling me that he and his engineer felt that lately, their console, an MCI-628, hadn’t been sounding it’s best, and then went on to ask me how I felt about upgrading it by installing a pair of mix amps from a vintage Neve console?
Well, I’m not a big fan of the “Frankenconsole” approach for a number of reasons, and I told him as much. But, I added, I know the MCI 600 Series desks quite well and they have a number of issues that, once resolved, can leave them sounding quite good. So, I suggested, how about I take care of those and then we could talk about doing the mod he requested, if he still felt it was needed? He agreed to this course of action.
At the end of this conversation, almost as an afterthought, I added that we should not schedule the work until after they had finished their current project, and before they started their next one, as the results can be quite audible.
Getting Started
Having agreed to this, we set a date and a few weeks later I drove up to the studio. The setting was a century-old farm about 40 minutes north of Toronto, with the actual studio set up in an old stone barn.
It was still a working farm, and as I pulled into the yard the first time, I remember looking over at some farm equipment and thinking to myself, “Hey, if I had to, I could fix that too!” This was because I’d spent my teen years on a farm and had found I had a knack for maintaining the equipment. The thought gave me a burst of confidence for the project that lay ahead.
In the barn/studio, I met Walter, the engineer, who proceeded to show me the console. The desk was in the condition I had expected it to be in, and after I took a few measurements we powered it down and I got to work.
I should offer a bit of background information here. In the late 1980s, I had some steady, part-time work with a recording studio in Toronto. This studio also owned a remote truck, and my original “in” was through driving the truck, something the owner was not licensed to do. My audio and electronics background then led to maintenance duties, and eventually to some live-to-air mixing and recording work.
When I first got involved, around 1986, there wasn’t quite enough gear to outfit both the studio and the truck for multi-track recording, so the studio console, an MCI-636 and tape machine, an Ampex MM-1200-24, would roll into the truck for live multi-track gigs. The rest of the time there were various live-to-2-track rigs that lived in the truck until they were finally replaced with a 58-channel Neotek Elite and a second MM-1200 in early 1987.
The MCI 600 series was the successor to the very successful 500 series, the desk behind a lot of the “Miami Sound” as well as a myriad of 80s hits. Like many studio consoles, the 600 was basically a good design but came with a few defects that would present themselves after the console had been in service for a while.
The most audible one of these was premature failure of the electrolytic capacitors that were used for interstage coupling of the audio signal. This would manifest itself as a progressive loss of low end (over a period of months or even years) but eventually would affect the high-frequency response as well. In practical terms this would show up in different ways but a common one would be that an instrument that was panned center, like, say, the kick drum, would appear to “pull” to one side of the mix.
Why? There was a pair of capacitors on the output of the pan-pot on each channel and if these caps failed at different rates, then the low-frequency response on one side would be better than the other, causing the kick to appear stronger on the good side.
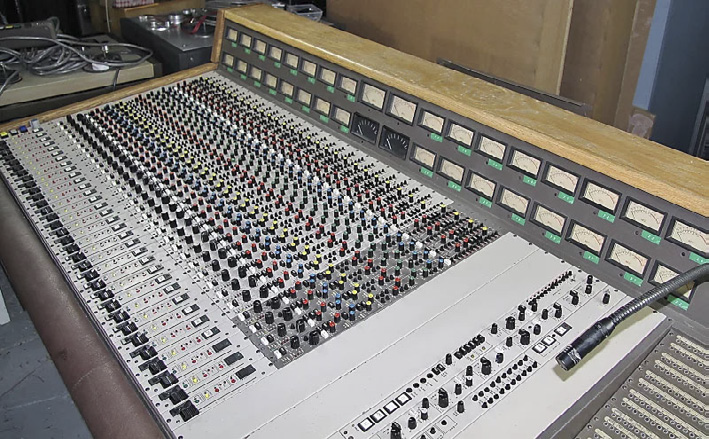
Another common point of failure, although this one took much longer to appear, was failure of the IC sockets. This was a metallurgical issue, with the spring contacts in the socket eventually just losing their grip on the IC pins. In a really bad case of this you could just flick the chips out of their sockets with your fingertip.
Working The Process
Armed with this knowledge, I got to work on the desk, dealing with the capacitors in the channel strips first. The purpose of these “caps” was blocking DC current from flowing between stages (for example: mic preamp stage out to EQ stage in) but one of the things we had found back in the ‘80s was that, in some cases, there wasn’t much (if any) DC to block. So, the capacitors on the output of the pan pot, for example, could safely be replaced with a couple of pieces of wire. This was one of the operations that I did on all of the channel modules.
I don’t remember the exact timeline, and I feel like this must have taken more than a one-day visit, but eventually I got through the channels and started in on the master section. This work was of a more experimental nature as I didn’t have an exact playbook in mind.
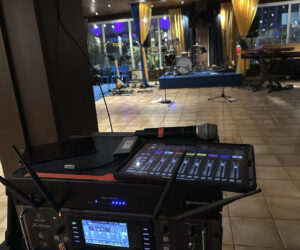
However, one thing I always do first when upgrading a console is the monitor module. Note that things in the studio world have changed dramatically since this took place, especially with the advent of a) stand-alone monitor controllers, and b) folks often only using parts of large format consoles like the preamps and EQs, but at the time, the monitor module was what the signal went through on its way to, you guessed it, the studio monitors.
The reason I deal with the monitor module first is so any changes (hopefully improvements) that are made to other parts of the signal path can be heard clearly and validated as to whether they are worth doing or not. When that was done, I moved on to the master module, which supports the mix amps (a.k.a., “summing amplifiers”), the master fader, 2-mix insert send and return, etc.
And here was where the fun started, since I was there to get the most out of this stage and hopefully ward off having to go through the exercise of grafting the mix amps from a completely different console into this one. As I mentioned earlier, I don’t like doing this for a few reasons, such as, I will not fit any part onto a module that can’t be safely and reliably supported by the existing real estate. In this case, the Neve parts required a completely different power supply (+24-volt DC versus the +/-18-volt DC that the desk ran on) and they were big and heavy so it would have been a real challenge to do this modification in a reliable, serviceable manner.
That meant the mission was to get the most out of the existing circuit design. This was accomplished by replacing capacitors first, sometimes with a piece of wire, sometimes with a larger value (higher capacitance) and sometimes with a different type of capacitor, such as film instead of electrolytic. We did this incrementally, with Walter and I taking a few minutes to listen and evaluate the changes after each step. After dealing with the capacitors, I moved on to trying different amplifiers (a.k.a., “ICs” or “chips”).
I should mention that this required me to power down the console each time I removed the master module, something that required numerous trips to what I nicknamed “the spider room” – the base of the disused stone silo next to the control room. It had a very small access door and a lot of cobwebs once inside. I tried to limit my time in there…
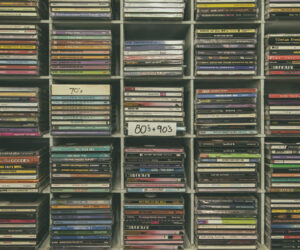
As I worked through this process, I was listening to a track on a CD that I’d recently acquired. I hadn’t given the CD a super-critical listen, having in fact listened to it mostly in my car (a Ford Focus with factory stereo), but I liked the song, and I liked the performance so that was that.
Until… I got to the mix amp. On an impulse, a few weeks earlier, I’d picked up a couple of chips that I hadn’t heard of, but had been intrigued by the description on the package, which read “ultra-high precision dual op-amp.” (This was just the tail end of the era when you could walk into an electronics store and find parts in individual packages with labels like that… similar to Radio Shack, although it wasn’t one). In any case, I liked the idea of that “ultra-high precision” bit so I thought, “Let’s try this.”
When I powered up the console again, checked myself for spiders, and put the track on, it did not sound good. Not distorted, but not good. I was pondering this, thinking about the possibility that this particular chip change was going to have to be reversed, while still listening to the track, when Walter, who had been doing various “maintenance day” projects around the studio, walked back into the control room. He immediately made a face and said something to the effect of… “Whoa, what happened?”
I told him I wasn’t quite sure, but I thought that we should check a few more tracks to see if we could isolate what we were hearing. Walter suggested a Beatles compilation CD he had there. Well, you can’t go wrong with the Beatles, right? Except… this was back in the day when all CD re-issues were not created equal, and depending on when they were released, the mastering for CDs was not optimal. I was aware of this, so when the Beatles didn’t sound good either, I said, “Let’s try something else.”
We next went to a CD by some ‘80s rock band, and it didn’t sound too good either, but again, I felt like it could have been mastered for vinyl and poorly transitioned to CD. That said, I was just about to concede defeat when I remembered that I had the CD that I’d been using as my PA check tracks for the last few years.
That CD was Ben Harper’s Welcome to the Cruel World (circa 1995), and when I put it on, our jaws dropped. It sounded stunning. Not quite ready to celebrate on the strength of one album, I remembered that a colleague that I’d worked with in 2000 had regularly used a Rickie Lee Jones track to check his work. (We’ve lost touch, but last I knew, this person’s title was “head scientist” at the audio manufacturer he ended up working for).
I didn’t have the same album that he used (It’s Like This, specifically track 1, “Show Biz Kids,” but I had an older CD, Traffic From Paradise (1993) and I reasoned that Rickie Lee Jones hopefully had the same high production values for it as for the later album. I put on track 7, “Jolie, Jolie,” and our jaws hit the floor again.
Looking back some 20 years later, I’d be hard pressed to say exactly what differences we were hearing, but I can say having done more of this work since then that one thing that really stands out with this type of upgrade is the reproduction of instruments with a lot of high frequency transient information such as hi-hats, shakers and tambourines. If you really listen to these sources on recordings, you’d be amazed at how often what we’re really hearing is closer to white noise, that our brain is identifying more by the figure than the sound.
For example, listening to say, a hi-hat recording you might hear the “chhtt-chhtt-chhtt” and go “Oh, that’s a hi-hat,” but, listening to either the live hi-hat, or a well-recorded, well-reproduced playback, where you can actually hear the metal of the cymbals and the wood of the drum sticks, you realize that “chhtt-chhtt-chhtt” is the figure that the drummer is playing but there’s a whole lot more going on with the instrument than just that.
Finishing It Up
So, what happened with the first track that I was playing? Well, essentially, the signal path in the MCI became so revealing that it just sort of took the mix apart, unveiling all of the flaws in the recording in the process. With the Beatles CD, it highlighted the flaws in the mastering/manufacturing chain (since we can’t really fault the original recording, can we?).
Again, I hadn’t really subjected that first CD to a really critical listen, and while nothing really jumped out at me, I was prepared for the idea that there might be issues with the recording. This was mainly because one of the senior people (a major contributor to the development of the Ampex line of tape recorders) on a forum I hung out on at the time called the Ampex List had flagged some issues with it. On a casual listen, I hadn’t noticed anything in particular and I actually remember wondering what he was on about when I listened to it in the car. (Sadly, I lost track of that disc after that day, as I’d like to go back and listen to it and try and quantify this.)
Anyway, suffice it to say that after hearing two good tracks on the newly upgraded Master section, Walter and I signed off on it and moved on. The last thing that I did that day before heading home was tweaking the levels on the main studio monitors, a classic pair of 15-inch Tannoy models powered by a pair of Macintosh mono-block amplifiers. The amps had a screwdriver adjusted level trim on them, heavily covered with masking-taped notes saying to NEVER adjust them. I took some measurements and of course they were not matched, so I fed a 1 kHz tone to them from the desk and then with an AC voltmeter, adjusted the output levels to match to my usual +/- 0.01 volts.
About a week later, I was back at the studio doing some remedial work replacing some failed switches and similar tasks that I either hadn’t gotten to or didn’t have the parts for on the first visit. After about an hour of this I asked Walter if they’d mixed anything on the console since I’d done the work. He replied they had and proceeded to press “Play” on the half-inch mastering deck.
I happened to be sitting in the “sweet spot” at the console where the engineer sits, and when the track started with a bowed double bass, I remember feeling the hairs stand up on the back of my neck as I heard literally every hair on the bow go over the strings. The track that followed sounded… amazing.
Quite pleased, I went back to work. After a while, I got the itch again and said, “Hey, how about another track?” Walter obliged and pressed “Play” again. Well, what came out sounded like… mud. The bass was muddy and indistinct, the singer sounded like she was holding her hands over her mouth – awful. I turned around to ask Walter “What the…?” and saw that he was sitting there with a very puzzled and deeply concerned look on his face.
“What happened?” I asked again, at which point Walter explained that both tracks were from the album they had finished just before I’d started the work on the console, but the first track had been remixed after I did the work because the band had called the studio, told them that one of the players had left the group and would they please take that person’s parts out of that one song?
The Takeaway
The upshot of all this was that Walter and the owner decided that they had to remix the entire record, on their dime, to make it match, sonically. Unfortunately, neither of us can remember the name of the band. All I remember is that they were from the U.S. Northeast, that the double bass was played by a very accomplished Toronto session player, and that at the time my only description of the band was that “they sounded like a band you would hear at a Star Trek convention.”
So, what’s the takeaway from all of this? This: Just because you “like” a song or even “know” it doesn’t guarantee that it was well recorded, so using it as playback material to check results when tuning a system may not give the desired result.
This also applies to the quality of the playback material. I once finished timing and tuning a system in a corporate training theatre and was quite pleased with the results… until I got a call from the manager (who had hired me) saying that his crew was not happy with how it was sounding. I went back the next morning and, like an idiot, started re-checking and second guessing everything I’d done before speaking to the crew.
After spending a couple of hours and not really getting any different results, I went in to the control room to ask the crew what they were hearing. They then proceeded to play a truly horrible MP3 of “Owner of a Lonely Heart” by Yes. Now, that song was certainly a popular PA test track when it came out in the ‘80s, and it may still be great, but that low-quality MP3 wasn’t doing it any favors. And, the fact that I had cleaned up the playback path by eliminating a bunch of timing and tuning errors in the system meant that they were finally hearing it accurately.
Exactly how you determine that a recording is of sufficient quality to be used as a test track is a much bigger conversation, but the short strokes are to use tracks that are known to be that way (there are lists) and then make sure you’re using a good quality playback format.