Find The Time
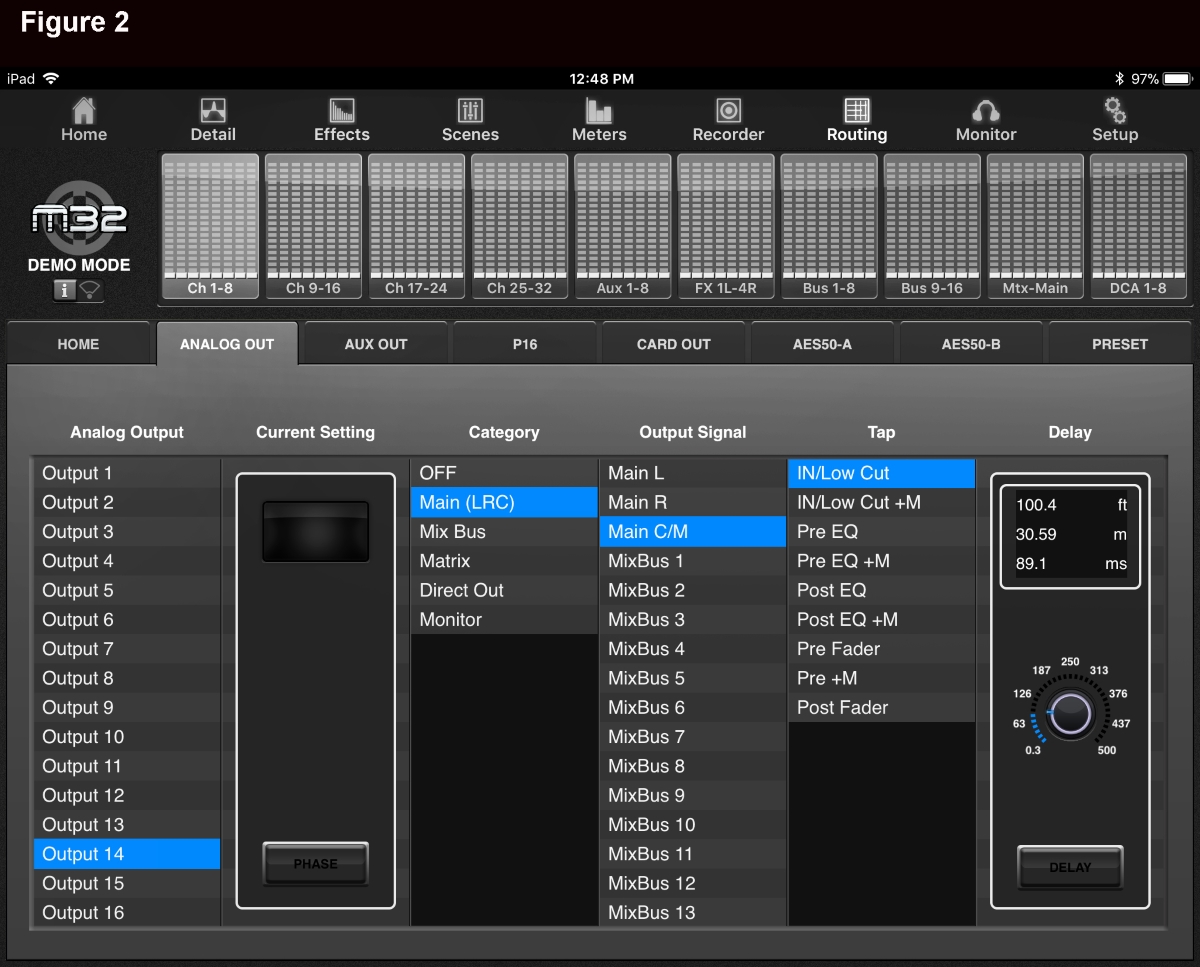
Figure 2 is screen shot of my Midas M32 console. The delay section is generally accessed from the console’s output page, just as with an analog console with an outboard delay unit.
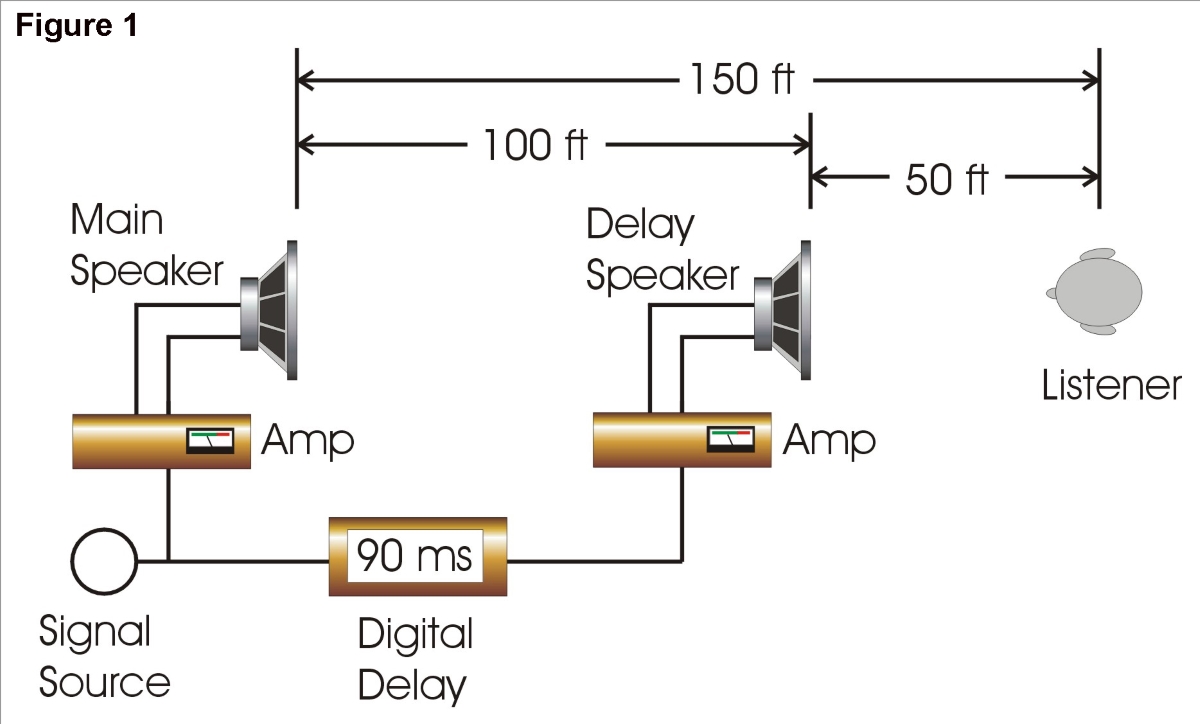
In this case, I routed XLR output 14 so that it’s connected to the main left/right/center bus, specifically the center signal. Then I dialed in 100 feet of delay, which the console converted to 31 meters and 89.1 ms of delay. It’s simple, really.
Well, not so fast. It seems easy in theory, but just how do we come up with the correct delay setting if we can’t measure the loudspeaker distances accurately? There are some pretty complicated tools that help in setting proper delays using a computer or even an iPad, but they tend to be rather expensive and are thus relegated to major tours and sophisticated installed systems.
Fortunately, we can also set delays by ear. Here are the basics. Feed a simple click or beep sound to the system; a snare rim-shot or cowbell works great. If a source along these lines isn’t available, have someone else click his/her tongue in front of one of the system’s microphones. If the console is under tablet/iPad control, so much the better since you’ll be able to hear delay adjustments in real time.
First, position yourself very close to the delay loudspeaker bank, a little to the side. This allows one ear to hear the main loudspeakers, and the other ear to listen to the delay loudspeakers.
Now, with the volume turned down in the delay loudspeakers, send the pulse sound to the main loudspeakers. It doesn’t have to be very loud, maybe 6 to 10 dB above the normal room clatter is sufficient. Gradually bring up the volume in the delay bank until the level approximately matches the sound from the stage.
At this point you’ll hear two distinct clicks, the delay loudspeakers first and then the mains a short beat later. Start lengthening the delay value until the two separate clicks merge into a single sound. If you go too far, simply back up and start over.
Also, the volume of the delay loudspeakers may need to be raised or lowered in order to hear the effect. Once it seems to be dialed in, walk directly in front of the delay loudspeaker and confirm that the echo is still gone. If not, add or subtract a few milliseconds from the digital delay, and listen again.
I tend to fall on the side of making delay loudspeakers a little “long” since our brains are used to dealing with room echo happening later than direct sound. The other way around is much noticeable and will give away the location of the delay loudspeakers instantly.
Get Real
Now put on some real music with percussion (road crew favorites are usually something by Steely Dan or Santana). Starting at the stage, perform a “walk through” of the coverage area, and particular listen for echo zones when in the delay coverage field. I then like to “walk through” the delays from the back of the coverage area on in (towards the stage), listening for any echo problems.
In addition, if the delay loudspeakers are too loud, the sound can “wrap- around” the back of the cabinets and cause interference with listeners closer to the stage. The volume should be just loud enough that it’s not really noticeable.
Finally, put on some program of the actual music style to be performed, if possible. Various music styles will need different adjustments. For instance, classical music can have lots of string swells and legato playing, which can disguise echo problems but ends up showing up as a fake “phasey” stereo quality. During the live performance, you can tweak the delay for a more “mono” sound to get it right.
Dealing with delays can be tricky sometimes, but they’re often the only way to cover a large crowd with any kind of control. A nice bonus is that it really makes us listen to our systems, and that’s why we work in pro audio in the first place, right?