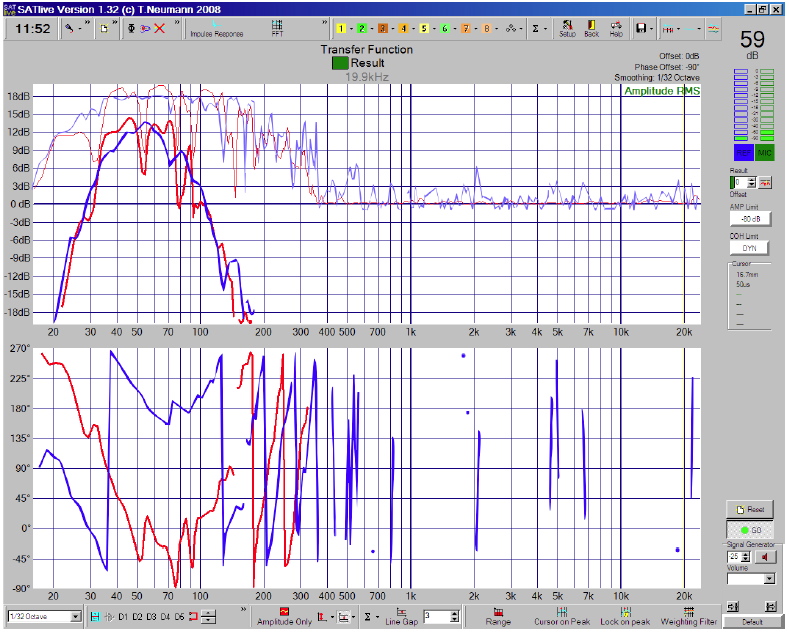
8) Add delay to the subwoofer facing backward until its phase trace overlaps with that of the subwoofers facing forwards. Do not forget to save the curves.
9) Invert polarity on the subwoofer facing backward. The phase trace can be seen to shift 180º.
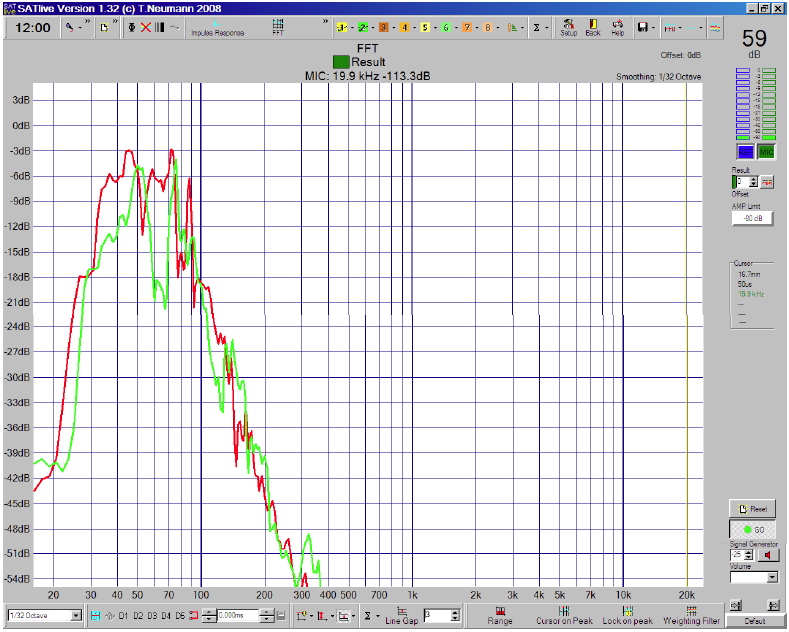
10) Unmute all subwoofers. Measure the amplitude response of the adjusted system and compare to the initial measurement for the forward facing subwoofers. If the phases have been correctly adjusted we shall see a significant reduction in level.

We recommend that you now listen to the result by walking from the front to the back, around the system. The difference should be remarkable.
We can also listen to the difference between the cardioid configuration and the conventional one with pink noise by asking someone to mute the output of the backward facing subwoofer.

11) If the gain for the backward facing cabinet has been changed, adjustments to the processor limiters will be required so that both subwoofers limit at the same time.
In this example, the gain did not need to be modified, so no adjustment on the limiters is necessary.
Sound pressure level in front of the cardioid configuration
Not all the back subwoofer energy is used for cancellation.
At the front of the cardioid configuration, pressure is gained, compared to a conventional configuration (without a backward facing subwoofer, that is).
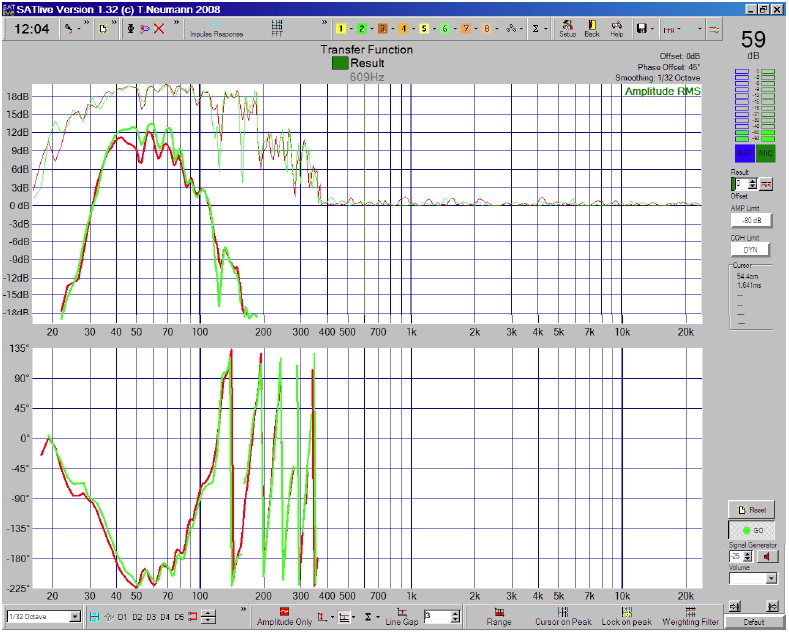
Figure 30 shows the sound pressure difference between the subwoofers facing the audience and the cardioid configuration.
In this specific example, we have gained approximately 3dB between 40Hz and 75Hz. Above 75Hz there is practically no difference and below 35Hz levels are also the same.

Before adjusting a real system for the first time, it makes sense to practice this procedure as often as possible and with whatever combination of gear we happen to lay our hands on, until we have mastered the technique.
Using scaled down systems will allow us to become familiar with the procedures until we are confident to try larger systems.
And, above all, don’t be scared of trying things out (first with scaled down systems and at home, your warehouse, workshop, etc). If there is something that you have not quite grasped, practice will clarify it.
Stay tuned for the coming articles in this series, where we’re lay out some more examples. Want to get a jump on the reading? Head on over to the DAS Audio Website where you can DAS Audio Engineering Department.
