
In the world of live sound, certain topics are guaranteed to draw fellow engineers into a multi-hour discussion that usually ends in no agreement. Drum miking is at (or near) the top of the list.
Further, every situation is different. Sometimes it’s best to just go with a pair of overheads and a kick mic, while at the other end of the spectrum, sometimes the situation calls for individual spot mics for all 48 inputs on the drum riser.
Complicating the picture even more are important aspects in addition to actual mic selection and placement. Sure, that’s got to be “right,” but it has to be combined with aspects such as processing and the overall scope of the mix.
With that in mind, here’s a walk-through of my general workflow for attaining quality drum sound, appropriate for the style of music (and reinforcing appropriately for the space).
Kick Microphones
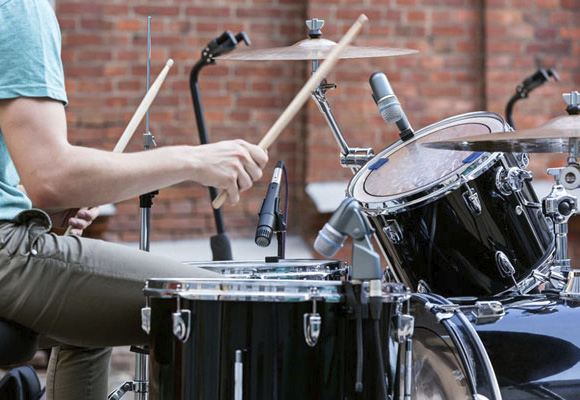
Other than buried and unintelligible vocals, I can’t think of a bigger source of eye-rolling among engineers than lousy and/or inappropriate kick drum sound. This can range from a 110 dB reproduction of a basketball hitting a gym floor with no true low-end characteristics to a super-hot signature that overwhelms the entire low end. Where to start?
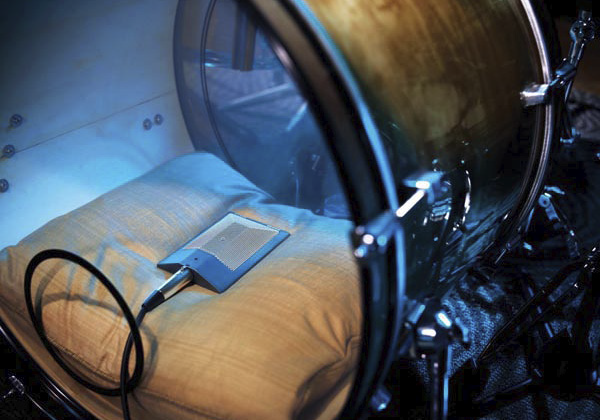
First, let’s think about aesthetics. Most pop, rock, and R&B music benefits from a kick sound that’s somewhere in the sweet spot between the previously mentioned tonal atrocities; a nice, solid, controlled low end with appreciable attack on the high end. A great way to attain it is with a dual-mic approach; a mic inside the drum to capture the attack of the beater hitting the head and another mic located outside to fill out the low end punch.
Inside is typically handled with a boundary-type mic with high SPL capability and a relatively full frequency response (at least 20 Hz extension on the low end and above 10 kHz on the high end). The Shure BETA 91A and Sennheiser E901 are two common models for this purpose. Some engineers favor the signature of the vintage Shure SM91 in comparison to the newer models due to its different capsule and preamp.
Outside, the choice is usually a dynamic mic designed for low-frequency extension. There are a lot of options and several variables, such as the drum itself, tuning, and aesthetics. Most commonly I see the Sennheiser E902 (or the lower cost E602), Shure BETA 52A, Audix D6, and the more recently released DPA 4055 condenser. All can provide a tight, punchy low end with nice high end extension, and if need be, can stand on their own without an inside mic.
Other popular options in this regard include “old school” designs such as the Electro-Voice RE-20 and Sennheiser MD421. Another option is the Audio-Technica AE2500 dual-element mic with both cardioid condenser and dynamic capsules. The dynamic element helps delivers the aggressive attack of the beater while the condenser captures tonality of the shell.
I’m also a big fan of the Heil Sound PR40 (and the kick-specific version, the PR48), a large-diaphragm mic that shows exceptional LF response. (In fact, I’ve used PR40s to record space shuttle launches several times with plenty of headroom to spare).
Kick Workflow
My general approach with kick starts with the inside mic. I bring it up in the mix, gain it (or pad it) appropriately, and start by gating the channel. (Very rarely do I come across any drum that’s tuned well enough to get by without using a gate.) Next, a high-pass filter is applied around 85 Hz, since the punch will come from the outside mic, and this is followed by a deep cut in the 200 to 250 Hz range to clear up any “boxiness.”
I also generally find that a couple of cuts in the 800 Hz to 1 kHz range helps keep the key vocal areas of the mix from being cluttered by the kick’s punch, and if necessary, a spike at around 4 kHz can add attack if there’s not enough of the beater.
Finally, before moving on to the outside mic I throw a bit of delay on the inside channel, just enough to push the location of the inside mic to the location of the outside mic. This aligns the two mics, a difference that can be clearly heard if the tops and subwoofers of the PA are aligned properly.
Attention then turns to the outside mic. If the system is running aux-fed subs, once again I spin up the gain and do a minor bit of tweaking, usually adding a gate with a fast attack, mid-fast recovery, along with some minor EQ cuts around 200 Hz and 1 kHz.
Then I take the mic out of the tops to see how well it plays with just the subs and the inside mic. If it’s a particularly hefty PA, I’ll add the outside mic to the tops, but if it’s a more analytical, linear system, I’ve found that sometimes the additional low end in the top isn’t as well translated, adding smear and clutter.
After that’s done, I usually play with the gate release time and range settings to dial in the desired “punch.” Shaping the sound to fade out exactly when you feel is contextually appropriate goes a long way to a kick sound that sits well in the mix.
From there, compressing the kick is a matter of taste and necessity. Generally, yes, you’ll be compressing – and it’s up to you if you want to do a parallel compression situation or compress on the individual channel strip.
Chances are, some sort of compression will be needed to get it to sit exactly where you want it in the mix. I generally start with a compressor at a 3.5:1 ratio, quick attack and recovery for the inside, and a slower compressor at around 2:1 to round the edges off the low punch, as needed. Sometimes compression isn’t needed – I’m looking at you, excellent jazz drummers – but in most iterations of pop and rock music, it helps.
Snare Microphones
Working our way down the console, snare is the next part of the equation. This is done with a single mic or more frequently, with two – one on the top to capture the initial “crack” and another on the bottom to capture the sound of the snares against the bottom head, which give the drum a lot of it’s personality. It’s also useful with drummers who go back and forth between hitting hard and playing subtly.
Solid dynamic mics that can handle high SPL are favored for snare. The Shure SM57 and BETA 57 are considered solid choices, favored by many because they handle SPL well and graciously deal with the abuse being struck hard by drumsticks. Other options I see (and frequently use) include the Telefunken M80, beyerdynamic M201, and Heil PR22, depending on the drum and the drummer.
Tom Microphones
Also getting increasingly more use are miniature mics that clip right on the drum shell, such as the DPA d:vote 4099D and Audio-Technica ATM350 condensers, both of which stay well out of the way and can be flexibly positioned via goosenecks. Many of these choices can also be applied to bottom snare, but I tend to prefer condensers for this application – the pre-polarized nature of the design means that it’s better at picking up subtleties, and many condensers now handle high SPL.
Snare Workflow
Often I choose to gate the top snare mic while keeping the bottom mic open or gated very lightly with a very low range. This lets the soft notes blend through while only opening up the top mic for a more sizeable “crack.” (Remember to always flip the polarity on the bottom mic as well.)
Compressing the top is usually necessary, and the common snare sound most often heard in pop and rock music these days is the product of a 4:1 ratio, quick attack, quick-medium release. But the individual method and amount of compression is mostly chosen based on the “flavor” you’re going for.
Toms can be captured a variety of ways, and most require a little EQ finesse along with a good gate and compressor.
Toms Workflow
My personal favorite tom mics are the convenient clip-on Sennheiser e904 (and the less expensive e604), along with the Shure BETA 98A and the Heil PR28. Any mic with solid SPL handling should be up to the task, and clip-ons make setting things up very convenient.
With floor toms, sometimes I like to experiment with a larger-diaphragm mic. The LF response of this drum matches up better with a mic suited for kick, and if there’s space on the riser (and the drummer doesn’t mind the bulkier mic), I almost always use this approach.
I start by gaining up my toms – placed into a group for compression – and placing a gate on them. I’ll increase the gain and play with the hold and release times to get the duration of a tom hit I’m looking for, and then EQ to taste. Some mild compression, around 3:1, usually helps give body and substance to tom fills.
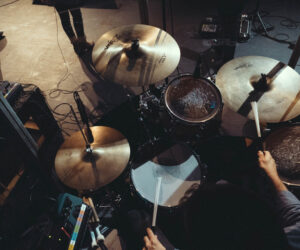
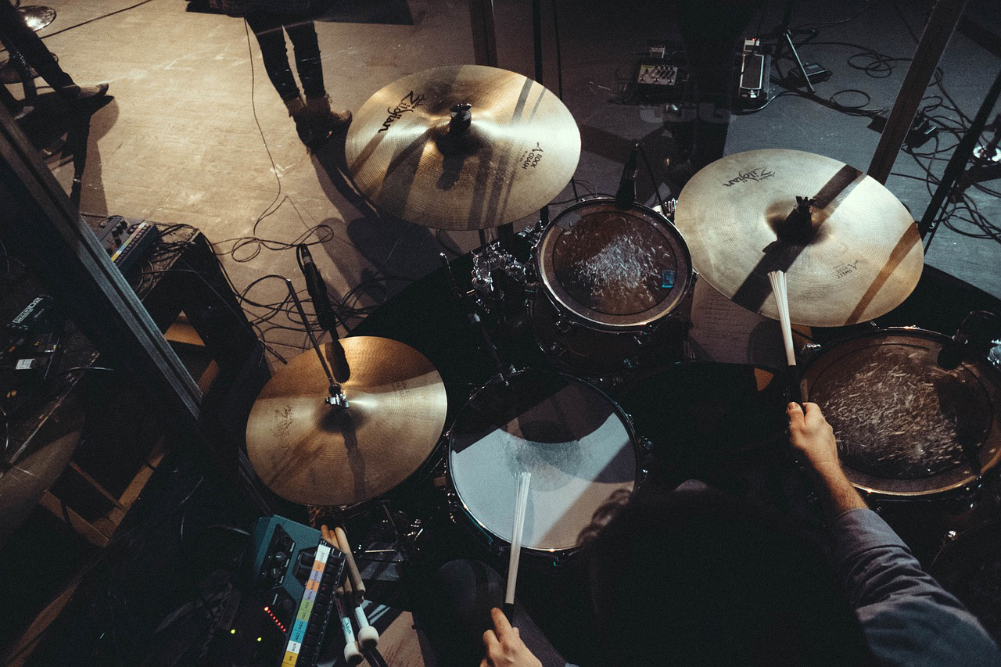
Hat, Ride & Overheads
Miking cymbals is something I tend to be very opinionated about. Not because I’m particularly passionate about certain techniques or mics, but because in my observation, at least, some engineers chronically overdo it, particularly in smaller rooms.
Sometimes we forget that we’re doing sound reinforcement: that magic “r” word means that we’re there to provide extra horsepower to the items that need it – but not everything.
My general rule is that if the venue’s capacity is less than 500, I don’t place overheads on a kit. Cymbals are exceptionally loud in small rooms, and generally there isn’t the stage depth to get out of the vocal mics’ range of pickup.
Unless I’ve got a drum shield at my disposal, it’s not necessary to mic the cymbals because of their natural projection. On the other hand, I almost always mic hi-hat, even in smaller rooms. It’s such an important part of the mix that I want to have the control to bring it in when needed.

There are two primary choices for miking cymbals. First is the traditional overhead placement to the left and right of the kit, eyeballed to a reasonably equal distance on either side and placed high enough to capture cymbal sound as well as a small bit of the kit’s overall ambient personality. The second approach is to spot-mic each cymbal closely. There’s also the option of combining both techniques.
Generally, I place a set of condenser microphones – any reputable, reasonably priced brand will do – as an overhead pair, and then spot-mic the ride cymbal underneath the bell. I prefer an SM57 on ride, as I find its personality provides a pleasantly “dirty, trashy” sound to the bell, which augments the condenser’s cleaner, more defined sound.
Finishing It Up
A word of caution: avoid the low-ball (dirt cheap) mics. The point of overhead miking is to capture the high-end shimmer of the cymbals, not necessarily the hefty body of the kit. But many of the low-ball models have a lack of HF de-emphasis, while more mainstream mics are the result of higher quality control, which includes an appropriate de-emphasis circuit. The result is a much more coherent, natural and “less-hyped” high-frequency response.
I group overheads into a stereo channel, rolling up the high-pass to about 500 Hz, with light compression to taste. Sometimes additional EQ attention is required around 2 to 5 kHz to remove some drum noise. Overall, overheads usually require minimal processing; just turn them up until you can hear them and they sit nicely in the mix, and you’re good.
Processing drum channels from this point is a matter of personal preference. I usually build parallel compression groups with kick, snare, and hi-hat grouped together into a stereo group, along with a stereo group for toms, and another group for any additional instruments that end up on the drum riser. I also create another stereo group as an unprocessed dry group, and put the overheads into this group after processing on their individual channel strip.