Of those two, only USB is typically supported on all PCs, so I would lean in that direction. A minimum feature set includes XLR inputs, 48V phantom power and balanced outputs. There are many devices in the marketplace that meet these criteria, so let me add some additional considerations that will narrow the field.
Chassis: Avoid plastic boxes. A metal chassis with all connectors bolted to it will survive the inevitable drops and jerks from connected cables.
Outputs: Balanced is a must, but balanced via an XLR connector is a big plus. This narrows the field dramatically, but it allows you to use any mic cable to connect to the system. If you must use 1/4-in TRS, then at least make sure that the jack is bolted to the chassis with a nut. Many units have plastic connectors that simple protrude through holes in the chassis – bad news for a lot of reasons.
Knobs: There are two schools of thought on this. Physical knobs make it easy to tweak levels, but make it harder to maintain an absolute calibration.
Since the vast majority of audio measurements are relative, you might go for the convenience of a knob.
Some units use digital encoders to set levels so that a fixed absolute level can always be dialed in.
Other units are controlled completely by software so any level changes have to happen there.
Ironically, most units without knobs actually cost more (like fat-free food) as they are targeted at more sophisticated users.
Prices range from $150 – $1000. Audio boxes have evolved into a gray marketplace of consumer vs. semi-pro vs. professional units.
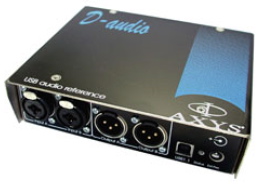
Check out Edirol, M-Audio, Presonus, EASERA Gateway and the Duran D-Audio, but skip the low end offerings from any of these brands. Don’t make the common mistake of buying two or three different models en route to a professional model.
Microphone
Your first microphone should have two main characteristics: omni-directivity and a physically small capsule.