3. Let other people turn them on (padlocked and chained)
I hate microphones with power switches. The reason is simple: there will be problems. People on stage will accidentally turn them off and not think to check they are on before talking. In the wireless world, by their very nature, the microphones need a power switch. That doesn’t mean you can’t keep them from using it. [Evil Laugh]
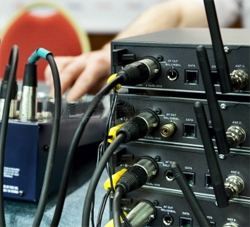
Many wireless microphone packs have lockable controls. In the Shure systems we use, by holding down the SET and MODE buttons at the same time, the microphone is locked in the ON position. Even if a singer switched the power switch to OFF, the microphone would stay on.
And then there’s the tape. I still see wireless handhelds with a switch on the bottom and no way to digitally lock the power. Grab a roll of black electrical tape and cut enough tape to cover the switch.
For people on stage who still insist on having control over the on/off switch, bring out your mobster accent and tell them this: “youse can do watt youse want but ifs there’s a problem, youse be swimmin’ wit da fishes.” Just an idea.
4. Random channel assignment (wait, what?)
I can hardly bring myself to tell the story. But, for your benefit, I’ll do it.
I walked into a church for an audio consult and spied the Mackie SR 24-4, the standard mixer for churches back in the 1990s. There were four wireless microphones. On the mixer, they were labeled A,B, C, and D.
But here’s what the channel assignment looked like:
—B was on channel 5.
—C was on channel 17.
—A was on channel 18.
—D was on channel 11.
I was dumbstruck.
In general, like-minded inputs should be grouped together and logically ordered. For example, all vocal microphones should be located next to each other on the console, in the order they are seen on stage.
Using an organized layout leads to fewer mistakes, faster mixing, and channel mix comparison. What I mean by the last one is by having all related channels next to each other, it’s easy to compare EQ settings for problem-solving. Let’s say the backing vocals set but something seems out of place. By looking at the vocal channels next to each other, you can easily see if one has an EQ setting that might be higher than it should be. Even with a digital mixer, flipping back and forth between two screens for comparison is easier.
The Take Away
Prevent wireless microphone bleed by correctly setting the wireless pack’s gain. Practice good battery management so batteries are replaced before they die on stage. Keep microphone control in the sound booth by locking or otherwise covering the power controls on wireless microphones. Finally, don’t hunt and peck your way around the mixer—order the channel inputs in a logical manner.
Oh, and if you haven’t made any of these mistakes, be grateful someone taught you well.
Ready to learn and laugh? Chris Huff writes about the world of church audio at Behind The Mixer. He covers everything from audio fundamentals to dealing with musicians, and can even tell you the signs the sound guy is having a mental breakdown. Chris is also the author of Audio Essentials For Church Sound, available here.