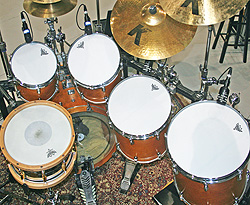
Mic’ing Process
Overhead Mic’ing – Cardioid condensers are the popular choice for overhead mic’ing. Whether one or two, the question must be asked—are the overhead mic(s) actual full kit mics (as in the traditional approach), or simply cymbal mics?
As “kit mics” they should be positioned to hear everything in the drum set in a balanced fashion. As “cymbal mics” they should be hi-passed aggressively to help avoid leakage from various drums, and positioned to focus only on cymbal sounds, rejecting the rest of the kit as much as possible.
But why two mics (in either approach style)? If there is a good reason to use two spaced overhead mics, do it (maybe true stereo mixing, for instance). But unless there is, one is probably better, as the common “spaced pair” mics naturally bring along timing problems when combined, and this may result in that comb filtering thing again—those partial sound cancellations that we don’t want to deal with!
Or, use a “together” pair of mics over the kit to eliminate the timing issues in the overheads.
Kick Drum – What’s the point? Everyone has an opinion on the best kick microphone and the best placement. It is never fully predictable, and always requires listening.
A good dynamic on the front side, often in or near a cut hole, may bring all the “thud” you want. A good condenser can specialize in that “snap” attack sound, either inside or on the beater head. Both are valid sounds, but deciding which is appropriate is the challenge.
Maybe some of both—this is why some techs choose to double-mic the kick/bass drum and blend to taste. But this double miking of the bass drum should only be done if the mixer understands and accepts the phasing issues that come with it. Similar to spaced overhead mics, there will be some time offset that partially cancels the sound.
Again, digital console delay may be used for alignment here.
Snare Drum – A rugged dynamic on the top head of a snare drum can be all that is needed to get the crack and tone you want. If not, try another mic and placement, or fix the drum itself.
Again, remember that the snare may cut through in the overhead mic(s) enough already. There is a lot of room for personal mic taste here. Listen and play with mic position for the desired sound.
Consider adding a condenser underneath, facing up into the snares for specific control of that unique high frequency sound. This mic position by itself can sound quite bad, but makes a nice overall contribution when blended with the top mic.
Reversing polarity (not phase!) of the bottom snare mic is a common choice. Sometimes it sounds better, sometimes not (there are too many variables here to predict). It is necessary to listen with and without polarity reversal and choose which sounds better.
The mixing console may include a polarity switch on each channel. If not, flipping pins 2 and 3 in the mic cable will get it done. And EQ is just a matter of taste.
Hi-Hat – Easy, you might think, get a good cardioid condenser and hi-pass the snot out of it. Right? Well, that probably sounds great for the hi-hat alone. But any time we place a condenser in or near a drum kit, the real trick is to hear the target source while also not catching extreme leakage from the snare and other sources. Experiment with placement. Upside-down miking can work.
Rack Toms – Whether selecting a dynamic or a condenser, a stand-mounted or a miniature clip-on mic, the usual plan here is to provide one mic for each rack tom, giving great isolation and ability to process individually.
As the rack toms are not often played every measure until there is a drum fill, it is common to gate them aggressively until they are actually played.
Otherwise, they idly contribute lots of useless leakage, which deteriorates the overall kit sound. EQ these if desired. It is not uncommon to see sound techs aggressively scoop out the low mid or mid range section of rack toms to suck out the “boxiness” or even boost the high mids for extra snap, or boost the bass for more thud. EQ should be used only after mic selection and position are optimized. Listen!
Floor Tom
Mic’ing the floor tom is very similar to the process for miking rack toms. We might make a different mic choice to accentuate low end if it is a large drum, or high frequency attack, if desired.
