What if you were able to get an acoustic guitar to sound like it’s being captured on stage by a good microphone, but with the greater SPL and freedom of movement that a pickup affords?
And further, to tailor that sound to the audio characteristics of the particular musical instrument and the pickup system that is installed within it. That’s what the new ToneDexter preamp/DI from Audio Sprockets strives toward, and for the most part accomplishes.
In development for more than four years by guitarists/engineers James May and Andy Narrell, including extensive in-the-field beta testing, ToneDexter was just released in May.
The basic concept is to use a microphone (the recommended choice is a small-diaphragm condenser, but any other condenser or dynamic mic may be used) to capture the acoustic sound of the instrument and use that to modify and “correct” the more colored sound created by the pickup system – and then store this instrument-and-pickup-specific result for later use.
We’ll take a look at the details of this process, how well it performs, and the experiences of a few musicians who have used it on tour.
First Appearances
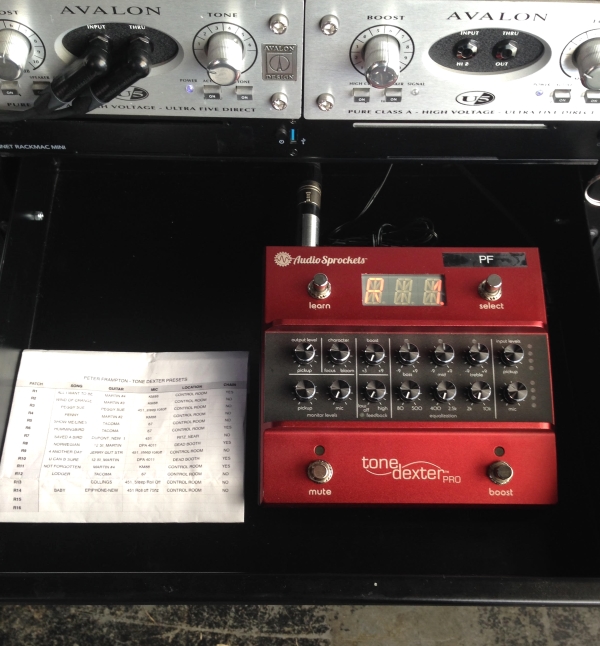
ToneDexter is about the same size as a typical acoustic guitar preamp, at about 6 x 6 inches and 2.5 inches high, including control knobs.The unit tapers down toward the front, where two multifunction footswitches are located. The generous three-segment display also performs multiple functions during the “training,” tuning, EQ setting, and performance tasks.
It’s powered with an external power supply that connects to the unit with a barrel connector (which I personally find to be more rugged than the micro USB connectors that some devices use).
The controls include a pickup level trim, an output level, WaveMap selector and “character” knobs, a LF notch filter for resonances, and bass and treble EQ.
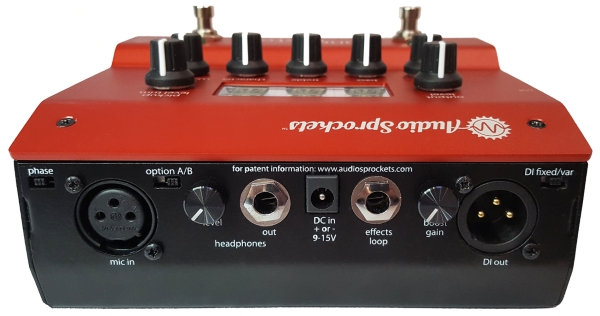
The rear panel features an XLR3F mic input that provides 48-volt phantom power (used when creating the presets), a 1/4-inch stereo headphone out with level control, a 1/4-inch TRS effects loop connector, and an XLR3M DI output that is switchable between fixed level and variable – controlled by the unit’s output level control.
On the right panel is a 1/4-inch instrument input, and a 1/4-inch output is on the left. A phase switch changes the polarity of all outputs, and the Option A/B switch accesses the two memory banks.

Creating A Preset
The basic process to create an instrument-specific preset with ToneDexter is quite simple and takes only a few minutes from start to finish. After powering up the unit, plug in a pair of headphones, connect and place your desired microphone to capture the instrument acoustically, and plug in the guitar or other instrument. Play in your normal style for a few moments while you set the input level control, using the LED display as a guide. Listen to the sound of the miked instrument and adjust the mic’s position if needed.
When you’re ready, press the learn button and begin playing for about a minute while ToneDexter learns the differences between your pickup’s output signal and what the microphone “hears.” It creates a WaveMap as you listen to the process through the headset. When the learning is complete, compare the sound of the raw pickup, the mic by itself, and the newly created WaveMap. If you’re satisfied, scroll to an open memory slot and store the result.
If desired, multiple presets can be created using different microphone positions or microphones, or train additional instruments. In under 15 minutes, I successfully trained and evaluated three instruments – a later ‘80’s Martin with a stock undersaddle pickup, and two handmade acoustics by luthier Mike Kelly (Goodyear’s Bar, CA) outfitted with an LR Baggs Lyric and a K&K Mini.
When done with a training session, unplug the mic and headphones, note which instruments are assigned to particular presets, and the system is ready to be used on the gig. Each of the two memory banks will hold 11 presets.
ToneDexter in Use
On stage, the system is easy to set up and use. Connect a mic cable to the XLR output and out to the mixing console, the guitar or other instrument to the 1/4-inch tip-sleeve input, and an amp or other monitoring system to the 1/4-inch output, if desired.
Rotate the WaveMap selector to the preset that matches the particular instrument and pickup, and adjust the input level if necessary while the instrument is being played. A separate control determines the output level for both outputs, unless the XLR output is switched to the “fixed level” position.
To counter feedback sensitivity at the instrument’s resonance point, a sweepable notch filter covers the range from 73 to 392 Hz (in the GEN version of firmware), with the display temporarily showing the selected frequency as the knob is turned. This notch engages a 12 dB cut with a 1/12-octave width.
The two EQ shelving filters provide 9 dB of boost or cut, with the LF inflection point at 125 Hz and the HF at 2 kHz. The display will temporarily read out the adjustments in 0.5 dB increments.
During performance, the left footswitch mutes the output, and also accesses a tuner. The right footswitch enables a boost circuit for soloing, with up to 8 dB of level increase possible – with its level control located at the rear of the unit. For the club and outdoor gigs I’ve used it with, the ToneDexter has performed quite well, and I’ve received positive comments about the acoustic sound of the instruments.