In addition, it’s usually a good idea to use high-pass filters (roll-off at 70—100 Hz) on vocals. Depending on how your subwoofers are fed (aux feed or main mix crossover), POP filtering (HPF) helps in eliminating the explosiveness of some consonants. HPF also helps in eliminating background/stage rumble and mic handling.
When miking an ensemble or vocal group, it’s a good idea to use the same mic for all vocals. Remember that different mics have different polar patterns and frequency responses, and this can complicate the EQ of your stage monitors when trying to eliminate problematic frequencies.
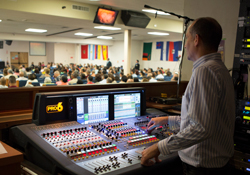
Processing The Voice
The second stage after capturing the voice is a good preamp. If your console/mixer lacks this, acquire and insert a quality external preamp. There is a huge variety and at different price-points to choose from.
The preamp will define how good the quality of the signal being passed to the rest of the audio path is. EQ for the voice can be tricky. My approach is to eliminate what is not needed, like a sculptor remove the unnecessary material from the stone to uncover a masterpiece. Keep EQ flat as much as possible, only eliminating those frequencies that cause trouble, particularly mid-lows that “opaque” the voice.
Between 250 Hz – 1.5 kHz, a notch filter can help in reducing nasal resonances which, most times, are annoying. This frequency is different for each person, and is created by a combination of the natural resonance of the nasal cavities and the skull. In certain cases, a boost at 3 kHz can add clarity to the voice, making it more intelligible and/or helping it stand out (cut through) in the mix. A boost at 5 kHz can add brilliance, while a boost in the 8 kHz range adds “air” or high end to the source material.
Basic (fundamental) voice ranges:
1. Bass: 75 – 300 Hz
2. Baritone: 100 – 400 Hz
3. Tenor: 135 – 500 Hz
4. Alto: 180 – 700 Hz
5. Soprano 250 – 1100 Hz
Another frequently used treatment is compression. Unfortunately, a lot of folks don’t have the slightest idea of how to apply compression to a voice. To me, it’s both science and art, and took me years to really understand it. I continue to experiment and search for new approaches and techniques.
As with any other piece of gear, fully understand your compressor (read the manual, it was printed for a reason). Compressors have personality. A particular unit may work beautifully well for one thing, such as drums but, may be terrible for voice. After identifying the right compressor for your needs, use it on all vocals (especially on the worship leader or lead singer).
Here are suggested values for common compression parameters:
Ratio: Very strong and aggressive voice (4:1 to 6:1); all others (2:1 to 3:1)
Attack: 20 ~ 60 ms
Release: 300 ms ~ 1 seg
Threshold: begin at the max and start reducing it until you get 3 – 5 dB of gain reduction during the louder passages.
Use the output compensation button! It’s there for a reason (too). Use it to compensate for the gain reduction of the compression stage circuitry. Without this compensation, the gain reduction and pumping effect will be very noticeable to the ear.