What’s The Purpose?
We need to understand the purpose of recording a live event. Sometimes it’s just to archive an event like a speech or meeting for posterity, and/or so that a transcriptionist can make notes at a later date. Usually made off of a feed from the master output or an aux send on the console, archival recordings typically don’t require special mics.
Another type of archival recording is known as a “board tape” because back in the day, we actually used cassette decks for recording shows for personal use and/or for the band to critique their own performances. Board tapes may need to be supported by additional mics on stage because instruments that are already too loud in the house (Yes, I’m looking at you, Mr. Double-Stack-In-A-Bar Guitar Player) are not featured well in the PA mix and can be obscured on the recording. I’ve found that the best way to get a good basic recording of a band is to mike up everything and then use an aux send to create a specific mix for the recording.
The best way to attain a quality live recording is to multi-track – record each instrument and vocal on to its own track, and after the gig, the tracks can be mixed and tweaked. This can present a few problems because we may need to connect a multi-track recorder to the console and add more mics, particularly models well-suited for recording. A good approach is to utilize a separate console for the recording and either split the stage mics into both consoles (as with mains and monitors) or deploy another set of mics onstage for each.
Two microphones at each input can be awkward on instruments and amps, as well as simply not possible for vocalists, especially those that want to move about. So usually, live recordings are captured via a single mic on each input. Once all of the nuts and bolts of interfacing the recording unit to the console has been hashed out, it’s time to select the mics.
One of the first things I look at are audience mics. No matter if it’s a board tape or a multi-track, placing a few mics on the audience helps ensure that it won’t sound like the band is playing to an empty room.
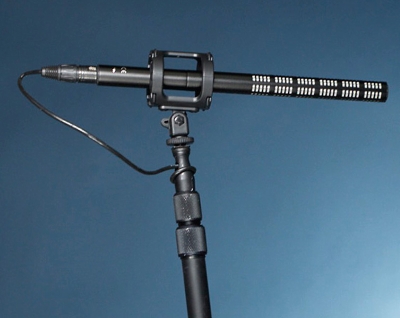
One way to go about it is to position a few mics on stage, off to the sides and pointing at the crowd. Choose models that are less sensitive to their sides, such as shotguns, so they tightly focus on the audience while not picking up too much noise bleed from the stage. Another method is to hang a few cardioid mics over the crowd or place a few of them at front of house on stands high enough to get above the crowd.
Approaches & Options
As noted, a quality recording always starts at the source, but in the live world, it’s often about compromises. For example, a large-diaphragm condenser might sound best on a particular singer but be too bulky, and many singers want to use a handheld mic, possibly even the lousy old noisy mic they’ve sung with since high school.
This is where diplomatic skills can come into play, in order to convince performers that a particular model from our inventory will be much better for the recording, even if it means taking away their “security blanket.” Swapping mics is usually easier with musicians who normally don’t care what’s on their instrument or amplifier as long as it sounds good in the monitors and PA.
Another challenge that can rear its ugly head: when switching to a mic that has a different pattern, there may be the need to move a stage wedge so that it’s not in a pickup zone. For example, a hypercardioid may mean locating a wedge more to the side, in the null zone, rather than directly in front of the performer.
I tend to stick with my inventory of standard live mics when doing show recordings because I’m quite familiar with them, how they sound, and their pickup patterns. I spend a little more time on positioning because I want to keep out as much stage bleed as possible.
One trick is to drape a truck packing blanket over a mic stand with the boom set horizontally. The blanket acts as a Gobo (studio term for the isolation walls placed in between loud instruments and amps in the tracking room) and helps keep sounds from bleeding.
Another technique is to turn or angle amps in different directions to direct their sound away from other mics.
Long ago an “old soundman” taught me to use a figure 8 mic to pick up an entire section, like strings or percussion. Place the mic near the edge of the stage and point the front toward the source, positioned in a way that the rear is directed off stage into a quiet area.
The mic then picks up just the section you want. This approach also works with shotgun mics if you’re trying to capture a single instrument and want a tighter pattern than a figure 8.
Headworn and lavalier models can come in handy for recording as well. Some vocalists have horrible mic technique, so place a secondary mic just for the recording to capture every note. Another approach is to tape an omnidirectional lav underneath a podium mic and use it just to feed the recording. That way when the presenters get off the mic (notice I said “when” and not “if”) the lav has a better chance of picking up their speech than the cardioid podium mic. A wireless lav or headworn mic on the presenter works best for recording, if feasible.
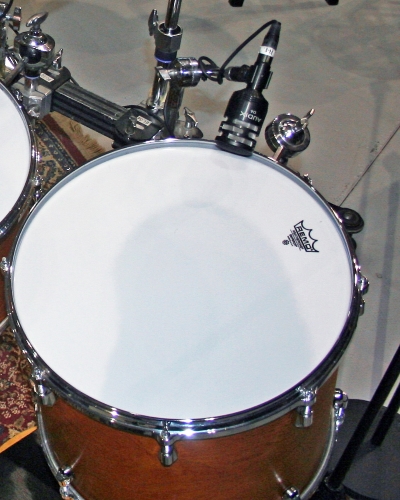
For a band recordings, tighter pickup patterns (i.e., hypercardioid) helps keep stage bleed to a minimum. Consider close-miking drums and percussion with dynamics, and deploy small-diaphragm condensers for overheads and the ride cymbal (if there are enough channels available). Ditto employing a small dynamic underneath the snare to pick up some extra “snap” as well as a small condenser on the ride cymbal.
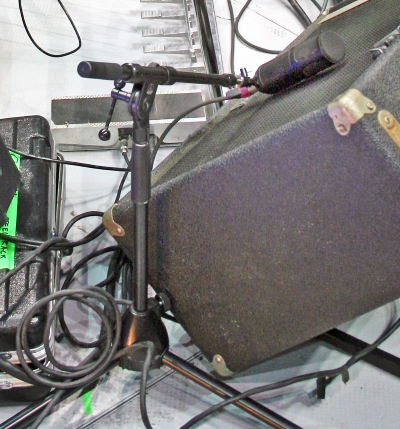
Amplifiers get dynamics and/or ribbons if they’re available. For Leslie cabinets, try a large-diaphragm condenser on the low rotating horn and a pair of small condensers for the high rotating horn. If enough channels are available, mike the high horn in stereo, using three tracks total. If the channel count is tighter, take it down to two, one for the low and high on one side and the other for the additional high mic. This presents the opportunity to attain some stereo at mixdown (and in the PA).
I once saw an engineer do something interesting for recording horns and brass. He placed figure 8 mics sideways in between the players, so each picked up a horn on either side and nothing else, because the figure 8 has a large null zone 90 degrees to the front and rear. He told me the horn players liked to swing their instruments when they played, and this way, there wouldn’t be a tremolo effect on the recording.
In The Details
Finally, when setting up mics, double-check that the clips and stands are tight and not going to slip during the show. Shock mounts and high-pass filters may also be required to keep stage rumble from getting into mics. Windscreens can help, even indoors, in reducing wind and breath noises from getting into a recording.
Make sure all cable paths are out of the way and taped down so that mics don’t get accidentally unplugged or moved about. Don’t run any cables alongside power cords; always cross them at an angle to reduce the chance of generating hum and buzz.
A little planning, knowledge of mics, and attention to stage bleed dramatically increase the chances for a successful live recording.