Take a sheet of paper and listen to the song. Count out each eight bars and then strike a line, put another line after the next eight bars, and so on.
If something changes before you get to your count of eight, strike a line and insert the number of bars above it.
This way, even if you must call the cues after months or years, you should be able to count out the measures and get the timing right.
It is also a great method for knowing when the end of a solo that does not present a nice clean tag is coming to an end — that is, if the artist always plays the song the same way.
In any event, it is a good way to jog your memory and helps you visualize the song. In Paul Dexter’s form of the cue sheet (Figure 3), he generally writes a few words of lyrics after each of the labels to remind him (and others) that a change is going to occur — for example, from the chorus to a lead-in for a guitar solo with a lyric such as “time for me to fly.”

He sees key words on a page that serve as a warning before a change. He said that, “The cue sheet in this basic form is a place to write new discoveries and notes and elaborate exactly in the spot where the effect is going to happen, such as a backdrop change or Kabuki drop, a truss movement or projection cue.” No matter what is supposed to take
place visually, it can be organized with the cue sheet.
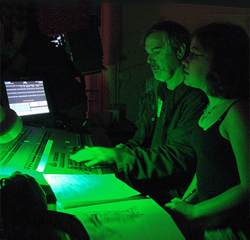
The Cue Card
I use 4 x 5 index cards as forms. Full-size 8-1/2 x 11 pages are too big to place conveniently on the console and scan quickly. What kind of information you place on the card is the trick. I have a format I have used with a few variations for many years. Figure 4 shows the form for a manual console, and Figure 5 shows a form for a computer console.
Although they may not seem to differ much, the detail in the Preset column (column 4) is simpler for a computer, whereas a total breakdown of dimmer numbers and intensity is required for a manual board.

Cue Number
I use A – B – C instead of numbers for cues, so if I am calling board cues along with follow spots no one can confuse cue 1 with follow spot 1 or frame 1. Also, I do not believe in consecutively numbering cues straight through the show, because the song order can and often does change during the course of the tour.
Cue
The cue is the downbeat, instrument, lyric, or whatever you use to indicate when the action should take place. Because the shows are not scripted, I use very simple ones, such as “band starts,” “first lyric,” “sax solo,” “chorus,” “end song,” or “restore.”
Action
The action notations (under the Time column) can change slightly depending on whether you are using a computer or a manual board. A computer board is simply noted — for example, P.S. 11 12 (2), which means preset 11 is to cross-fade to preset 12 on a 2 count (2 seconds).

A variation can be written as P.S. 10 @ (6) and previous cue @ (10), which means to pile on preset 10 and fade the previous preset on a 10-count fade. Note that the parentheses always indicate time; the number inside the parentheses indicates the seconds. A mark of ↑ indicates a bump up, and ↓ or BO indicates a blackout. Brackets, [ ], can be added for other notations.
It is also possible on a computer board to use a channel in the manual mode. This is indicated as M d36/7 (8), which means to manually add dimmer 36 to a level of 70% on an 8 count. On a manual preset board, the notation could be A B (3), which means that scene A crossfades to scene B on a 3 count. The notation A @ B @ (3) indicates to add scene A and fade scene B on a 3 count. Another action would be A @ (3), which means to add scene A on a 3 count.
Preset
The Notes column provides references to the actions or things that remind you of why the cue is done. On the manual board, the Board column indicates each dimmer level specifically — for example, d9/F d10/F d14/2 d18/6 d26/9 (2), which means dimmer 9 level full, dimmer 10 level full, dimmer 14 at 20%, dimmer 18 at 60% and dimmer 26 at 90%, cross-fading on a 2 count. Similarly, d14/3 @ (10) would mean to fade out dimmer 14 on a 10 count.
This could also be used to lower the dimmer level — for example, d14/3 @ (5) — from the previous level to a lower level. Because a fade out and a change in level look the same in the notes, some people underline when it is a level change only.
Follow Spot
The notations under the Follow Spot (F.S.) column can be complex if more than one reference must be considered. As a general example, however, follow spot notations might read (john) F#6 @ (3), which means to fade up on John in frame 6, full body on a 3 count. The use of ↑ @ indicates a bump up, and ↓ @ or BO @ indicates a blackout the same way it does with dimmers.
You can develop letter or numerical notes for the size of the circle of light needed; for example, I use “1/2” for a waist shot and “HS” for head and shoulders. You can make up anything that is easy for you to remember when you are looking at your cards.