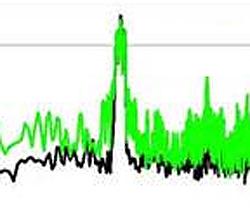
Audio Examples—After
Example 2.1: Source file dithered down using MBIT+ with default settings. This is the application of dither in a normal context.—Listen
Example 2.2: MBIT+ Normalized—Listen
f you listen beyond the noise itself, the music is all still there. Especially take note of the sustain and decay on the last vibe-hit. Imagine that the decay from the vibe was the end of a reverb tail. That’s something you’d want to hold on to.
Now, you probably want to know what all of the POW-R and MBIT+ stuff means. Dither is really a tradeoff between removing distortion and “ambience recovery,” but sometimes dither noise, especially flat dither (triangular and rectangular), can actually obscure the ambience and decays we’re trying to retain.
These different dither options are actually called noise-shaping filters. Think of it as the EQ curve of that particular dither noise. To make the application of dither as transparent as possible, companies have developed their own dithering algorithms and filters to accomplish this.
The idea, in many instances, is to remove energy from the most audibly sensitive areas, 2-4 kHz, and move it to less sensitive areas >16 kHz. You may have noticed the high-frequency shelf in example 2.2, while it sounded fairly dull overall.
Now, if you’d like you can check out the other noise-shaping filters in action. As I did with the previous examples, I’ve provided an example of the normal context for the dither and also one where the noise is equal to the original signal. With and idea of what each one sounds like, you can decide which shape might be most appropriate for your project.
Audio Examples—Shape
3.1 POW-R 1—Listen
3.2 POW-R 1 Normalized—Listen
3.3 POW-R 2—Listen
3.4 POW-R 2 Normalized—Listen
3.5 POW-R 3—Listen
3.6 POW-R 3 Normalized—Listen
3.7 Rectangular—Listen
3.8 Rectangular Normalized—Listen
3.9 Triangular—Listen
4.1 Triangular Normalized—Listen
