Envelopes
The envelope section allows you to modify the shape of the waveform when a note is played. Attack, Decay, Sustain, and Release are the controls you’ll find.
Sometimes there are more than one set of envelope controls. There is usually a dedicated envelope for the amplifier, and then the other can be assigned to filter or something else.
—Attack adjusts the start of the waveform, this will allow you to fade the sound in over time. Think of this as a way to control the volume of the tone from zero to full over a short period of time. From instantly on, to a very slow ramp up in level depending on how this control is set.
—Decay is a time control to set how long before the sustain level is reached.
—Sustain is the level the sound will be while the note is held.
—Release is the opposite of attack. When a key is released the sound fades out over a period of time set by this control.

Here is an example of a tone using a fast attack, fast decay, medium sustain and fast release. Listen
Now let’s slow the attack way down, set medium decay, low sustain and slow release. Listen
Hopefully you can hear each of the controls at work in those examples.
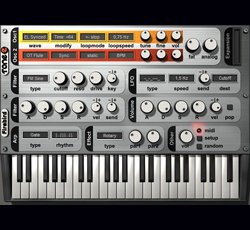
Filter
The filter is a powerful part of the synth. With just two main controls, it can really shape the sound quickly.
The filter section is where you will find the most variation. The design and functions and resulting sound will be different from one synth to another in both hardware and software.
The two main controls for a filter to pay attention to are Frequency or cutoff and Resonance. Some synths will let you choose what type of filter: high-pass, low-pass or band-pass.
—A high-pass filter removes all frequencies below the cutoff frequency (removes low frequencies).
—A low-pass filter removes all frequencies above the cutoff frequency (removes high frequencies).
—A band-pass filter removes everything above and below a range around the cutoff frequency.
—The frequency or cutoff control you see in the filter section determines the range which the filter operates in.
—The resonance control will take that cutoff frequency and amplify it making the sound more aggressive.
—Often there is a control to set the steepness or curve of the filter—usually this is 12 dB or 24 dB.

Here’s an example of the filter in use. First the unfiltered sound, then the filter will sweep down to 10 percent, then the resonance will be brought up to 70 percent, and swept back up. Then the curve will be changed from 12 dB to 24 dB. Listen
Next I’ll use the second envelope in this synth and use it to control the filter automatically. Listen
There’s another way to control the filter, using the LFO, but I’ll leave that for another lesson.
At this point you should be able to make some interesting sounds. If you know how to assign controls to knobs on your MIDI controller keyboard, start assigning some of the parameters you’ll need most often—attack, release, filter cutoff and resonance.
These are some of the controls you’ll usually reach for first when tweaking a synth—better to reach for a knob than the mouse.
Jon Tidey is a Producer/Engineer who runs his own studio, EPIC Sounds, and enjoys writing about audio on his blog AudioGeekZine.com. To comment or ask questions about this article go here.