Opposite Approach
Now let’s reverse the process and listen to snare mic in the headphones while having the drummer hit the kick. You’ll probably hear a lot more of the kick bottom than expected. And just as with the first example, this can lead to the gate on the snare being accidentally triggered by low-frequency energy of the kick drum.
Therefore, do the opposite trick of engaging the low-cut (high-pass) filter on the snare mic while hitting only the snare and watch how much bandwidth it really needs. Then slide the low-cut filter up to where it’s just touching the bottom of the snare frequencies, around 200 Hz or so, depending on snare size and tuning.
Have the drummer hit only the kick while soloing the snare mic in the headphones and you should hear a lot less “kick” in the snare mic. Again, this makes setting the snare gate easier since it’s not listening to the kick, and the kick transient impact will be cleaner since it’s not being picked up as much by the snare mic.
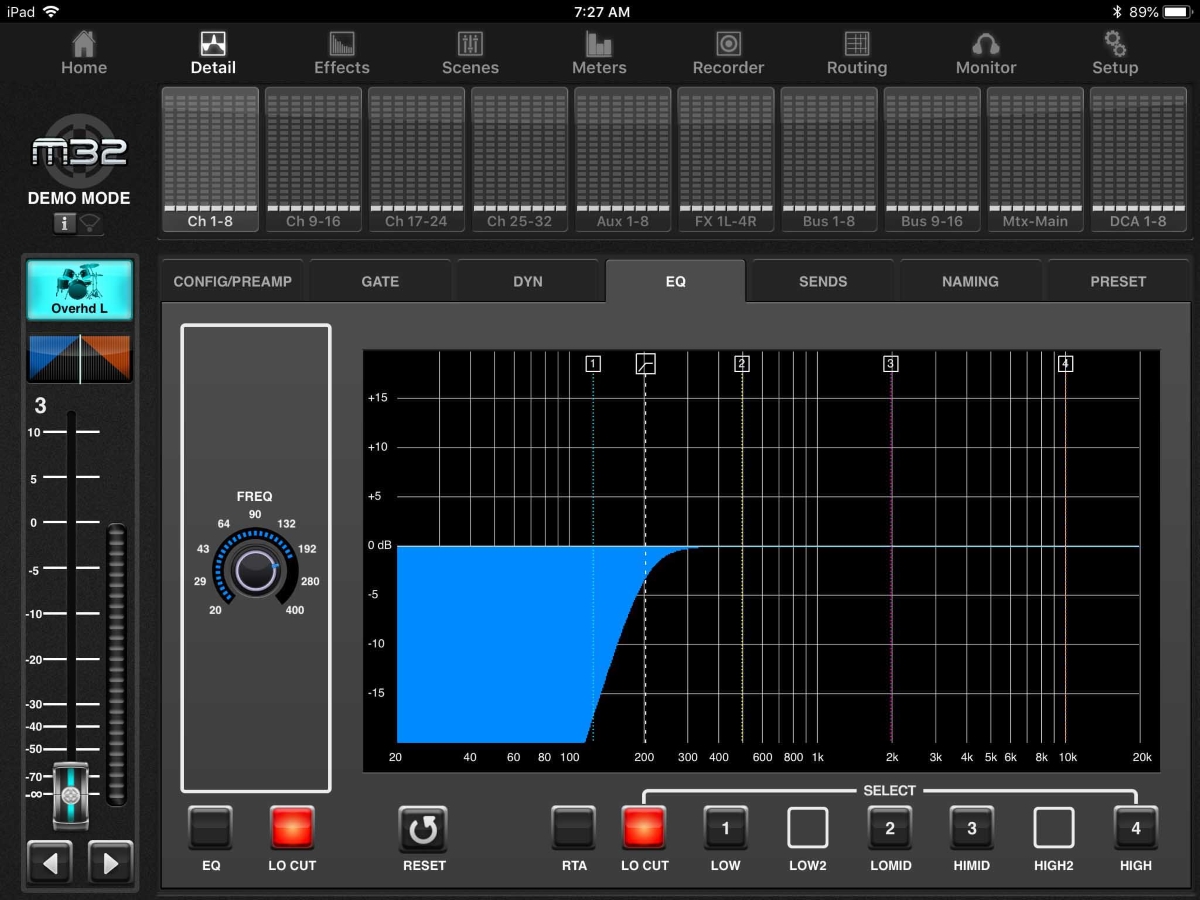
Now, that’s the easy part. The next step is to do this for every other mic on the kit. An obvious one is the overheads, which are primarily handling cymbals. I usually hi-pass them anywhere from 200 to 400 Hz, depending on the kit.
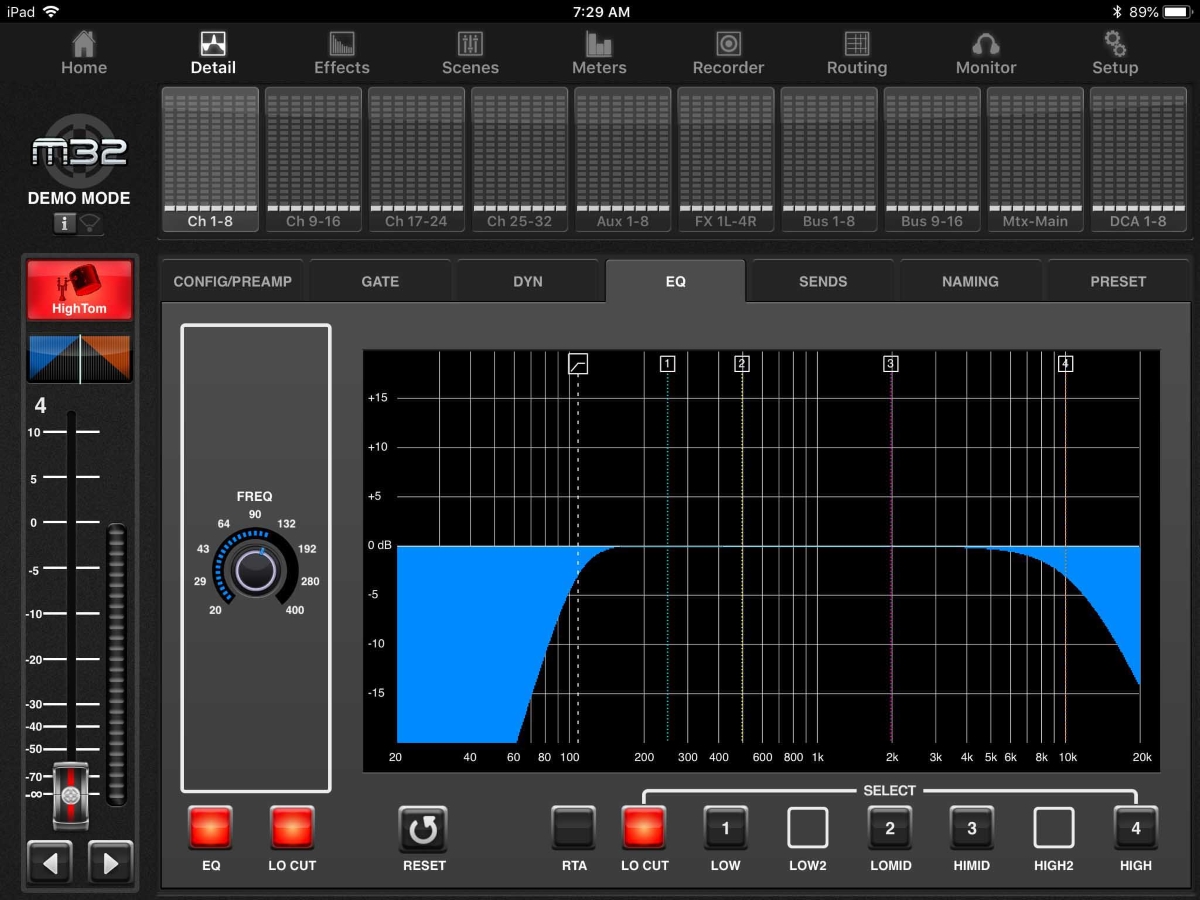
Rack toms don’t have a lot of sonic energy below 100 Hz, so that’s where I set their high-pass filters. Floor toms are tuned a bit lower, so I usually set their high-pass filters around 60 to 80 Hz, varying again shell size and tuning. Depending on how much “smack” you want from the toms, they can also be low-cut around 10 kHz or so without losing anything at all from the top end. One other note: Because I personally don’t like a dark-sounding hi-hat, I usually set the high-pass frequency for it around 150 Hz.
What we’ve now accomplished is setting a bunch of spectrum brackets around each drum input that limits what that they hear to what each drum is actually putting out. These sonic “gobos” go a long way to cleaning up the sound of the entire kit since there’s much less low-frequency leakage into the high mics and vice versa.
By using a combination of the built-in channel RTA on a digital console and most importantly, our ears, it’s easy to create sonic brackets around not only the kit, but every other instrument on the stage. Frequency bracketing works on vocal mics, guitar mics, choir mics, basically anything using a mic, and it makes timbral (basic) EQ of every instrument easier since they’re not fighting each other as much in the mix. But more on frequency carving later…
Editor’s note: This article is part of a collection of drum-related articles from the June 2018 issue of Live Sound International. Read the rest of the stories here.