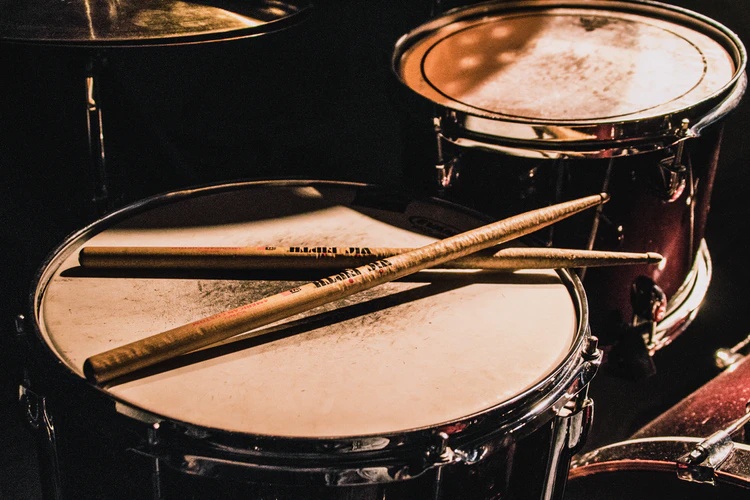
Snare
I experiment often when recording snare drums. If you want to EQ the snare drum mic, use a very clean equalizer that can handle very high peak levels without distorting.
Because a lot of the snare drum is heard in the overhead mics, I take the time to make sure the drummer is using the right snare drum for the song.
Thinking that you’ll just re-trigger a snare sample replacement later, because the snare drum and the sound you’re getting sucks, is the wrong attitude!
Tuning is super important to me, and almost like a guitar, the snare drum must be tightened after each take. Start with a good (new?) head and make sure, like all drums, the lugs are all equally tensioned.
Figure 5 shows the typical snare drum mic position. I was lucky with this drummer; he had a space between the two toms enabling me to sneak in a brand-new Shure SM57.
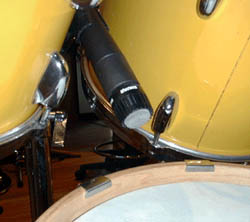
The only other place to get a mic in is from the hi-hat side, but it’s not ideal because the drummer will probably hit it.
In general, I always aim snare and tom mics directly at the center of the drum head where the drummer should hit the drum, recording as much of the transient part of the drum hit as possible.
If there is too much “hit” and not enough tonality, then I’ll move the mic slightly downward, in front of where it is hit.
Try to make sure not to aim the mic at a lug by positioning it equidistantly between two lugs. Pulling the mic back away from the snare drum greatly changes the sound.
Doing this, generally produces a bigger and rounder tone with less attack and a little more ambience. I still aim the mic at the center of the drum and if the back of the mic touches the rack tom, use a right angle XLR connector.
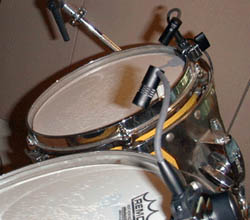
Figure 6 shows typical under-snare miking. I always mic the underside of the snare drum even though I end up using it only about 30 percent of the time.
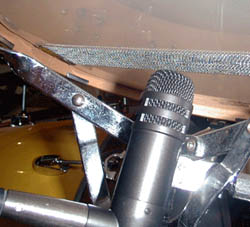
Depending on the snare drum when a drummer hits hard, the attack or “stick” sound is so loud that you have to reduce the snare drum recording level so the peaks don’t distort, and the result can be very little snare sound.
You can use just about any mic under the snare. Sometimes I’ll tape the mic right to the post of the snare drum stand with gaffer’s tape if I can’t get a stand positioned in and around all the other stands.
Very little of this microphone is used in my close snare drum mix – no more than 20 percent. I always flip phase on this mic since the top mic is facing it (Read more here about that).
Using the bottom mic can brighten the snare sound differently than an equalizer. I sometimes roll all the low end out of the bottom mic so it does not add any tone from the bottom head.
Snare Microphone Choices: Some of my favorite dynamics for snare drum miking include a new Shure SM57 or Beta57, Sennheiser MD-421U (if you can fit it in), and Electro-Voice RE-20 (if you have room).
Good condensers are Neumann KM184 or KM185, KM84, Sony C-37A, AKG C 414TLII and C 451 and C 452, and an old Norelco C60. The C 452 has a whole accessory set of swivels and attenuator pads that make getting in close on the snare drum easy.
The Audix ADX90 electret condenser clips to the rim of the drum and is perfect when floor space for mic stands is limited.
Toms
The floor and rack toms are miked from the top only. I‘ve miked the top and bottom of toms and I don’t think it is worth it except for some strange and very tonal sounds.
There is a point at which too many microphones around the kit will cause a loss rather than a gain. Further, I find myself obsessing on too many internal drum balances and not focusing on just making a good drum recording.
The principal question for tom mics is whether to use dynamics or condensers; both have advantages and disadvantages. Dynamics present a “dry” and immediately present sound. You’ll have better isolation from the rest of the kit making balancing easier. Dynamics are also better for loud drummers who hit hard.
Condensers offer a fuller sound and are able to capture more of a drummer’s subtleties. They are great for light to medium drum volumes. Disadvantages include more leakage, more expense and the risk of damage from being hit. They’re also larger and prone to distort more at louder levels.
Figure 7 shows a U87 on a rack tom. Make sure to have the -10 dB capsule pad switched in. I like this microphone, especially for floor toms.

Figure 8 shows a pair of Audix ADX90s on the high rack toms; these are electret condensers that attach to the drum rims with built-in shock mounts.
Toms Microphone Choices: Dynamics include Sennheiser MD-421U, Audio-Technica KP Series, Shure SM57, Beta52 and Beta57; condensers include Neumann U87, KM184 and KM185, AKG C 451, C 452 (w/pads and swivels) and C 414TL11, and Audix ADX90.
Hi-Hat
The all important hi-hat should be miked even though it usually cuts through all the other microphones. Use a condenser for this bright sound that can handle good, hot levels.
I try to get a mic close enough to be almost in the drummer’s way and aim it right where he is striking the cymbals. I record this mic on a separate track and sometimes roll out low frequencies so that the snare drum’s (right next door) low end is not exaggerated.
High-Hat Microphone Choices: Use condensers exclusively! Some of my favorites are AKG C 451 or C 452 with -10 dB or -20 dB pads depending on mic pre, Neumann KM185 supercardioid or the original KM84, or Sony tie tack mic on the end of a stick.
Room Mics
Room mics can often save an otherwise miserable sounding drum kit and lackluster drummer!
The opportunity for sonic treatment of a room mic is almost endless and I always record it on a separate track for post-processing.
Heavy compression effects work best while the drummer is playing because the compressor is presented with the maximum dynamic range possible. The old vintage tube compressors are popular for this, but I’ve had good luck with a Universal Audio 1176LN compressor/limiters, LA Audio Classic II Stereo compressor (these are both FET-based units) and Empirical Labs’ Distressors.
If you’re short of tracks, record this mic on one and monitor it in the middle of the drum mix. Adding a little of this mic gives the overall kit a definite room tone without washing out the stereo image.
Positioning the room mics is the most important decision: too close and it produces a “not-very-useful” tonality shift, and too far away causes a distant sound like added reverb.
In an unfamilar room, this process may be a bit tricky, so don’t hesitate to ask the advice of someone who should know where best to locate these mics.
Room Microphone Choices: Use any condenser that you would use for overheads or vocals. All of the aforementioned models will work fine, and there’s a lot of room for experimentation.