

Operating the sound system from the mix position during a Sunday worship service, “it” all began when the first note from our grand piano was distorted.
Hmm…
We’d checked the piano channel and sound prior to the service, and all was fine.
My first reaction to the distortion now being produced was to reduce the gain on that console channel, thinking perhaps the piano player was “nailing” the keys very hard.
Yet the problem remained. Next, I did a pre-fade listen (PFL) in my headphones – yes, it was definitely distortion on the piano channel, no question about it.
To capture sound from this grand piano, we use a magnetic pickup from Helpinstill Designs, which sends the original vibrations of the strings (the source of the piano’s sound) directly to the mixing console.
Anyway, my next thought was that someone had accidentally bumped the pickup so that it was hitting some of the strings. Oh well, nothing could be done until the service ended, so I just did my best to work around and minimize the problem.
But a quick look right after the service showed that the pickup had not been disturbed. Finding nothing else apparently wrong either, we set up a couple of microphones to capture the piano in case we encountered the same problem during the next service, scheduled to start in less than 30 minutes.
And sure enough at the service began, here it came again – big-time piano distortion! We quickly switched over to the mics, which covered us without major incident.
But now I was completely perplexed. What could it be? Perhaps the pickup unit itself was failing – my most logical guess at this point.
Prior to that evening’s service, we needed to move the piano to a different location on the platform. Looking at the microphone cable linking the pickup to its jack in the floor box, it finally dawned on me to check that cable. Sure enough, it was going bad.
Thus, a $10 mic cable was compromising the sound of our $30,000 grand piano fed to our professional caliber sound system! It often is the simple things, isn’t it? And yet another hard-earned lesson for yours truly.
To avoid this disruptive and embarrassing problem, all I had to do was invest in better cables, and further, regularly (say, once a month) check the performance of each one with another small investment: a cable tester.
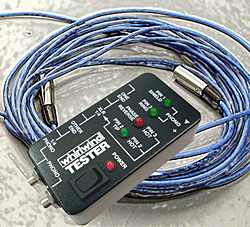
The truth is that our church already owns a very good cable tester made by Whirlwind (called, appropriately enough, the Tester), but I’d simply gotten out of the habit of using it regularly. Big mistake.
There are many models of cable testers available, and most are very simple to use and understand. A suitable one can be had for far less than $100 from your local contractor or retail store.
A device like the Whirlwind Tester can be interfaced with a variety of audio connectors, such as XLR, 1/4-inch and RCA.
Once connected, the tester quickly shows, via a simple read-out on the unit’s front panel, if the cable and connector are working properly. Many will also show polarity (don’t call it phase!) reversal.
A “hands-free” design is preferred to allow manipulation of the cable to locate intermittent problems. In particular, I “wiggle” the ends of the cable right next to the connector to check for intermittent problems, because this is the most likely location where they occur.
Cable testers and testing may not be the “glamour” aspect of audio, but it’s a bedrock that allows the more glamorous parts (such as mixing) to flourish. Why let one of the least expensive aspects of a system be its weakest link?
Gary Zandstra has worked in church production and as an AV systems integrator for more than 35 years. He’s also contributed numerous articles to ProSoundWeb over the past decade.


