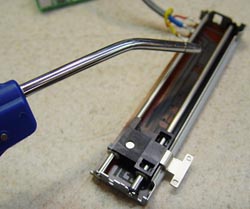
Q: I have an old analog mixer with really dirty faders. I’ve tried deoxidizing cleaner on some of them, but now they feel much worse, yet seem to work okay. What’s wrong?
A: No doubt about it, your mixer is in need of a good cleaning! Here’s a rundown of the steps I normally take.
1. Vacuum and/or blow out faders with compressed air. Vacuuming gets the “dust bunnies” and larger chunks. Try to run the fader up and down while you do this.
2. Treat faders. My preference is CAIG DeoxIT. The reasoning for this is that many other lubricants are thicker, which stay greasy and seem to trap dirt, where the DeoxIT evaporates “almost” totally, leaving a conductive coating on the contacts.
3. After spraying with DeoxIT, blow out the faders once more to remove excess liquid and hopefully the remaining dirt. (Use goggles or take precautions… DeoxIT burns the eyes and tastes only slightly better than WD-40.
4. I’ve been fairly successful using this method. Sometimes though, faders “just flat wear out” and no amount of cleaning will revive them. These worn faders will be among the first to go “scratchy” following a cleaning.
5. One extra item… I’ve observed several instances where the knob was pushed onto the fader so hard that it scraped along the front panel and rare occasions where such downward force was applied to the knob that the fader itself was damaged. Take care replacing the knobs.
And, for more great information on cleanign consoles, check out Properly Cleaning Mixing Console Faders and Zen & The Art Of Mixing Console Cleaning & Maintenance.
For more tech tips go to Sweetwater.com


