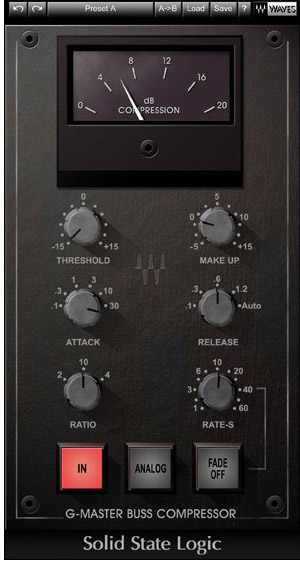
Generally you’ll find that most renowned mixers use the bus compressor to add a sort of “glue” to the track so the instruments fit together better, but that also means that they’ll actually use very little compression.
In fact, sometimes only a dB or two of gain reduction at the most is added for the final mix. That being said, many mixers will also offer their clients (artists, band members, producers and label execs) a more compressed version to simulate what it will sound like after it’s mastered.
This “client mix” is achieved by using a signal path across the mix bus that’s similar to what a mastering engineer would use, that is, a compressor that’s fed into limiter at the end of the chain to raise the level to a point similar to a mastered release.
Because the clients get used to hearing the “client mix,” it’s so easy to let bus compression get out of hand. One of the problems with compressing too much is that it leaves the mastering engineer a lot less room to work, and in the case of a track that’s “hyper-compressed”, virtually eliminates the ability for the mastering engineer to be of much help at all.
There are two times during the mix that you can insert your buss compression – when you first start the mix or towards completion. While the two choices might not seem all that different, you will get a slightly different result from each.
At The End Of The Mix
If you wait to insert the bus compressor later in the mix, (the way it’s been traditionally done), the compressor settings will be a little less aggressive since you’ve probably already inserted a pretty good amount of compression on the individual tracks.
Usually it’s inserted at the point during the mix where most of your elements and effects have already been added to your mix and it’s now time to concentrate on balances.
One of the advantages of inserting buss compression towards the end is that if you don’t like the sound, you can easily substitute a different compressor or even eliminate it all together. It doesn’t take much (usually a dB or two) to make a sonic difference to where it’s at least a little bigger sounding.
At The Beginning Of The Mix
The other way is to insert the buss compressor right at the start of the mix and build your mix into it. Since this affects the dynamics of the mix right from the beginning, mixing this way might take a little getting used to, but it has some advantages.
First, the mix comes together a little quicker since it has that “glue” almost right away as a result.
Second, you’ll find yourself using a little less compression on the individual tracks. This has the secondary benefit of giving you greater control of the overall compression of the mix.
If you feel like there’s too much, it’s pretty easy to back off on the buss compressor to where you or your client feels better about it (if that’s what they’re looking for), where if you added it towards the end, sometimes the only way to dial it back is to tweak the individual instrument compression, which can take quite a bit of time and re-balancing.
The third thing is that the bus compressor tends to even out the levels of the individual instruments a lot so you need less automation. The downside of doing it this way is that if you decide you don’t like the sound of the compressor, the overall sound and balance of the mix can change a lot when you insert a different one.
When starting with the bus compressor in the signal path from the beginning of the mix, you’ll find that you’ll be using somewhat more compression – about three or four dB.
Bobby Owsinski is an author, producer, music industry veteran and technical consultant who has written numerous books covering all aspects of audio recording. For more information be sure to check out his website and blog.


