
Many artists new to recording acoustic guitars only think about placing microphones in front of their guitars.
However, the savvy engineers and producers all know that you can do a number of things to enhance your session even before it begins.
In this excerpt from The Ultimate Guitar Tone Handbook (written with Rich Tozzoli), we’ll look at the 7 steps you (and the artist) can take when prepping for recording acoustic guitar.

1. Change The Strings
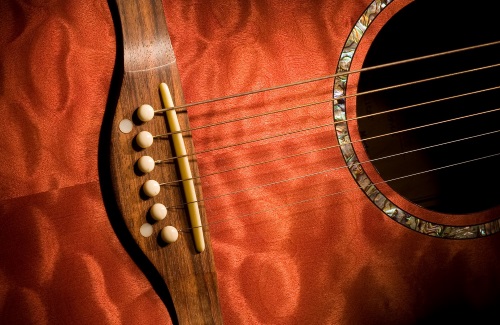
It may seem obvious, but putting on a fresh set of strings may help alleviate any potentially problematic issues such as tuning and a lackluster tone.
Don’t let them be lazy about this because unless you’re going for a dull sound, a fresh set of string will make the instrument resonate stronger, and therefore sound better to the microphones placed around it.
Recordings are snapshots of time, and you won’t want to listen back after that magic performance and wish you had a clearer, brighter sound because you didn’t change your strings. With an electric guitar, you can compensate slightly for dead strings by turning the treble up on the amp.
No such luck when recording an acoustic, unless you choose to run it through an amp, of course. Also, fresh strings will hold the guitar’s tuning longer, which in turn will make for a smoother recording session. You can even put a little graphite from a pencil in the nut slots to let the strings move a bit easier.
Don’t forget they should keep wiping their strings down during the session, as the dirt and oil from your fingers, as well as the simple oxidation of the air, will shorten their useful life.
The type and thickness of string you use, which will also be dictated by the type of instrument you play, will also alter the tone of your guitar.
2. Tune It Up
Make sure they tune their guitar with as precise a tuner as you can get your hands on, and check to see that it’s intonated correctly. They can do this by tuning each string, then playing it’s harmonic at the 12th fret, and then by fretting each string at the 12th fret.
All three should register ‘true’ on the tuner. If they don’t, you know your intonation is off a bit, so either fix it first or be prepared to work around it.
3. Listen To The Guitar
Have the artist just sit quietly with the instrument and play it for a few minutes. Listen closely for any buzzes on the neck, since they signal positions you want to avoid if it’s an issue that can’t be immediately fixed. Get a good feel for how the instrument really sounds so you can compare it to the recording when you hear it played back.
4. Listen To The Room
Listen to how the guitar resonates in the room. Does it enhance the instrument’s sound? A good room will definitely compliment the sound of an acoustic guitar.
Consider whether the room is worth miking. Do a quick check of the room by loudly clapping your hands and listening for any unwanted echoes or reflective ‘pings’.
If the room isn’t great, it will dictate the type of mic you choose because you’ll want to pick up less ambience in the recording.
However, if the room does sound good but has too much reverb, your sound can end up sounding cloudy and less defined. You can sometimes overcome this by setting up on a rug instead of the hard floor to keep the reflections to a minimum.
A short, bright room sound is best for acoustic guitar recording, especially when it includes any combination of wood, tile and brick. Carpeting will deaden the sound, depending on the thickness, so use it sparingly. To get a woody room tone in a carpeted space, lay down an area of wood tiles, like the kind you find in a hardware store.
The sound of the guitar will reflect upwards off the floor, depending on the type of wood and how much you’ve lain down. Having the guitarist face a heavy wooden door is another great trick to get some additional positive reflections, if needed.
In mediocre to poor sounding rooms, consider close-miking close the guitar with a tight cardioid mic to keep the sound focused only on the projection of the instrument. Avoid using omnidirectional mics in poor sounding rooms as the 360-degree recording pattern will capture unwanted room reflections that will not compliment the overall sound.
5. Stand Back From The Instrument
If possible, have someone else play their guitar, using the same technique as the artist do (pick or fingers), since what you hear is different from that of the players’ position and different than what the mics will hear.
Close your eyes, move around, and to try to listen for that sweet spot where the guitar sounds best as it’s direct sound combines with the reflections of the room. Is the best sound on the neck, on the body, or both?
Does the instrument resonate better a few feet back or up close? The only way to know is to listen. The results may surprise you, as different acoustic guitars project in different ways. Remember that the sound hole may not always be the best choice for mic placement. All of this listening will help you make suggestions to the engineer (or yourself!).
6. Consider The Guitar’s Part In The Production
Is the part supposed to fit into a dense mix, a sparse mix, or is the guitar to be recorded solo? Discuss this ahead of time, as it may dictate not only the type of guitar you choose, but also the amount of mics you select to use on it.
The more mics you use, the wider the sonic space you can create in the mix, but this might not be what the song calls for. Do you really need to use stereo mics? If possible, think about the guitar’s place in the mix before you begin.
7. Have Them Take Off Their Clothes
Well, at least have them take off any offensive items such as watches, rings, or jewelry that may bang against the instrument.
Also, certain jackets and/or shirts may have buttons that can cause a problem. And no big belt buckles! Big watches are also usually a problem, so don’t forget to take it off before you begin tracking.
Many great takes have had to be redone because of extraneous noise from clothing and jewelry, so remove the problem even before it becomes one.