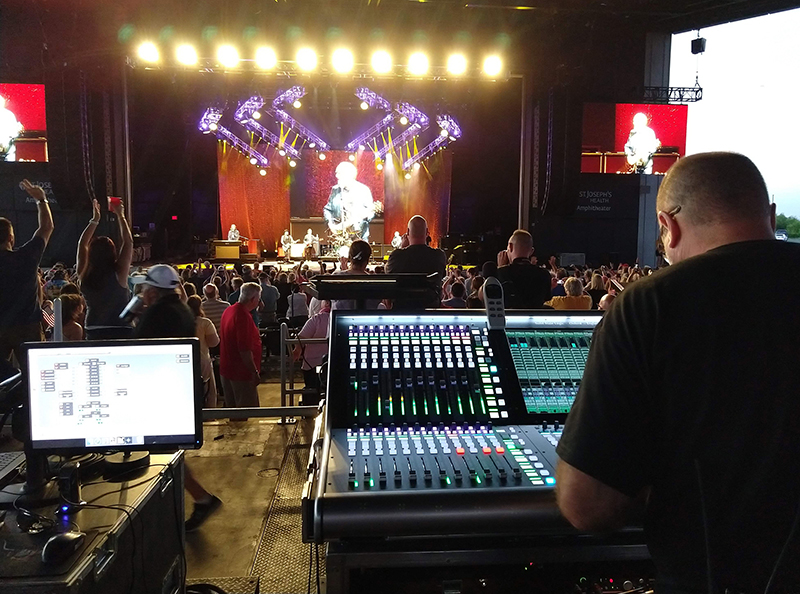
On an Avid S6L, it’s extraordinarily easy to spill out the members of any output fader type, so putting a VCA or group onto a layout means that I can quickly still access every member inside of that group or VCA and modify it quickly. Even if I didn’t want to spill it, the members of the group are also displayed on the encoders above the group, so as a good example, I leave my toms in a VCA with the encoders above the fader showing me the four tom fader levels on encoders.
One of the things to be aware of when using VCAs and groups though, is that if you have FX sends on input channels, and you move that VCA, the post-fader FX sends will change in level, but if you change the level of the group for the input, you’re not changing the effect’s send level. So, unless your FX for that channel is returning to the same group you just moved, you’ll be really affecting the relationship between the source’s level and the FX return.
Samantha Potter (FOH): My first layer of organization comes at the bank level. I make sure my channels are in the order that I build them. That is to say that I consider the drums (and their relationship to the bass) the fundamental part of a mix, so they go first. Then followed by percussion or rhythm instruments, more musical instruments next (such as brass, piano or keys depending on the genre), and lastly vocals. I prefer lead vocals to be last so I don’t need to seek them out on a layer. Depending on how many physical faders I get per bank or layer, I keep rhythmic instruments together, “musical” instruments together, and vocals together. I don’t want to have to search much if I can at all help it. Whenever I can I try to keep all my inputs on a single layer, but that’s often not a luxury I’m afforded.
I really only use DCAs as a remote control. They’re great when you get that balance absolutely perfect and you don’t want to disrupt it. I usually make one DCA for the kick/bass, one for the rest of the drums, one for the rest of the band, one for vocals, one as an FX master, and if I’m doing aux-fed subs, I’ll use a DCA as a sub/master control. These are great when you need them and make organizing a little bit easier.
I only employ subgroups when I want to process a group of channels (imagine that) – drums and large groups of vocals. Compressors can make quite an appearance in my groups. It can be that extra little magic touch, but really I try to handle as much as I can going into the board so that I don’t have to over-process everything. The less I need to do, the better. My techniques are truly for organization and less for imparting myself into the mix.
Jim Yakabuski (FOH): When faced with an extremely large input list (in the range of 50 to 80 inputs), I begin by planning an overall channel layout on my console that’s going to provide the quickest access to vital inputs, in addition to channel groupings that make the most sense visually. My default channel layout usually involves following the input list mostly 1 to 1, and then I move a few important channels around strategically to place them on familiar and accessible fader banks. However, with larger channel counts, this isn’t always the best plan.
I’m a big fan of utilizing DCAs for channel grouping, but depending on the console I’m using, things are laid out differently based on the amount of DCAs that can be assigned to the Center or “Master” Bank(s). One console brand I really enjoy mixing on is DiGiCo, and the SD7 is one of the best on the market for allowing quick access to larger numbers of DCAs and “personal, custom assigned” banks of channels. With the additional “upper” bank of 12 faders located immediately above the 12 faders of the master section, you can assign an additional 12 DCAs or faders of your choosing for a total of 24 easily accessible faders in the center of the console, where you happen to be standing to mix.
Other console brands like Yamaha, SSL and Allen & Heath have options in their workflow to easily move channels around into custom fader banks (Yamaha), or easily maneuverable fader bank layouts (SSL and A&H). With these options, it’s easier than ever to locate important faders exactly where I want them and even place them on layers that will never change even when an overall bank change is made. I was always a fan of the Avid Profile’s “Bank Safe” feature for this very reason. I could place my lead vocal directly on the first fader to the right of the DCA’s, and that’s where it would stay for the whole show! How convenient…
