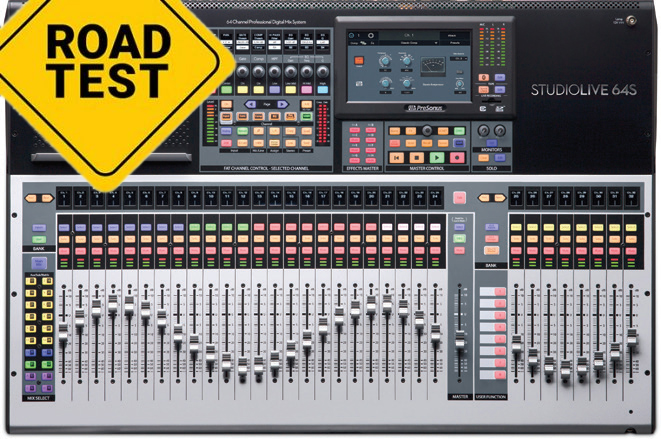
The StudioLive 64S is the new flagship of the StudioLive Series III line of consoles from PreSonus. It offers 64 primary inputs in addition to 8 stereo FX returns, a pair of stereo Aux inputs, plus Tape In and a dedicated Talkback input. On the output side, in addition to the main Mono and Stereo mix buses, there are 32 buses (which can be configured as aux or subgroup, and buses 17 – 32 can also be configured as matrices) and 8 dedicated FX buses.
The console surface is laid out with 24 faders on the left, a master fader in the center, and 8 more faders on the right. This right bank of 8 faders can be banked independently, for users like myself who prefer the “euro” style layout of inputs on the left and masters/DCAs on the right.
Alternatively, if no DCA or bus master layer is selected on the right, those 8 faders simply function as an extension of the left bank of 24, allowing an operator to work directly with 32 inputs visible at once if preferred. Selecting a DCA group will spill the member inputs onto the left fader bank. In addition, a User layer is available.
Pressing one of the Mix Select keys running down the left edge of the surface will flip the console into sends-on-fader mode, which also assigns the bus’s master level to the main fader and allows the channel strip pan control to function as bus pan into stereo buses. I mix a lot of IEMs, so this last feature – noticeably absent on some other consoles in the price range – is highly appreciated.
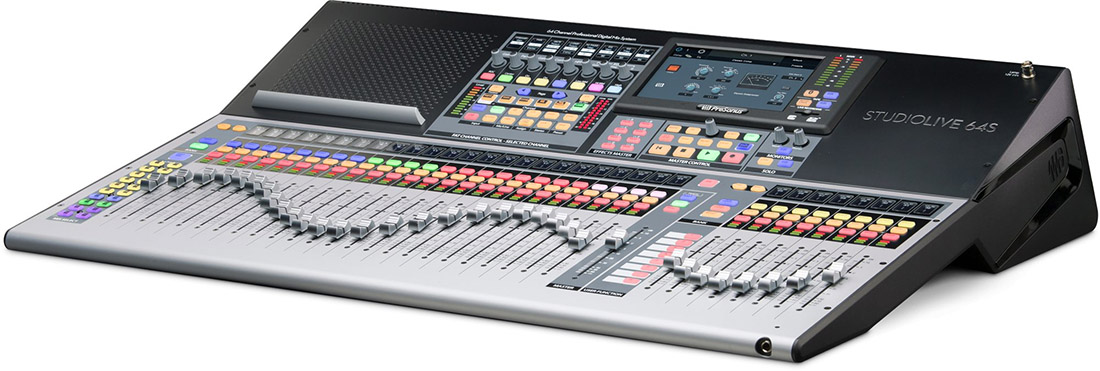
These Mix Select keys give one-touch access to buses 1 – 16 and FX buses A – D, while a second press causes the selected button to flash and gives access to 1 – 17 and FX buses E – H. This can take a little getting used to, as my work with other consoles has me in the habit of tapping the bus flip key again to exit sends-on-fader mode, and on this console that puts you into another mix, rather than leaving the mode completely. On the 64S, tapping the large Main Mix button gets you back.
Holding the main fader’s Select key can lock it to the Main LR mix, instead of having it follow the currently flipped mix master, but there’s no persistent visual feedback for this function (the main fader has no scribble strip) so caution is advised here.
Getting Around
A big test of a console’s workflow design, for me, is seeing how far I can get through setup and operation without consulting the user manual. The basic channel strip functions are clearly indicated in the dedicated channel strip section, and I found that using the touch screen in conjunction with the touch and turn knob was often the fastest way to adjust desired parameters.
Operations like soft patching and channel naming were straightforward, and I found it quite easy to swap out the “stock” channel EQ or compressor for a plugin via a simple menu. As a child of the digital revolution, I’ll take a standard parametric EQ any day of the week, but I’m positive that the included analog EQ plugins will be a hit with many users.
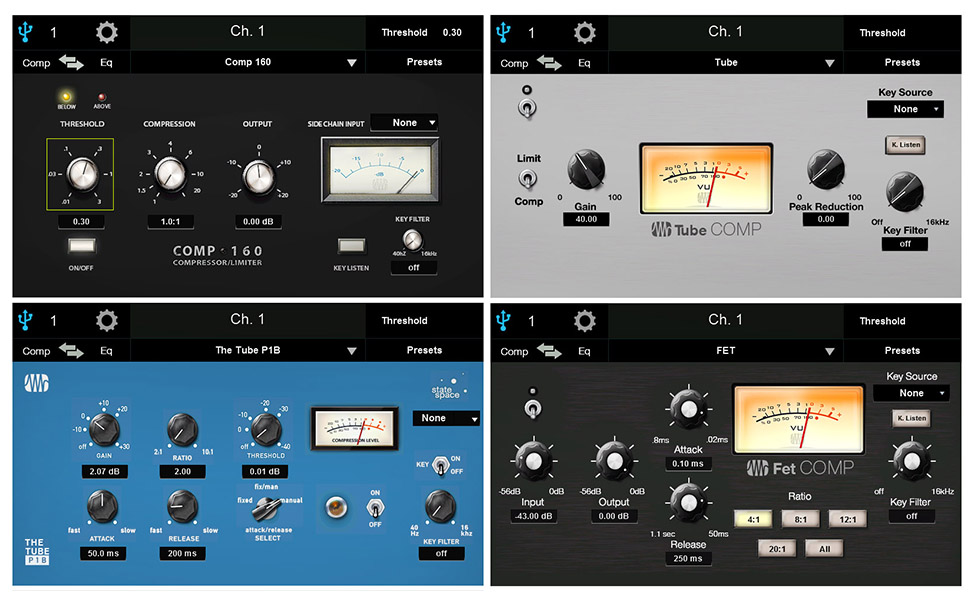
Conversely, I will admit to having a soft spot for vintage analog compressors like the 1176LN and the LA2A, and so the vintage comp plugins are a great treat for when I want a little character that would, on many other consoles, necessitate burning an FX slot. Not so here – these plugins can be swapped into any and all input/output channels as desired, and a wider selection of 11 more plugins is available from PreSonus for an additional fee.