Greg Price got the ball rolling last time (here) with the first in a series of articles sharing our knowledge of the vocal chain. It cannot be re-emphasized enough that the vocal is the most important part of your mix, and therefore should be the first focus of any good mix.
When I was a young engineer, I asked my friends who were not musicians or mixers what they liked (or disliked) about my mixes. Without fail, comments were about the vocal. Obviously there are elements of a mix that must be there in order to support the vocal, but ultimately vocals are the key to comments like “that’s the best sounding band I’ve ever heard.”
A very prominent recording engineer/producer once told me that he views a mix as a beautiful plant. The vocals are the flowers that everyone gazes at in admiration, but without a solid root system and stem (drums, bass, guitars), the flowers would not be possible.

Both Greg and I use Waves Audio plugins to help achieve excellence in our mixes, but please note that we’re not suggesting using all of these tools all at once. Used sparingly, however, they are akin to bringing a gun to a knife fight.
Previously, Greg concluded at number 4 by discussing the C6 Multi-Band Compression plug-in, so let’s pick it up from there.
4. Multi-Band Comp, Continued
I’ve developed a few presets for the C6 that I believe are a great starting point. Give them a try. Again, they’re intended as starting points, not as “be all, end all.”
The specific vocal preset that Greg mentioned was created out of necessity, for my own needs. I wanted to have a preset where the threshold, attack, release, and ratio parts of the plugin were optimized for vocal. Basically the goal was to be able to properly gain up any vocal, with the preset as a great starting point.
I experimented for over a month with different bands to come up with it. The floating, additional two outside filters are intended to adjust the frequencies that are problem areas, but the inside four filters should work pretty well as they’re set up.
5. MaxxVolume
With the advent of in-ear monitors, I’ve found that singers have become more dynamic over the years. This can be good and bad. Dynamics are a very important part of music, and absolutely are what make a mix stand out. But in the case of vocals, the goal is for every single nuance of the singer to be heard over the top of an often complicated mix.
One of the tools that I don’t go anywhere without is MaxxVolume. It’s an expander, compressor, limiter, and gate. Prior to using this plugin, I’ve worked with singers where I had 20 dB of fader swing and chasing going on. If set properly, the MaxxVolume sits my vocal squarely in the mix, and with small fader moves keeping it there, allowing me to focus on other elements of my mix instead of chasing the vocals all night long.
I use the Vocal Absolute Level preset as a starting point with MaxxVolume. The Low Level side of the plug is the “expander” side of the plug, the High Level side of the plug is the “compressor,” the Leveler is the “limiter,” and Gate is the “gate.”
Don’t forget to toggle the loud and soft button above the metering, which adjusts release times of the compressor. Set thresholds for compression and expansion, and set the limiter to engage when the singer is over the top. It will take some experimentation on your part to get the desired result, but you’ll know it when you find the sweet spot.
Finally, there is the gate feature. Wait – a gate on the vocal? Trust me, this is an amazing tool. Have you ever solo’d up a lead vocal and noticed that along with the vocal is a lot of extraneous stage noise? Especially when the singer is running across the stage in front of the amp line, etc.?
This gate works very nicely in eliminating a lot of this noise, and can clean up the mix significantly. Give it a try and listen to your mixes with it engaged versus not, and I think you’ll be pleasantly surprised.
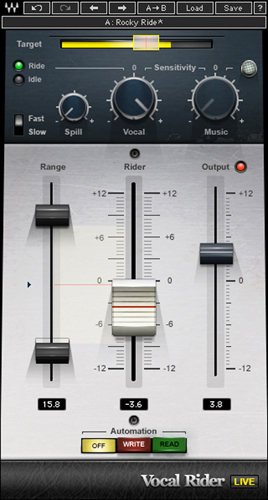
6. Vocal Rider
Most compressors change in timbre the harder they’re hit. More gain on the input side, and most compressors have a “pumping” or a “squished” sound to them. This is timbre change, and for some applications, that’s what we’re shooting for.
But personally, I don’t like my vocal to sound compressed. I want it to sit hot in my mix, but when the singer screams, I don’t want it to sound like every piece of electronics is about to explode.
Vocal Rider does compression and expansion without timbre change, which can be an incredible tool if that’s what you’re seeking. Vocal Rider Live has some extra tools that really help live engineers.
Two knobs are added at the top: Music and Spill. It’s a “look ahead” plugin, meaning that it actually looks at a signal and can differentiate between a vocal and unwanted ambient stage noise, thereby providing better tracking of the compression and expansion.
By adjusting the Spill and Vocal Sensitivity knobs, you can get a really nice result of compression and expansion only when the vocal is occurring. The Music Sensitivity knob is an additional tool that allows use of the side chain of the plugin. If you feed a bus of everything else but the vocal into the side chain, the plugin actually takes this into account in deciding what to compress and expand.
7. Vocal Group/Bus Compression
Bus compression can be tricky. As the mix fluctuates dynamically, you can be hitting an inserted bus compressor very hard and really destroy the mix. Besides parallel compression (which Greg will cover in the next article), I use bus compression sparingly.
Earlier I noted the timbre change that can occur with some types of compression. Often that’s what I’m looking for with bus compression. Waves has modeled many amazing compressors over the years and has developed some software that really captures the essence of the original piece of gear. Plugin modeling is an art form. Taking an analog piece of gear and creating a software version that looks, acts, and most importantly sounds, like the original piece of gear is a very hard thing to do.
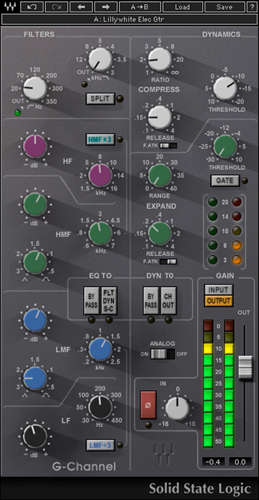
One example of this is the SSL Comp plugin. In the late 1970’s, Solid State Logic developed large-format mixing consoles that every engineer of the time used (or wanted to use). Almost every favorite record in my collection was mixed on an SSL E Series or G Series SSL console, and the latter included a bus compressor in the master section that became the sound that we all used while mixing records. So any time I need bus compression this is my go-to plugin.
Touching on presets again – you’ll notice that this plugin also includes presets from some of the most respected engineers in the business. Who wouldn’t want the settings that Steve Lillywhite uses? I start here and adjust.
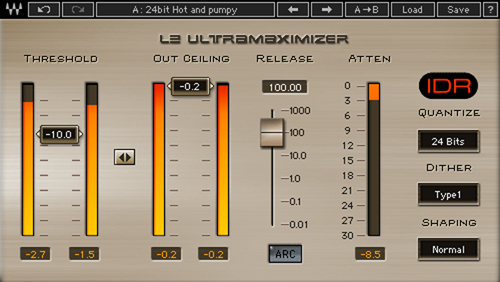
Finally, on my mix bus, I deploy the L2-Ultramaximizer. It’s the sound of today. Every major recording in the last 10 years has utilized the L2. It has brick-wall limiting in a way that no other limiter can do.
My mixes sound bigger and fatter while still able to play within the lines of sound pressure levels that are increasingly becoming legislated.
One other thing to point out that many overlook – every Waves plugin includes a question mark on the right side. Click it and you go directly to the individual manual. It’s a very handy tool as you start to become acquainted with the plugins.
Next time Greg and I will talk about vocal EFX and offer further info as well as a summary of this series.
(Editor’s note: This article originally appeared on PSW in 2013. Part 1 is here.)
Ken Van Druten is at “Pooch’s Corner” and Greg Price is at “Greg’s List” at www.waveslive.com.


