Ken Van Druten and I are engaging in a series of articles, starting here, that are focused on live sound plugin applications. We’re both live sound engineers, recording engineers/producers, and writers/educators who will be sharing the powerful processing and sound design tools that Waves Live plugins bring to our workflows.
We’re going to start the series with vocals, arguably the most important input every engineer faces. First, on a live stage, the vocal is one of the most opened and gained up microphones on the stage.
Second, it’s paramount that the vocal embodies great clarity, texture, dimension, and quality.
Third, the vocal on a live show, recording, video, and TV broadcast is one of the most important elements of the mix. The audience wants to hear the singer sing the song, not hear a symphony for the kick drum.
So let’s dig into this thing. It’s a subject so important that we will spend three articles in the series on the subject.
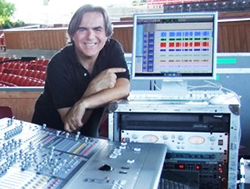
Here is the road map that we will cover:
1. Basic Input & Channel Selection
2. Compression
3. DeEssing & EQ
4. Multi-Band Compression
5. Max Volume
6. Vocal Rider
7. Vocal Group/Bus Compression
8. Vocal Effects
9. The “Kitchen Sink”
There’s a lot of ground to cover so grab your microphone and let’s rock!
1. Basic Input & Channel Selection
When it comes to mic selection, use some common sense. Chose the right mic for the right job. Common engineering sense will go a long way to keeping symphony/recording condenser mics out of the hands of a heavy metal screamer capable of collapsing the diaphragm of a Shure SM57, let alone a SM58.
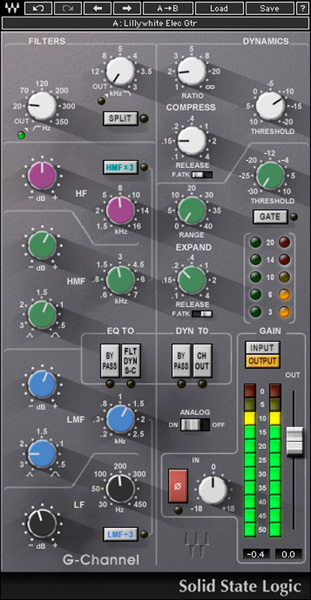
Channel selection for me is very easy. I’ve used the SSL G Channel from the beginning. Two other favorites are the Renaissance Channel and the SSL E Channel.
Remember this is your first stage of what could be a good plugin chain. Plan and think wisely. As you go down the chain, never lose site of the finished vision you’re creating. If you find that sound you’re looking for, STOP. So often, I witness engineers and producers continue adding processing and losing their way toward that great finished sound that fits the singer, music, and the mix.
2. Compression
I start simple. Using my favorite, the SSL G Channel, I begin by loading the CLA Vocal preset from the “Load” drop-down menu and head for the filters. Filters on consoles and plugins are a very overlooked but powerful element to vocal sound.
My vocal starts with 160 Hz – 200 Hz of high-pass (HP), depending on the singer. If he or she is popping the mic, I might go up to 200 Hz on the HP. Note that you could lower the HP on the plugin and use your digital console’s HP filter to handle this task depending on your taste.
Compression on the SSL G Channel is next, my first compression stop on the vocal. I like to ease into this first stage of compression: 2/1 ratio and very light -2 to -3 dB of gain reduction is what I look for. I engage the EQ To (FLT_DYN_S-C), sending my EQ to the comp. FATK is in for fast attack.
By the way, this is my start for all vocals in the mix.
3. DeEssing & EQ
I’m ready to move on now that I have addressed the bottom and top of my vocalist. The SSL G Channel gives me the texture I want from the modeling of an SSL console that is embedded in the plugin.
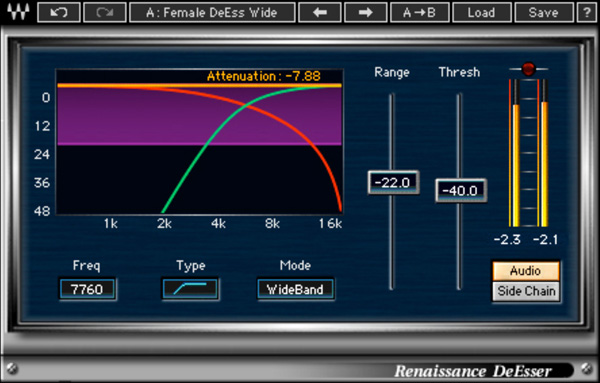
I very rarely use de-essing; however, it can be a very effective tool. The combination of a vocal that has an abundance of “ss” (sibilance) and the ability of modern PA systems to amplify and project those “ss” sounds can be a challenge.
Add in hi gain on the vocal and all of the sudden you have 10 kHz really singing. A simple shelf setting between 6.3 kHz and 10 kHz on the Renaissance DeEsser will do the trick. Experiment here with Threshold and Range. You can be as subtle or aggressive as you need to be.
“Corrective EQ” is a technique I find very useful. I prefer to remove a disruptive or non-musical frequency rather than boost away to the sound.
Modeling tools embedded in the H-EQ Hybrid Equalizer plug-in continues my theme of a natural vocal. H-EQ has UK vintage/modern, US vintage/modern, and Digital offerings that fall in line from where I started on the SSL G Channel.
I find the music key signature and it’s easy to achieve a musical EQ solution for my vocal on the “keyboard” that lives in H-EQ. I look for that one frequency where the vocal mic resonates in the PA system.
Instead of removing that frequency from the entire sound system, I will make a small correction on the vocal channel.
This leaves all of the other inputs the benefit of that frequency. Typically we find 315 Hz to 630 Hz to be an area to look within the vocal and the resonate point in the PA system.
H-EQ is not done yet. By adding the killer Analog level and THD level control section, I now have ultimate control of the production of my vocal. Experiment with the Analog/THD section – you will discover a powerful tool.
4. Multi-Band Compression
The C6 Multiband Compressor is the “live and dynamic” workhorse for my vocals. I will not have a vocal without the C6. If you told me I could only have one tool to use for my vocal, I would say “C6” before you finished the ultimatum.
My application is stupid simple on this plug-in. Ken has written an amazing vocal pre-set for the C6. I simply go to the “Load” drop-down menu, load Ken’s preset, and BAM. Yes, I tweak frequencies, but most of the time it’s perfect from launch.
That’s it for steps one through four. I’ll pass the discussion to Ken, who next time will discuss his C6 pre-set and continue with the list. In the third (and final) segment, both he and I will together address the remaining points.
(Editor’s note: This article originally appeared on PSW in 2013.)
Greg Price is at “Greg’s List” and Ken Van Druten is at “Pooch’s Corner” at www.waveslive.com.


