Vocals are such a huge part of what makes a song memorable to every individual listener. In pop, rock, opera, country, and especially worship music, the element that often makes a song special is the vocal(s). A great vocal performance coupled with amazing and meaningful lyrics is the icing on the cake of a great song and in the world of live sound mixing, awesome sounding vocals can be the difference between a three-day-old cupcake and a three-tiered wedding cake.
In worship music, where the lyrics mean so much, it’s doubly important that we use every audio tool at our disposal to create a “worshipful” mix for the congregation with pristine sounding vocals front and center. If you’re lucky enough to get to mix great vocalists that understand and exhibit excellent microphone technique, you’re halfway there. More than a few sound engineers have reached their wits’ end struggling to turn a poor vocal performance (and a less-than-professional mic technique) into an acceptable finished product.
As audio mixers for worship music. our first priority is to make the lead and background vocals sound great by creating both clarity and warmth so the song lyrics are clearly heard yet pleasant to the congregation.
Getting Started
If you’ve read my previous articles, you’ve undoubtedly seen me mention this before: It’s hard to dial in a fantastic sounding vocal if the PA system is not tuned, so do all you can to make sure the system is balanced before reaching for the channel EQ. This can be done by simply playing some music through the system and leveling out the frequency bands until the music sounds like it ought to, or taking things a step further and testing and analyzing the system with software such as Rational Acoustics Smaart.
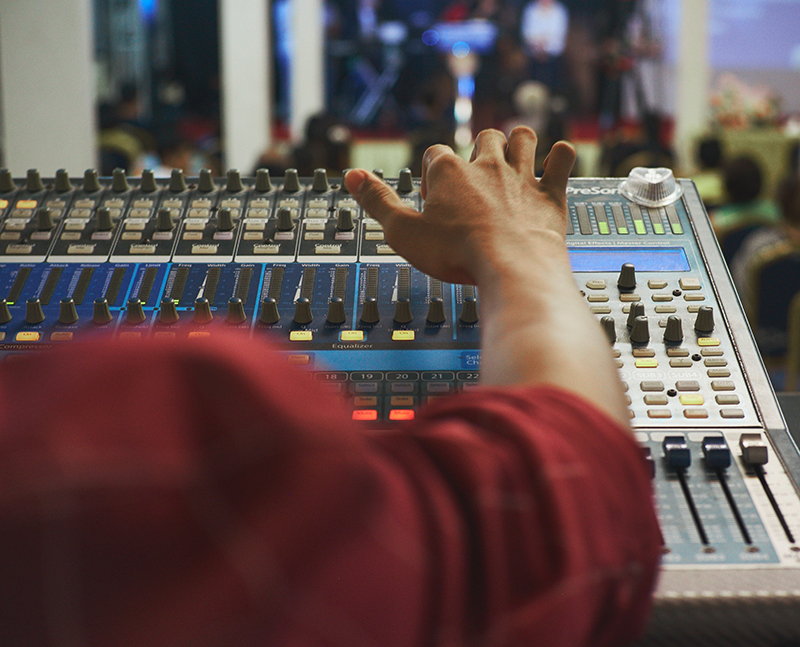
That said, it may sound a bit over-simplified, but I strongly suggest first focusing on the preamp gain, high-pass filtering (HPF), and fader. Getting this right goes a long way in building a solid foundation.
Preamp Gain: Begin by adjusting the gain knob (fader down at this point) while the performer is singing or speaking into the mic at a good level. Listen in headphones while watching the input level meter. Slowly bring up the preamp gain until you see a nominal (or average) signal that hovers around the “0 dB” mark (analog) or -16 dB or so on many digital mixing boards. If you’re looking at the LED meters, aim for “kissing yellow.” We want the gain set so that quiet passages from the singer arn’t reading too low on the meter but loud bursts aren’t causing the meter to clip or go into the red.
HPF: A quick note – high-pass = low-cut – when you engage an HPF, it “passes the highs” by way of “cutting the lows. Older consoles have a fixed-frequency switch, but most modern models have a frequency-variable control HPF on each input channel.
This feature is possibly the most powerful and under-appreciated tool on a mixing board. It can be implemented on selected channels to roll off low frequencies that cause “muddiness” in the sound system. Particularly with vocals, excessive low frequencies can really hurt the clarity of your mix. With a lead singer and several background singers all singing in a lower register, this can really build up and become an unwelcome pile of mud in your mix.
Again, while the performer is singing or speaking, solo the channel in your headphones and focus on the notes in the lower register while slowly increasing the corner frequency (the frequency at which the filter is cutting by at least 3 dB) of the HPF. A setting in the 100 Hz to 200 Hz range should get rid of the unwanted buildup of low frequencies and clear things up.
Now slowly turn up the fader and see how it sounds in the PA system. If the HPF frequency needs to be much higher than 200 Hz, you probably have an abundance of sub and low frequencies in the PA, so it will serve you well to reduce these before proceeding.
Don’t be afraid to do some touching up as you go. With the vocal in the PA, you may want to set the HPF frequency a touch higher if the performer is singing mostly lower notes, and in other songs, when the register is much higher, you’ll sometimes find that backing down the roll-off frequency brings warmth back to a vocal. It takes some experimenting, but eventually, you’ll settle on a happy medium that results in a nice warm low-end without mud and buildup.
Additional Tweaks
After successfully setting the preamp gain and HPF, you’ll probably feel the need to touch up individual vocals some more. Continue keeping it simple. Make small and thoughtful adjustments in working toward the final product. The principal tools to get you there are EQ, compression, and effects (FX).
EQ: Some consider HPF to be a part of the EQ section I do,) and assuming that’s set nicely, the next step is some minimal EQ. Once again, if the PA is tonally balanced, there shouldn’t be the need to do much more. I suggest first applying subtle broad strokes versus multiple narrow, deep cuts and/or boosts. In addition to the HPF, try cutting some frequencies in the 200 Hz to 250 Hz range. A bandwidth around .5 to .75 of an octave wide with a 2 or 3 dB cut should make a nice difference.
I like to use a “balanced boost/cut relationship” when making EQ adjustments. I cut a little bit in one area of the frequency spectrum (e.g., lows), and boost a similar amount in the opposite area (highs). For example, if the vocal is slightly dull and lacking clarity and crispness, try cutting some lows and low-mids while also adding high end.

I often use a high-frequency shelf to boost clarity and presence. It doesn’t take much. Set the corner frequency around 5 kHz, add a decibel or two of boost, and watch that vocal cut right through the mix. After doing this, you can often turn that channel’s volume down a bit on the fader. Alternatively, if the vocal is excessively “harsh” and sibilant, try making a couple of cuts in the 2.5 kHz to 10 kHz range. Couple that with filling in any low-mid cuts you may have made earlier while also lowering the HPF frequency.
Imagine a seesaw when equalizing. The lows are on the left and highs are on the right, and the center pivot point is 1 kHz. If the overall tonality of the vocal is too thick and dull on the top, cut some lows and add some highs. If it sounds “gnarly” and is ripping your face off, try lowering the highs and adding back in some lows.
Another helpful trick I’ve learned over the years when EQ’ing vocals is choosing a different “tonal character” for the lead vocal versus the background vocals. I like lead vocal to have great clarity and presence so the words of the song are easily understood, but if I equalize all the other vocals in this way, I usually run into “overcrowding” in the high-frequency spectrum.
To combat the problem, I choose “warmer” EQ for the background vocals – with the crispness and clarity rolled back some. This EQ technique, along with panning the background vocals to the left and right of center, helps create space in the middle for the lead vocal and an overall sense of width and depth for all your vocals. Give it a try!


