Microphone Choices
There are three microphones choices for vocal recording: condenser, dynamic and ribbon. The differences are vast and the right choice can make or break the vocal sound and performance.
Most of the time, a large diaphragm condenser mic is used for vocals for its ability to capture the loudest to the softest of sound and nuance.
The large diaphragm offers a big surface area to pickup low frequencies and most modern condensers have huge dynamic range specs meaning it will be difficult to distort them with close, loud singing.
While old vintage condensers sound wonderful, I find them (depending on their condition and upkeep) a little more finicky, temperamental and a little unreliable compared to some of the newer mics coming from Germany.
So in the world of condenser mics there are a lot of great choices. I like the whole line of Brauner mics, Neumann (both new and vintage models), an AKG C12, Sony’s out of print C-800G and vintage C-37, Manley Reference, David Bock, and Dave Pearlman mics, and John Peluso remakes of classic vintage mics such as his 2247 SE or P12 models.
Dynamics in the studio work great for loud and brute force singers. There is nothing like the urgency of the sound brought on by a good dynamic mic. Some singers must physically hold the mic to “produce” their vocal sound because they are used to working it during live shows.
I’ve tried to let them sing their vocal that way if there is no handling noise and minimal P-popping. I’ve sometimes given the singer a handheld dynamic mic while standing in front of stand-mounted condenser mic. I would record both mics to two tracks and later go between them in the mix.
The list of good dynamics is long and here are a few worth using for studio vocals. I like Shure SM7A or B, Electro-Voice RE20 or RE27N/D, and Heil Sound PR 40, PR 22, PR 20 or PR 20 UT.
Ribbon mics have always been favorite vocal mics, dating back to the 1930s. Today the modern versions are better than ever with wide-open sound, more gain and rugged ribbons less prone to damage from close vocals like the old classic models.
In general, ribbons are great for harsh or bright sounding voices that need some mellowing. I like the AEA R84, Shure KSM353, and the Coles 4038 with its “brontosaurus bottom end.”
Microphone Positioning
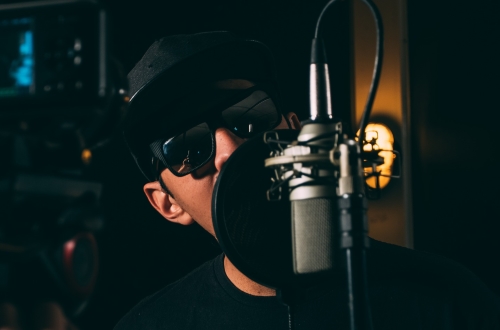
The mounting, positioning, distance from the singer, and even the angle of the mic all weigh heavily on the finished vocal sound.
I like to use a heavy floor stand and boom. I try to position the boom’s counter-weight opposite the singer — out of the way. The counter-weight should be padded in case someone does not sufficiently tighten the stand’s height and it slips and comes crashing down.
I learned a lesson years ago when, in a hurry, I (or the other assistant) didn’t fully tighten a mic boom overhead of session drummer Earl Palmer’s kit.
Halfway through the session it came down and the counterweight hit him in the head. The producer nearly called the session while ol’ Earl stopped bleeding. (Sorry again Earl!) I prefer to use a good shock mount microphone holder and hang it so the mic’s capsule end is about eye level and aimed at the singer’s mouth.
Check with your singer(s), who will have a definite preference as to the way they like to project sound towards a studio mic. It is better to angle the mic down rather than allow the singer to sing straight into the mic’s capsule.

Windscreens — Pop Filters
With the mic angled and above the source, you may not need to use a pop filter, but your singer must keep from pointing upwards at the mic; this will defeat the whole purpose.
So if the singer can sing straight ahead just below the bottom of the mic without tilting up, then no windscreen is needed.
If the singer cannot keep straight ahead or wants to sing directly into the mic, you’ll have to use a screen. There are several great models out there and for the perfect popping storm — singers with an extreme popping problem try Pete’s Place Blast Filter.
Middle Atlantic has a more conventional two-stage nylon mesh type.
The Stedman filter is also a good choice because, like the Blast Filter, it’s metal and washable.
Pop filters change the sound slightly. There is a greater or lesser loss of super high frequencies depending on the particular filter. But there is another method to reduce plosives — an ordinary #2 pencil.
Although not as effective for big pops, this trick will kill most small pops.
Simply strap the pencil vertically in line with the mic body’s length (assuming you are hanging the mic vertically) using rubber bands (don’t use tape) so that the pencil bisects the face of the capsule.
The pencil will disturb the puff of air from a P pop and divert the impact from the capsule.

Headphones
Headphones for you singer are very important. I have several different models I bring if the studio’s selection sucks.
All three of these models are closed-back, circumaural earphones that attenuate ambient noise and keep the cue mix from leaking out.
I like Shure SRH840 phones for their fat and loud sound. Ultrasone HFI-680 are bright phones your artist may prefer, and finally, AKG K271 phones or some variant offer the most unvarnished truth of the sound.
Try to get your singer to keep both ears covered with the phone cushions to prevent spill. The phones should fit well and make sure a powerful amp drives them.