
We’ve all been there. The room is highly reflective or the PA can’t be placed in a preferred location for whatever reason. Or both.
Ideally, you’ve noted the challenges during a walk-through and can put some thought into an overall approach and a system design that will produce success despite the obstacles.
My most recent “nightmare room” serves as an example of what can be done.
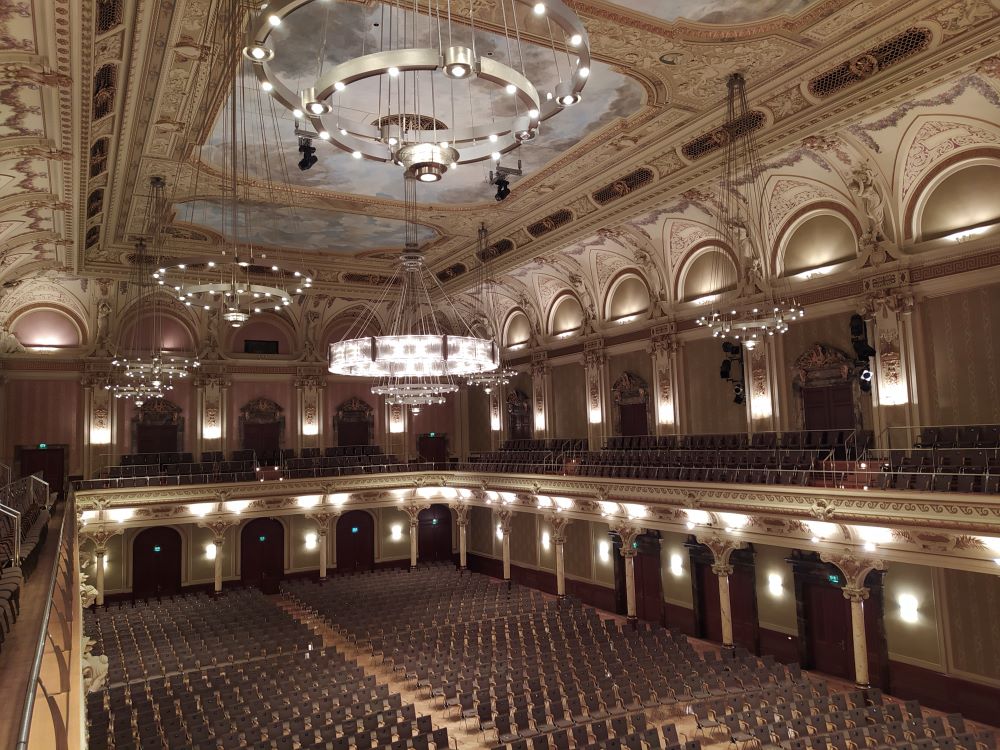
The space was square with two glass walls of full-length windows, two more walls covered with mirrors, a marble floor and a flat plaster ceiling. (I told you it was a nightmare!) Of course, the corporate client for the awards banquet my company was supporting expected great sound from both the presenters and the band.
The first thing I noticed during the walk-through was that the two walls of windows had drapes, so I asked the client if we could close the drapes.
She allowed one wall to have the drapes drawn, but the other, opposite the stage (of course), was to be left unobstructed so that attendees could enjoy the view. Still, the drawn drapes on the on wall helped (quite a bit, actually).
Next, I asked if we could run some pipe and velour drape (provided by my company) behind the portable stage, which resided in front of one of the mirrored walls. She liked the idea, so we got a double bonus: improved acoustics and a fee for the pipe and drape.
I was then informed that a large video screen would be placed along the other mirrored wall. Checking in with the video company later, I was informed that a dress kit (velour drapes that frame a screen) would be provided, and while the kit’s main function is to make a bare screen look better, it also would provide some damping.
Still, the PA and stage were facing the uncovered wall of windows, so even with the modest improvements elsewhere, there was still the potential for major refection and slap-back issues. Our solution was to place the main loudspeakers high up on my custom stands and point them down toward the audience, enhancing direct coverage while also helping to keep energy off the glass. In addition, the subwoofers were placed at stage left only – at stage right they were too near a reflective wall.
Well prior to the event, I contacted the band for some advance information. Significantly, I learned that the drummer has a big kit with large tom sizes and the guitar player uses a half-stack with a 4 x 12 cabinet.
We mitigated the drum sound with a plexiglass shield around the drummer, and with the guitarist, we spoke with him about turning down his amp and also pointing it sideways. But at sound check he insisted on having his amp face the audience, so with the mix, I brought the rest of the band up around him, and pretty much left him out of the PA. And, the bass player was kept in check by having him turn his amp down to a reasonable volume level, and to compensate, we put more bass in his monitor.
The space was still highly reflective but would have been unusable for an amplified system if we’d not been proactive. The client was happy and a couple members of the venue staff told us that it sounded better than any other event held in that room.
With that anecdote in mind, here are some tips and tricks that I’ve picked over the years that can come in handy facing acoustic challenges.
Keeping It Contained
Start by working with the band. Control the stage volume so you don’t have to fight against it. Packing blankets can be placed in front of loud instruments or amplifiers, as well as behind loud items onstage to absorb some sound and limit it from reflecting off a back wall. A mic boom stand with a horizontal boom (T shape) provides a quick and easy place to drape a blanket.
Plexiglass shields are another way to contain sounds onstage. They work well for isolating instruments from bleeding into different stage areas and also from bleeding into the audience, while still allowing the performer to be seen. Most often seen in front of drum sets, shields can also work well in front of any instrument onstage. We often employ them to contain stray (and/or too loud) percussion sound, and they also help keep other sounds on stage from getting into the percussion mics, which are usually left on as the musician may switch between several instruments and “toys” during a song.
Stage amplifiers can be loud. Turning a closed-back cabinet around to face away from the audience can reduce the bleed from the stage, especially if it plays into a blanket. Amplifiers placed at the side of the stage and aimed at the musicians still allows them to hear while limiting the “blare” into the audience. Angling the cabinet upward to point at a musician’s head can mean turning it down, thereby cutting stage volume.
Simply rearranging the performers onstage can also help. At one show I convinced the two guitar players to stand next to each other instead of at opposite sides of the stage. The result was they lowered their stage volume because now they could clearly hear each other.
Of course, using in-ear monitors instead of wedges can reduce stage volume immensely. Not all performers are comfortable with in-ear monitors, so I’ve developed some approaches to help change them over.
Most people use ear buds with their phones/personal music players, so they’re already familiar with the sound and feel of IEM. While custom-molded ear pieces provide the best fit, sound and isolation, standard phone ear buds can work.
If a performer doesn’t have his/her own ear buds or doesn’t want to wear hard plastic earpieces, I offer a set of mine that use replaceable foam tips.
In addition, we set up a few wedges and/or side fills with a basic mix of kick, piano, guitar and vocal, so if they decide to pull out their “ears,” they’ll still have monitors.
Adding the input of an open mic pointed at the crowd to a mix can lessen the sense of isolation felt by performers wearing IEM. It’s also a good idea to make sure everybody is happy at sound check, even if it takes an extra song or two. The additional time spent can make all the difference.
Another way to eliminate monitor bleed is to place the main loudspeakers behind the band so they also serve as monitors. This can work well with performers who do not have a loud stage volume or with artists used to working with just a few monitors. Locate the loudspeakers so they won’t generate feedback yet close enough for monitoring.
Unless the audience is located a decent distance from the stage, reinforcement is the name of the game when dealing with a loud stage volume. Only put instruments into the PA that are not heard well in the listening area. If the guitar player is loud enough for the room, simply bring the band up around the guitar. Same with some drummers, as many tend to be loud enough in small rooms.
Alternatives To The Norm
For highly reflective rooms, the first priority is keeping the sound focused on the audience as much as possible while avoiding the walls and ceiling. This can be accomplished in a few ways. For large events, one of our primary solutions is a digitally steered PA that can be configured to direct its output, and without having to tilt or aim the cabinets. Asymmetrical coverage patterns can be used to further tailor coverage.
Of course, not every situation has the budget or need for a digitally steered system. For smaller shows in highly reflective rooms, loudspeaker tilting can be employed. Just as in my example earlier, use tall stands to get the loudspeakers higher in the air and then tilt the cabinets down to point at the audience. This helps eliminate reflections off the rear wall in comparison to loudspeakers deployed in a traditional upright position on a shorter stand.
Yoke brackets or stand tilters can be used, and some loudspeakers even have dual pole sockets, one for straight ahead mounting and one with a downward tilt. Make sure the stand is sturdy enough to hold a tilted loudspeaker as the center of gravity of the loudspeaker may not be directly over the pole. Sandbags can be placed on the stand base to provide additional ballast.
For loudspeakers stacked on top of subs, “Acoustic Aiming Devices” (AADs, a.k.a., small blocks of wood painted black) can be used to tilt the cabinets downward toward the audience. Make sure the stack is secured with straps. AADs can also help tilt cabinets upward toward a balcony or to position floor wedges at a better angle.
Sometimes a room is so live and/or oddly shaped that the best thing to do is add loudspeakers on delay to supplement the main PA. This way, coverage is extended and clarity is often enhanced while keeping overall levels down. It’s common at corporate events to utilize delay loudspeakers even in medium-sized breakout rooms so it won’t be too loud in the front rows of the audience. Delays also reduce chances of feedback because the mains – located near the stage – are at a lower volume.
Another technique often used at corporate events with mostly speech programming is to roll off the lows below 150 Hz and the highs at 9 kHz to reduce the chance for feedback outside the human speech range (loosely 200 Hz – 8 kHz). If music is to be played through the same system, the speech channels can be routed through a submix to be band-passed.
Further Ideas
Column loudspeakers have made a big comeback in recent years. Their narrow vertical dispersion, coupled with a skinny form factor that can blend in aesthetically, has made them a hit with both install companies and live event professionals.
Unlike the columns of yesteryear, today’s models offer a wide frequency response and can get quite loud.
The décor and “look” of a show can take precedence over audio quality, and many event planners don’t want “big ugly speakers” to be located where they need to be for coverage. Modern columns can provide a winning (and elegant) solution. Some models utilize small full-range drivers rather than woofers and compression drivers on horns, and they can sound very smooth with vocals and speeches because there’s no crossover in the vocal region.
Stereo may be great when the audience is located between left and right loudspeakers, but a distributed mono approach may work better for a challenging space, particularly if a room is oddly shaped or the audience is in two (or more) separate areas.
One zone may be next to the stage, or even just one side of the stage, with another zone on the other side of the stage and/or with another zone near the bar in the back of the room. The lobby could be another zone, and so on.
The first few seating rows at center stage might be the best place to see a performance but not necessarily to hear it. In this region, loudspeakers can be deployed for zoned fill (a.k.a., front fill). Any size of full-range cabinets can be used, but slim designs with rotatable horns, laid on their side, are optimum for this application. The object is to use low-profile loudspeakers no taller than the stage wedges to leave sightlines clean.
Underbalcony seats present another problem area to cover. Many theaters have built-in underbalcony fill loudspeakers that can be tied into, but if that’s not available, small loudspeakers on stands can be placed in the outside aisles, pointed at the seating. Also, sometimes compact loudspeakers can be suspended from the balcony above to cover the center area or the entire under balcony.
Some events may not require more than a single loudspeaker location. If it can be covered with one loudspeaker, it should be. Adding loudspeakers generates interference between them, as well as being extra equipment that has to be hauled, loaded, set up and taken down. Sometimes just a second loudspeaker in a small, highly reflective space might generate enough reflections to compromise intelligibility.
The same goes with subwoofers – positioned on each side of a stage, they can create a “power alley” in the middle where their output couples. Placing a pair of subs on one side or next to each other in front of the stage will still produce plenty of low end but without the power alley effect. Further, a cardioid or steered subwoofer array can help keep low end from spilling on stage and reflecting off walls. Placing a single cardioid array on one side of may be all that’s needed.
As noted at the outset, the best way to deal with a tough acoustical environment is to perform a walk-through of the site in advance. This leads to a far better understanding of the unique challenges, which in turn will result in a system and overall sonic presentation that meets client and audience expectations.


