
Becoming a father is an amazing and humbling experience. Your time is no longer your own and you must part with all that uninterrupted sleep you enjoyed before. In the night my wife and I will trade off feeding our baby daughter. Sometimes she nurses her and sometimes I give her a bottle. Either way, we needed a way to observe her in her nursery once she began sleeping in there.
The wireless video camera we received as a gift works great. It has pan, tilt and infrared capability to see in the dark. The onboard audio however, is, shall we say, less than optimum. As a long-time sound person and maybe a (diet) audiophile, I just can’t stand to hear her over the small tinny speaker in the side of the video monitor that was given less thought than the speakers in a flat-screen TV.
Assembling The Parts
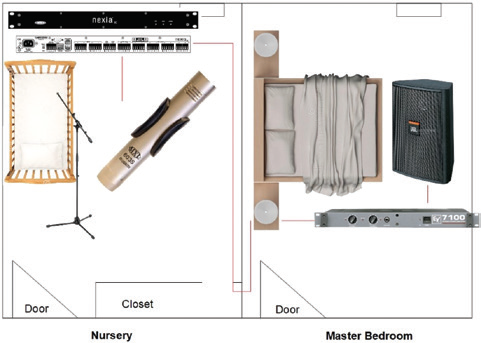
Luckily I had a few spare things lying around and was able to get a decently high-fidelity alternative audio system set up very inexpensively. The components include an MXL 603s small-diaphragm condenser microphone (and stand), an Electro-Voice 7100 power amplifier, and a JBL Control 23 small-format passive loudspeaker.
The EV amp was in my home studio and I no longer needed it, so it got put on baby duty. The JBL Control 23 loudspeaker is a nice unit, and it fits perfectly on my bedside table nicely since it’s so small. The black color helps it blend into the background so well that it’s hardly even noticeable.
I needed to purchase a DSP (a Biamp Nexia VC 2-in/4-out unit acquired on eBay for less than $50!) and some cable. In fact, the most expensive part of this system was the XLR cable. I went with a 50-footer built by Audio-Technica and a shorter one for an input. The long one needed to run from the back corner of the nursery to the closet, through the wall, and to my bedside table. Figure 1 provides a plan view and signal path.
Inside the processor, I created several paths for the mic signal to go through before hitting an output so I could experiment with processing. Figure 2 shows the scene I went with.

I inserted a meter to measure input level, a mixer to send the signal to either path “on/off,” a special set of EQs to tune the gain control (more on that in a minute), complementary EQ, a low-end roll-off, a limiter and meters for output level.
Two ideas were in play to manage the volume level of my potentially wailing baby. The first was a simple leveler, which waits until the level has passed a certain value for a certain amount of time and then pulls the signal down. The second was to set up a self-keyed ducker since that process has a few more options. This didn’t work as expected, so I bypassed it and focused on the first option.
To get the leveler to be most effective, I wanted to tune it to her little voice. This way, passing cars or other random noises wouldn’t trigger it. I started with taking a spectrograph of her crying and found that her most prominent frequency was around 1.2 kHz.
Figure 3 shows her crying on a logarithmic scale – the more pink/white a line is, the louder it is. (see red circle). Time runs left to right on the horizontal axis and frequency low to high on the vertical axis.
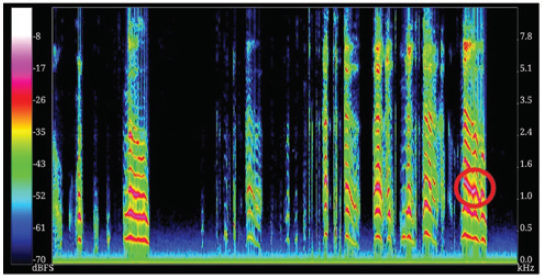
By tracing a line straight over from there to the scale, we see that her voice sits between 1 kHz and 1.6 kHz. This graph is impressive, but what totally blew me away was when I looked at her little voice on a linear scale (Figure 4).
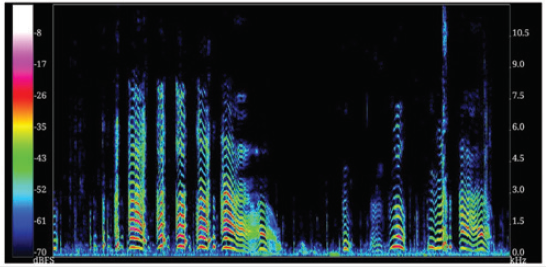
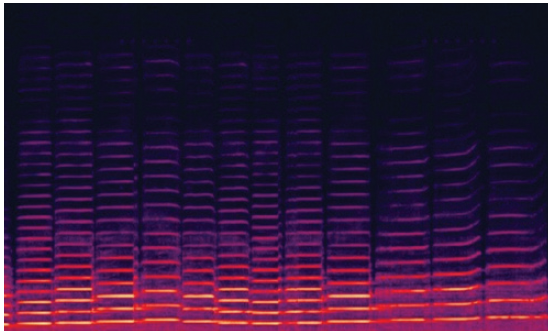
Each line above another line is a harmonic of the fundamental frequency. A baby’s voice is so amazing! It’s like a musical instrument. Figure 5 is a spectrograph of a violin – note how similar they are.
So, my intent was to create a tuned signal to initiate the leveler component. I started by cutting the lows below 1.2 kHz, then cutting the highs above 1.2 kHz. Now the leveler does its job and the signal then moves on to an equal and opposite set of EQs that put all the content back into the signal (Figure 6).
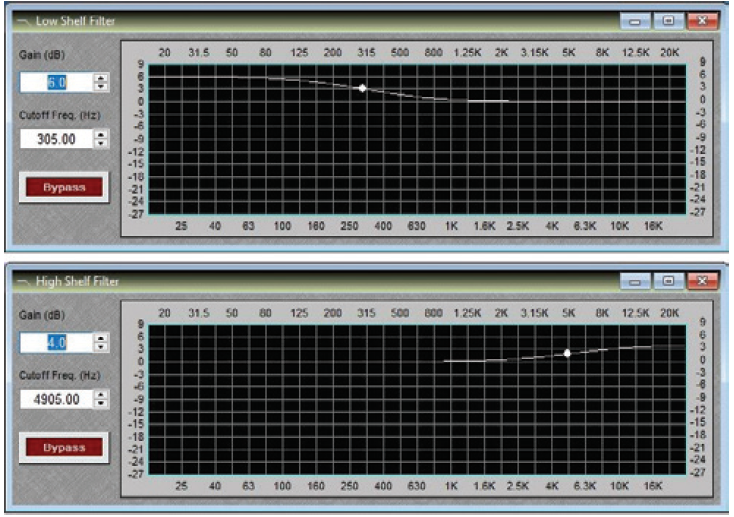
If you look closely, you’ll see I let the high end stay a few dB down and that’s because I found that between the curve of the microphone and the extended high-end of the loudspeaker, it was a little too bright.
Dialing It In
An interesting feature of this DSP is that it has selectable levels for its maximum output in volts. This means that the loudest possible sound internally can be several different voltage levels. Since the amplifier can only handle +20 dBu, I made sure that the DSP was putting out a maximum of +18 dBu. No matter how loud a signal gets inside the DSP, it can’t overload the amp.
I was considering adding an uninterruptible power supply to keep the system on in the event of a power outage, but I really only needed a power outage alarm. I was able to acquire a small alarm unit and put that in my room.
The microphone will need to be moved to keep it out of her reach as she gets older, and her voice may change a little bit as well so I may have to adjust the EQ. The DSP fan is a bit loud and it’s right next to her crib. I thought this might be a bad thing at first but then I realized that it’s actually a good thing for two reasons: I can hear the fan through the system in my room so I can tell if the system is working even when she’s not making noise, and it also works as a sort of white noise generator to help her sleep!
I’m really happy with how this project worked out and had a lot of fun working on it.