
With the introduction of digital consoles, better microphone options, PA systems with higher fidelity and more pre-production time, the gap between the worlds of studio and live sound has been steadily diminishing.
Most of the live engineers that I know are also either accomplished studio engineers or at least have project studios that allow them to prepare for live shows, including dialing in plugins and/or processing for later use.
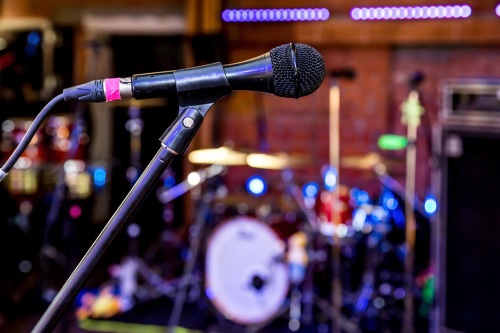
Although it’s not my express intent here to compare the two worlds, I’d like to point out that the live mixing process has shifted in recent years to include one vital aspect that was always a priority for studio work – capturing quality sound right at the source.
The traditional methodology of live audio, still very much present at smaller shows and when working with unknown artists, is to set up the stage and then through mic placement and processing, deliver the best result possible given the situation.
I still work this way all of the time when mixing several bands and at festivals. Limitations on time and resources prevent going into great detail with the band about the gear, stage setup, and positioning – as a mix engineer, the task is simply to embellish what you’re given.
But for situations where you’re asked to create a sound design during pre-production stages for a band you work with regularly, that approach might not be the only option. If you can influence sound sources in ways that sit better in a mix, and also support the entire sonic image without touching the processing part of the console, it can be a great way to go in minimizing work that needs to be down the line.
Here are some tips to help accomplish just that…
Communication Is Key
The sound heard through the PA system and the sound that the artist hears on stage are quite often two very different beasts. Especially if a source is being picked up by a microphone, the difference can be quite dramatic. So before jumping on stage and immediately ordering people to change their settings, make sure to listen to the source then talk to the artist about the difference between what they’re hearing and what you’re hearing.
Also make sure to inquire about what they think about their sound. If they absolutely love it and aren’t willing to change, it might be useful to record a short multitrack session and play it back through the house system, inviting the artist to hear it from your position and explain what you like and don’t like.
Always state your goal clearly. Saying “we have to change this sound because it’s not good enough” might not be as productive as “in this particular section of the song this sound competes with another sound, making things a bit muddy. Could we maybe try lowering the low-mids to see if we can support it better?”
Making sure artists understand that the sound of the entire act, including their own, can improve with a suggested change usually goes a long way, and it also demonstrates that you really care about how the band sounds.
However, if an artist insists on not changing a “signature” sound, then I advise not pushing the matter. Sometimes artists need more time for you to earn their trust and pressing the issue when they’re not ready can be counter productive.
Suggest A Better Solution
When seeking to change the sound of an instrument, make sure you know how to get there. It’s key to get familiar with instruments, how they produce their unique sound, and what affects their tonal landscape.
Although I’m not a drummer, early in my career I made it a priority to know how to tune drums, match cymbals, research how heads with different resonances affect overtones, and products that exist for helping to control the sustain of a drum. I’ve also stuck my head next to a lot of guitar amps, trying to find the “sweet spot” for miking, researching how a single coil pickup varies in sound from a humbucker, how a guitar behaves when it’s tuned with different tunings, and so on.
It comes down to this: if you know how a sound is generated and what aspects contribute to its signature, then you can quickly assess problematic factors and offer suggestions to the artist about possible fixes. It’s best to be specific – don’t ask an artist “the guitar sounds muddy, can we fix it?” but instead ask, “the guitar sounds muddy, may I suggest a different pickup combination?” There will still be some trial and error, but at least there’s a solid starting point for moving in the right direction.
Consider The Environment
Sound is a fickle thing, ever-changing and absolutely dependent on the conditions of the environment. As an engineer, I consider what sonic changes might occur with a temperature drop between sound check and show time, but in my view, the greater difference comes from the instruments being affected by their environment.
Consider the tension of the drum heads at a summer festival where sound check for the band is at 2 pm but they don’t take the stage until 10 pm. On a hot summer day, toms under the influence of intense heat are hard to tune (and harder to keep in tune), but as evening comes and the temperature decreases, they usually sound significantly better.
Therefore, it’s important to account for changes in the environment – and temperature in particular ¬– before making major alterations to instrument settings. In my experience, the alterations need to happen as a result of an average of several shows, revealing a consistent trend, instead of making knee-jerk changes after one sound check.
Pay Attention To Level Matching
In order to achieve the ultimate goal of having all sounds work well together throughout a show, make sure they’re all level-matched to prior sounds. It’s important to nail that funky guitar sound for the bridge of the second song of the set, but it’s equally important (or even more so) to make sure that that sound’s preset is at the same volume as the distorted growl coming from the same instrument a few moments before.
In addition to listening back to virtual recordings and/or marking levels while the band is playing, also look at the meters on the console and perhaps even a dedicated measuring rig to help you determine if there needs to be a change in level. Making sure that all of the presets are level-matched and working well among all of the instruments can save a lot of grief during a show, giving you space to focus on more intricate details of the mix.
Re-Evaluate Mix Approach
After doing careful source selection, meticulous level matching, and appropriate microphone deployment, the sonic landscape should now be ready for the show. However, make sure that your approach to mixing is now adjusted to the new surroundings as well.
For example, if there are no spikes of level due to matched sounds, maybe the compressor is now used as more of a transient shaper. Maybe the EQ is now more of a notch filter since you’ve already taken care of the bulk of EQ with sound selection. Maybe you opt out for a “faders at zero” approach to quickly gauge the small nuances of level riding that may occur. Whatever the case, be conscious of the surrounding environment and think within these new parameters.
Even if you don’t have the opportunity to regularly work with artists during a pre-production process but rather work with many acts on a “one-off” basis, a lot of these approaches can still find their way into your routine.
Remember: if the source sounds great, then the job will always be much easier while your mission shifts from putting out fires to, instead, helping to enhance whatever is happening on stage.