
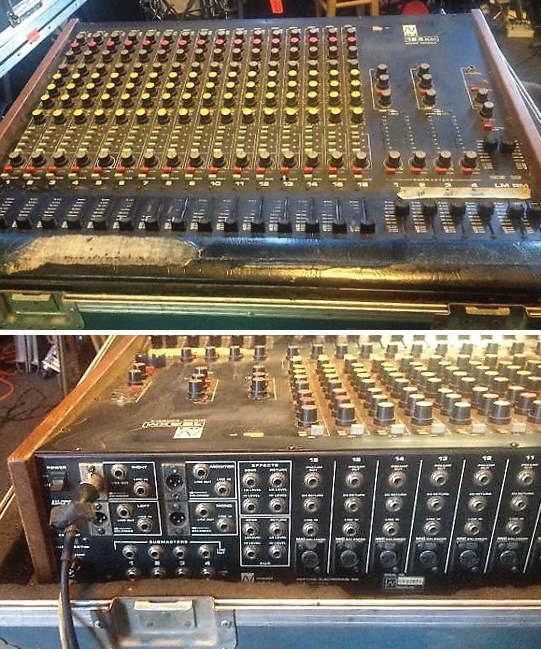
My live audio career began on a cold night in 1981 in a dive bar in Vancouver, Canada. It was a rough day that prefaced an even rougher night. I didn’t have a single clue what I was doing behind the NEI-Neptune 24-channel analog console.
I was enrolled in studio recording classes at the Columbia School of Broadcasting when a good friend landed a job as the lead singer in a band. I drove him to the audition, he got the gig, and on the way out the door I casually mentioned that I was in recording school, and if the band needed a sound engineer, I was available.
To my surprise (and to their detriment) they accepted, so I quit my “great-paying” job at the grocery store and found myself in that dive bar trying to mix that first live show while everything was feeding back. It was an inauspicious beginning to a 40-year career, to say the least.
Flash forward to the present. I was asked the other day by my friend and colleague (and LSI technical editor) Michael Lawrence, “What five things do you wish you knew when you first started mixing live music?” I had to think on it a bit, and I’m sure there are several additional things I’m missing, but here’s a short list of skills and techniques I wish I’d understood on that cold rainy opening night.
One. The PA has to sound good before any of your inputs will. Two of the biggest questions as we begin our live audio careers: “What is good sound?” and “When I first play a song or listen to my voice through a sound system, how is it supposed to sound?” Attaining the answers to these questions takes some time.
Most modern larger-scale systems come nicely packaged with optimized amplification and processing that help them to sound pretty sweet right out of the box. This certainly wasn’t the case in 1981, so tonal balance in that small club PA wasn’t served up on a platter – it was something I had to learn as I went.
The system consisted of two subwoofers per side, a midrange enclosure, and a high-frequency driver inside a horn cabinet. Not knowing what else to do, I plugged it all in, spun the amps up to 10 and figured it had to be right. I possessed no audio measurement system of any kind, not even a real-time analyzer (RTA), and to make matters worse, there wasn’t even a system EQ (not that I had the first idea how to use these tools anyway). My not-so-highly trained ears were all I had to judge spectral balance, and I was failing miserably.
The band soon added an EQ to the system, and with the help of some fellow mix engineers, I began to grasp the relationship between lows, mids and highs that would create the best starting point from which to build a musical mix. It was years before I added an RTA to “see” the sonic balance in the room, and more than a decade before I first watched a wizard by the name of Dave Lawler (a.k.a., “Dr. Dave”) tune a system using a Meyer SIM analyzer.
Soon after, I bought Rational Acoustics Smaart, with Dr. Dave providing guidance as I learned how to use it. So, a full 10 years into my career, I was finally able to compare a curve on a computer screen to what my ears had been telling me.
It’s taken me even longer to learn that in order to get great sounding inputs without a bunch of channel EQ, it’s best to start with an evenly balanced PA – a nice flat transfer function from 100 Hz to 20 kHz and maybe a small bump below 100 Hz. Even if a system is way out of balance, you can still achieve an appropriate sounding mix – it just takes a lot more work.
Two. Time align main loudspeakers with subs for low-frequency cohesion. After finally being able to properly tune and balance a system, many more years passed before I was introduced to time-alignment of the subs and mains for consistent, even low-frequency response. Again, my mentor Dr. Dave Lawler came to the rescue, teaching me this technique and since then, I’ve never looked back.
Uniformity of the sub bass to midrange region in a system relies on this process, especially if the main and sub loudspeakers are separated physically (e.g., flown mains and ground-stacked subs). This is never an exact science because venues can be large and arrival times different at every seat, but by working to achieve alignment in the majority of the listening area the result is usually much better than if this step is ignored.
The goal of a smooth spectral transition within the low-frequency region also relies on the previously noted process of getting the entire system tonally balanced, from the highest highs all the way down to the subs. If it’s a nice, “flat” system from 200 Hz to 20 kHz but there’s a plus 15 dB bump in the sub bass area, getting an instrument like bass guitar to sound even when the musician is playing up and down the neck is almost impossible.
Equally important is horizontal consistency of subwoofer response in the venue. As I’m sure many reading this have experienced, if subs are placed left and right, either on the floor or in the air, there will be areas of intense coupling (i.e., the front of house area) and other locations where massive cancellations occur (15 feet to the left and right of FOH area).
This can’t always be helped, but it may be possible to physically position the subs in an arc or add some time delay to sections of each sub array (from center stage to off stage) to help “steer” the energy. One or both of these methods can help reduce the “big hump” in the middle and redirect the power more evenly to the outer edges of the room.
Three. Solid gain structure favorably impacts every aspect of the mix. Gain structure can be described as a brief one-sentence concept or with multiple pages of data and theories.
Here I’ll use the one-sentence conceptual approach. As signal flows through the system, from an input on the console to the output at the loudspeakers and everywhere in between, the level should be strong enough to minimize noise but not so strong that it causes clipping and distortion. In my workflow, I set up my console something like this (maybe not entirely by the book, but it’s served me well through the years):
• Set preamp/gain level to read near 0 dB on the input meter with nominal or average level from an input.
• Turn the fader up to 0 dB. If I assign that channel to a VCA/DCA, I turn that fader up to around -6 dB to 0 dB to allow for cumulative summing levels of all inputs at the master.
• Finish by riding the master fader up to around -6 dB to 0 dB and check to see that the master meter is reading somewhere between -3 dB to +3 dB.
• If the system is too loud or too quiet, use the loudspeaker system processor or amplifier levels to end up where you want. (This was a huge lesson I learned over time that has helped me as a music mixer and as a corporate A1, where solid input and output levels are crucial for great recordings and loudspeaker zone management.)
This practice helps many other aspects of the mix remain consistent and “nominal.” If I use matrices to feed loudspeaker clusters, auxiliary or record feeds, those output levels will generally be where they need to be to sound powerful and clean without distortion or noise.