
1) Adding More Snares to Snare Drums
If you’re presented with an “inherited recording” to mix (one you didn’t engineer) with live drums where no bottom mic was used on the snare drum, or the track sheet says “snare” but all you’ve got to work with is a dull thump, try this: Route an aux send bus output from your mixing console to a small powered loudspeaker (or, if you have an extra power amp, a regular small passive loudspeaker) you’ve placed out in the studio room or vocal booth.
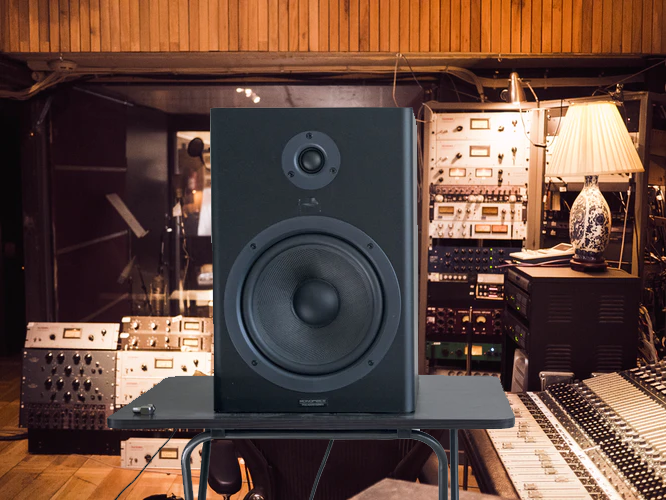
I’ve done this, putting my small, powered 5-inch Yamaha loudspeaker right on top of a decent sounding snare drum sitting on its stand. Use a spacer so the loudspeaker itself does not dampen the snare drum head too much.
I used the plastic protective ring from a 2-inch reel of tape for a spacer, strapping it and the loudspeaker down to the drum’s shell with gaffer’s tape. Then I put my favorite bottom snare drum mic on the bottom, and brought it up in the mix on another mic input fader.
While sending on the aux send bus from the original snare track, slowly add in the bottom mic. I sometimes “hard gate” the aux send signal to the loudspeaker if leakage causes too much snare buzzing in between snare hits.
Also be sure to do equalization, and also try flipping polarity —one way will sound better than another, and you shouldn’t need much of this to “vibe up” that dull snare.
2) Recording Sympathetic Vibrations
The strings inside a piano can be energized with a loudspeaker as well. Use non-residue tape to clamp down the piano keys in the key of the song. I usually hold down all the octaves of the key of the song, but you can experiment with forming chords too. You can also put something heavy on the sustain pedal to keep the damper off all the strings.
If you place the loudspeaker (or attached it) underneath the piano right up under the soundboard, you’ll hear it vibrating the harp and strings. I usually send the bass, guitars and keyboard tracks, but try sending only vocals for a very interesting vocal effect.
Of course, you’ll want to place a couple of microphones over the harp on the other side of the soundboard and add them to the mix as a stereo pair.
3) Adding Unique Room Ambience
Another trick is to place the loudspeaker out in a room and pick up it’s sound with a mic—a basic echo chamber. Some mixers routinely set up two loudspeakers with a stereo send and stereo mics just to add more “room” to sounds that are too dry or were recorded direct.
If it’s a good sounding room, this is a winner.
4) Kick Drum Mic
I’ve used old Auratone loudspeakers when recording kick drums—the small 5-inch woofer gets a low mid-range sound quality when placed close to the kick drum. Moving further away produces a more hollow sound good for special effects.
I’ve also used the woofer out of the ubiquitous Yamaha NS-10M since I usually find them around the studio in various stages of disrepair. The 8-inch Yamaha woofer gets a lower tone—almost a TR-808 (drum machine) sound with a lot of “hang time” (that’s decay length).
After soldering a mic cable to it, I prop it up on tape boxes and place it about a foot in front at an angle since air blasts from the drum can cause trouble.
These “microphones” are not going to give you anything above about 2 kHz, so you’ll have to mix in a real microphone for the rest of the drum’s sound.
5) Bass Drum Tunnels
A lot has been written about bass drum tunnels, and I’ve seen a few versions. The usual way is to build a tunnel using standard studio gobos or baffles, which I’ve seen as long as 15 feet.
A long tunnel presents the option of using more distant miking and still maintain isolation from the rest of the kit. Tunnels must have a roof made of more gobos and cartage blankets laid on top of all of it.
I’ve also read that a heavy cylindrical cardboard concrete casting form works as a prefab tunnel, and various diameters of these (up to about 24 inches) can be acquired at home improvement centers in just about any length you want. They’re much quicker to set up than dragging out all those gobos.
The mic should be put in the normal place—maybe just inside the hole of the front head or right in front of the drum. Then put a distant mic down near the end of the tunnel. Achieve a balance and sound with just two mics: the distant one down the tunnel, combined with the close mic.
Flip polarity around and try different positions before reaching for EQ, and if you’re recording to DAW, you can shift (in time) the distant mic’s recorded waveform closer to the close mic’s signal waveform timing. This sometimes helps and sometimes hurts.
And, I’ve used a shotgun mic for the distant mic for a faraway sound, yet sonorous presence.