
Direct injection boxes (“direct box” or “DI” for short) are as common in live sound as mixing consoles and XLR cables. Before I was charmed into the live scene, I dabbled in studio work.
Coupled with my love for the Internet of Things (IoT) and hobbyist electronics, I happened upon DIY Recording Equipment (DIYRE), a company that creates kits to build your own audio equipment. These kits range from “500 series” effects modules and processors to microphones and “coloring” units. As fun as so many of these kits looked, I wanted to focus on something live engineers use the most: a DI.
An Overview
A DI box takes an unbalanced input signal (usually a 1/4-inch input from an instrument) and outputs a balanced signal, usually via XLR. DIs are necessary because many of the devices we connect to mixing consoles – media players, audio interfaces, instruments – output line level or instrument level signals, which are voltages sufficiently high to overload the console’s mic level preamps.
DIs are also used to electronically isolate equipment from the console which helps prevent noise from entering the signal, and further, they provide impedance bridging. The impedance ratio for passive DIs is equal to the transformer’s turns ratio squared, or 144:1 for a 12:1 transformer. Active units are generally buffered circuits that can use field effect transistors (FETs) to achieve the proper input impedance.
Into The Fray
I discovered DIYRE several years ago and recently reached out to them for a DI kit to evaluate, a request that was graciously met. The FE2 DI kit (Ferrite DI mkII) includes the option of selecting the transformer model, with choices including the FE-X1, FE-X2, and Cinemag CM-DBX. All of the transformers have a 12:1 turns ratio, resulting in an attenuation of about 22 dB that’s the norm for a passive DI.
For this project I chose the most affordable option, the FE-X1 ($60), in order to see how it would stand up in comparison with other DIs of similar cost.
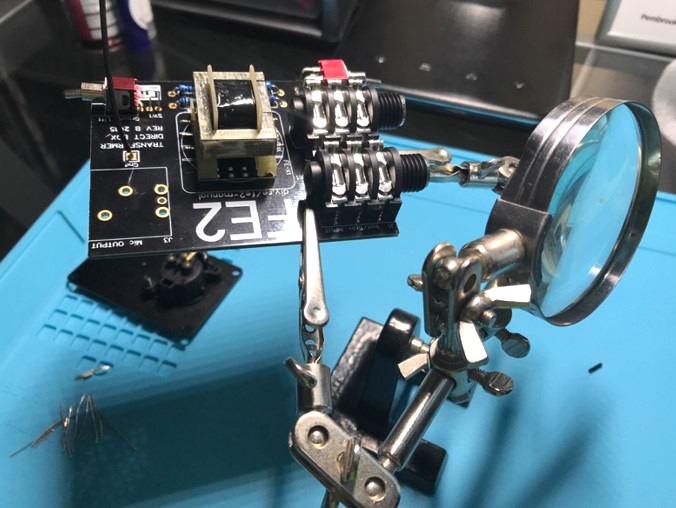
When the kit arrived, I found it to be very straightforward and organized, with every part in its own little box. All of the assembly instructions are online at the company website, also available as videos for more visual learners.

Several tools are required for assembly but they’re all good additions to any workbench if you don’t already have them. The list includes a Philips head screwdriver, flush clippers (to trim excess solder from joints), a soldering iron, solder with flux, and a mechanism (a “helping hands” tool) to assist in holding pieces while soldering. I also recommend getting a small fan to blow away the solder smoke (not good for your health) and doing the assembly on either a wooden surface or a rubber electronics mat (my preference).
The process is quite easy: log on to the DIYRE website and follow the text/photo- or video-oriented instructions. Those who are new to soldering should likely practice before working on the actual unit.


