

It occurred to me the other day that I’ve never done a post on making (terminating) Cat-5 cables.
Honestly, I don’t like making Cat-5 ends. They’re very finicky and I find myself re-making them more often than I’d like.
Part of it is the design of the connector itself, and part is just finding good parts. But even that is challenging.
I was talking with a friend the other day who swears by the Cat-5 ends at Home Depot. I’ve had nothing but problems with them. I bought some from TecNec a while back, and they came with a cool loading bar. I thought this would make it easier to terminate. And it was. Except almost none of them worked.
But, as more and more of our jobs become networking, we need to know how to make Cat-5 cables. And for the purposes of this article, when I say Cat-5, I mean Cat-5e, Cat-6 and probably Cat-7. The process is the same, the components are different. So let’s get started.
Cut The Jacket Carefully
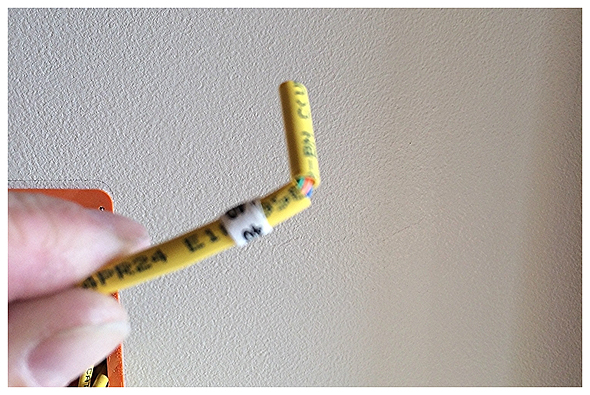
The jacket on category cable protects the four twisted pairs inside. When you cut it, be careful not cut too deep. The solid copper wire is fragile and if you score it, the conductor can easily break while you’re manipulating it. I like to run my blade over the jacket, then bend it at a 90-degree angle. This usually breaks the jacket and you can pull it off cleanly.
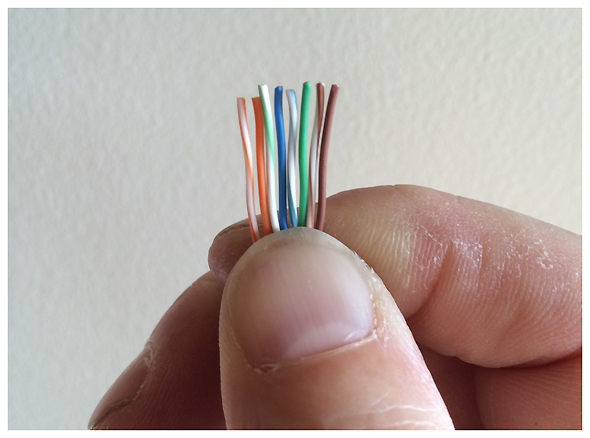
Organize The Wires
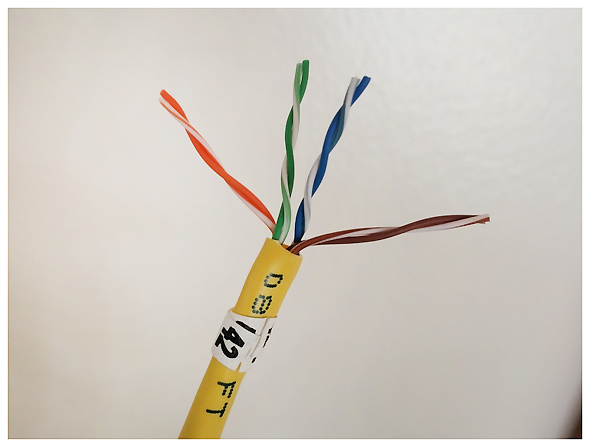
Once the jacket is cut, splay the pairs out in the right order. This will be helpful as you untwist them and get them lined up in the right sequence. Once the pairs are ordered, untwist them and begin the straightening process. I like to take each wire and pull it through my fingers a few times to get it straightened out. As I do this, I start lining them up in order.
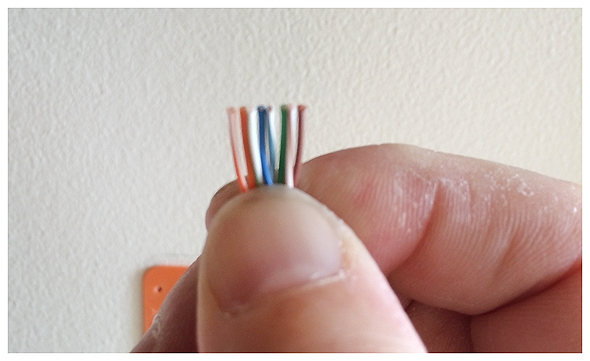
Know Your Standards
Most of the time, we want to wire Cat-5 using the USOC 568B standard. That means the wires will go in this order when you view the connector from the bottom (where the actual contacts are):
White/Orange
Orange
White/Green
Blue
White/Blue
Green
White/Brown
Brown
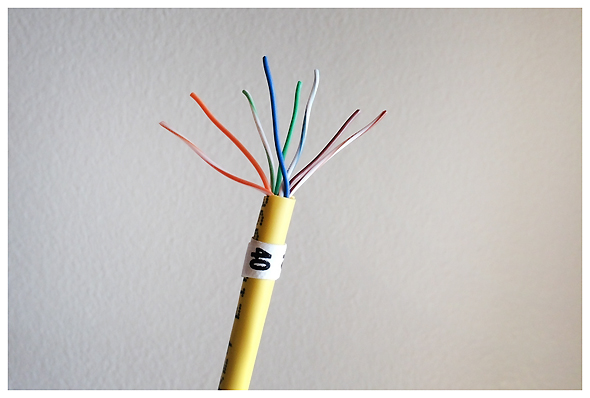
568A is similar, except it swaps the Orange and Green pairs. Most equipment will work fine with either, but when I ask manufacturers for recommendations, they usually suggest 568B. So that’s what I do unless the documentation specifically states otherwise. When you have the wires lined up right, it should look like this:
Cut To Length
Over the years, I’ve learned to strip the jacket a bit long, straighten the wire out and get it lined up, then cut it shorter to fit in the plug. It’s easier and it makes sure the wires are all the same length. You may have to experiment a little get a feel for how short to make your final cut. There’s probably a standard somewhere, but I eyeball it and it’s usually about half (1/2) an inch or so.
Insert The Wire Into The Plug
This is the hardest part of the job. There are little groves in the plug that the wire is supposed to slide into, but if you haven’t done a good job straightening the wire out, one wire may jump into the wrong groove and get out of order. So make sure you take your time, get the wires relaxed and going in the right direction. If you can’t take your fingers off them and have them stay in the right order, you’re going to have problems getting them in the plug.
Make sure you push them all the way to the front. There are only two little IDC (Insulation Displacement Contacts) teeth on each connection, and you don’t want to miss them. Many a cable fails to work because one wire didn’t get in all the way.
Crimp It Down
Once you’re all set, put the plug in the crimping tool and give it a good squeeze. I like the ratcheted crimpers because I know I’ve made a full press. But I’ve also used non-ratcheted ones for years and they work fine. Take the connector out and you should be all set.
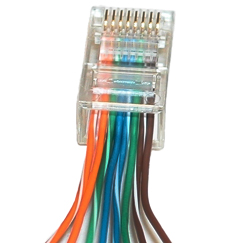
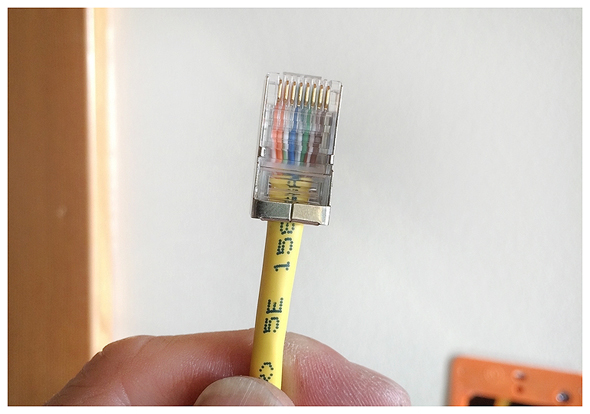
When you’re all done, visually inspect the end to make sure the wires stayed in the right order. It should look just like this one. After you do the other end, it’s best to test the cable with a 2-part tester (assuming the ends are far away). You can find the testers almost anywhere at varying price points.
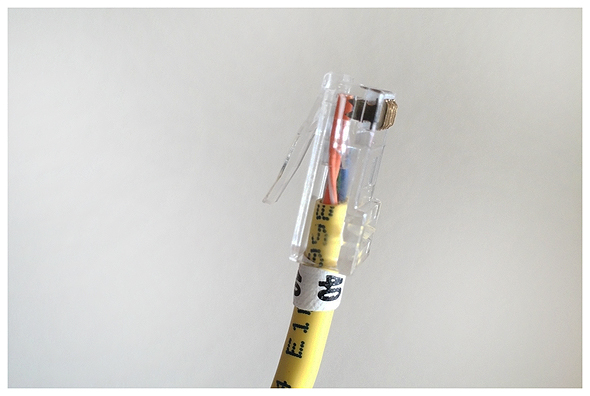
In case you’re wondering, this is a shielded connector, and we use them for video over Cat-5.
So that’s it. They’re not hard to make, just a bit of a pain. Personally, I’d rather make BNC cables all day long than deal with a handful of Cat-5 connectors, but that’s just me. The world is going Cat-5, so we better know how to use it.
Mike Sessler now works with Visioneering, where he helps churches improve their AVL systems, and encourages and trains the technical artists that run them. He has been involved in live production for over 25 years and is the author of the blog Church Tech Arts.