
When I first started mixing club bands back in the early 1980s, I thought I was pretty cool behind my 16-channel analog mixing board. Most bar bands had about the same number of channels on their stage, although a few larger bands had 24- or even 32-channel consoles. Wow!
We simply put a single microphone or DI on every input on stage and away we went. With today’s digital consoles, even a moderately priced package can support 48 to 64 inputs from the stage, which allows us to use multiple mics and DIs on some instruments to give us an A/B option, or a combined sound from two different mics or a mic/DI pairing.
But just because we can, does it mean we should?
Too Much?
A lot of less experienced engineers (and even some of us more seasoned folks) fall prey to thinking we need to use more than one channel for a given input because someone we admire or read about in an audio magazine has a “killer way” of manipulating multiple “like” channels. This is often done using multiple mics, a mic/DI combo, or “double assigned” channels that both receive the same single input.
As I’ll explain here, cool techniques and tricks can be used to get better results than can be achieved using only one channel, but before I describe some of these methods, I recommend first asking yourself, “Do I really need more than one input for this instrument?”
In certain scenarios (a “throw-and-go” festival, for example, where you’re mixing a band you’ve never heard before) it’s usually smarter to focus on a simpler methodology and whittle down the inputs to one per instrument. Of course, there are situations where it really can help to have more than one input, such as snare top and bottom, but as we continue this discussion, we’ll see that many problems can arise when extra input channels are added.
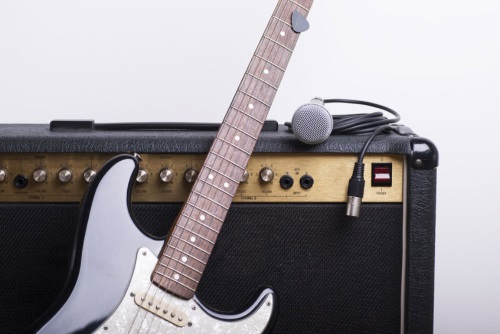
It’s also important to understand the impact of combining “like” inputs, because usually some element is slightly different between the two, which can create a problem. An example: deploying two different mics on two different speaker cones of a guitar player’s 4 x 12 amp. (A common combo is a Shure SM57 dynamic mic on one speaker and a Shure KSM32 condenser mic on the other.)
While we might get lucky and simply bring up both mics in the PA (same level, same EQ and a little panning) and discover total magic, most often there’s an anomaly in the overall tone. Maybe one mic has more low-end than the other, so the high-pass filter (HPF) is set higher to get rid of some of the “woof” – but then the two mics don’t quite combine correctly from a tonal standpoint.
Frequently, mix engineers just barrel ahead with both mics hot, simply because they’ve seen this done so often that it must be the way to do it. But the result can be a huge loss in tone and volume, so we may reach for the “polarity” reverse button (ø) on the console in the hope that it might improve the situation.
Side note: I say “polarity” reverse even though most consoles are labeled “phase” reverse. What actually happens when this button is engaged is that a “polarity flip” happens. “Phase” is a little more complicated. For a more in-depth discussion on this topic be sure to check out Jonah Altrove’s “Phase vs Polarity” on ProSoundWeb.
It all begs asking the question again: “Do I really need a second input for this instrument?” It may be that using only one guitar mic and EQ’ing it a bit is a much better solution.
Make It A Double?
Another popular technique among experienced engineers is “double-assigning” an input into two channels on the console. An example: when there’s only a single kick drum mic but you’d like to have two kick channels on the console that are EQ’d differently to emulate having an inside mic (with more attack and “snap”), and an outside mic (with more low-end and “fullness”). Unfortunately, this approach is often handled incorrectly.
Any time two channels on a console have the exact same input, with their EQ settings slightly different to achieve some tonal options, phase shift of various degrees starts to occur. This adversely affects the combined tone. It’s not vital to understand why, but it is important to remember that it does indeed happen and is why the kick drum can actually sound worse when the two differently EQ’d channels are combined.
The same goes with utilizing HPF for EQ tailoring on one mic but not the other. If the “inside” mic channel is EQ’d to be more “snappy” by rolling up the HPF and adding some high end, and there’s no HPF on the other channel, some serious phase abnormalities can occur. So, what can we do about it? Here we go:
Polarity (ø) Reverse Button. As noted earlier, using the polarity reverse button on a console to try to correct a badly combined pair of inputs has been the most widely used method for decades. Long before digital consoles came along with added features on the input channel strip, the “flip” was the only option for a fix. But keep in mind you’ll only get two results when employing the polarity reverse feature: result 1 and result 2.
Using the previous example of an inside kick drum mic (such as a Shure BETA 91) and an outside mic (such as a Telefunken M82), the general approach is to EQ each channel to sound the best it can by itself and then add them together. But if the combined sound is “weird” and low-end has disappeared, you would probably flip the polarity and try again. If it sounds better but not 100 percent of the way there, you’d then work some more with the EQ and then move on to the snare because you’re out of options.
Input Delay. Now that many consoles offer an input channel delay feature, there’s a much better chance of coming up with a great combined sound when using multiple channels. As a rule, I start by delaying the input that I believe to be “closest” to the input source (in the case of mics). For example, when combining two kick drum mics, I apply some delay to the inside mic because it’s physically closer to the beater head than the outside mic.
One can certainly experiment with adding delay to one input or the other to see which is better, but in general the goal is to delay the input closest to the source. This isn’t always obvious – if you’re combining a bass DI with a bass mic on the cabinet, one might assume the DI signal arrives first but this isn’t always the case. Use your best judgement and then start experimenting.
As you apply delay to one input, remember that EQ and HPF affect the combined result to a significant degree, so when changing either of these settings for one or both input sources, re-check the delay time after tweaking. When EQing the inside kick mic, mute it and move on to EQing the outside mic so both sound as good as possible on their own, then try them together. If it’s not perfect, try a little bit of delay on the inside mic until it comes together. Usually 2 to 4 milliseconds (ms) of delay will do the trick.
“Tuning” With Input Delay. You may find as you’re making minor changes to the input delay on one input that the combined sound moves and shifts in pitch. This is because the time offset changes the peaks and nulls of the comb filter, altering the frequencies that sum together as well as the frequencies that “cancel” as the delay is applied.
With that is mind, try this “next level” trick the next time you combine two kick or guitar inputs. Adjust the delay time of one input up and down just a bit while listening to both. With kick drum, the “sweet spot” of combined low-end frequencies will move up and down from 30 Hz to 120 Hz or so, and you can “tune” the low end to the desired frequency range. If you like a thumping kick at around 60 Hz, tweak that input delay until you get it singing or tweak it some more to get 40 Hz to be the roundest sounding region.
With multiple guitar inputs, try adjusting one of the delay times just a little and you’ll feel the midrange morph. When you’ve attained the biggest, fattest sound – you’re there. And don’t forget the good ol’ pan knob in this experimental process. Two “like” inputs that are just a little bit “unlike” in tone but are panned further left and right can sound really cool together, just avoid the center if they’re not time-aligned to work together perfectly.
Or, going back to where we started – you could just put one mic on everything and lower your stress!